Showing posts with label Sugar Free. Show all posts

Vegan Chocolate Cake with Vegan Buttercream Frosting

It wasn't the case when I first started blogging but I'm vegan now and I also found out that cane sugar gives me headaches. Between those two issues, it's not super easy to buy cake that fits my dietary restrictions so I've learned to just make my own. With lots of scouring the internet and tweaking other recipes to suit my needs, I've come up with the very best ever no cane sugar vegan chocolate cake with buttercream frosting. This stuff is TO DIE FOR!

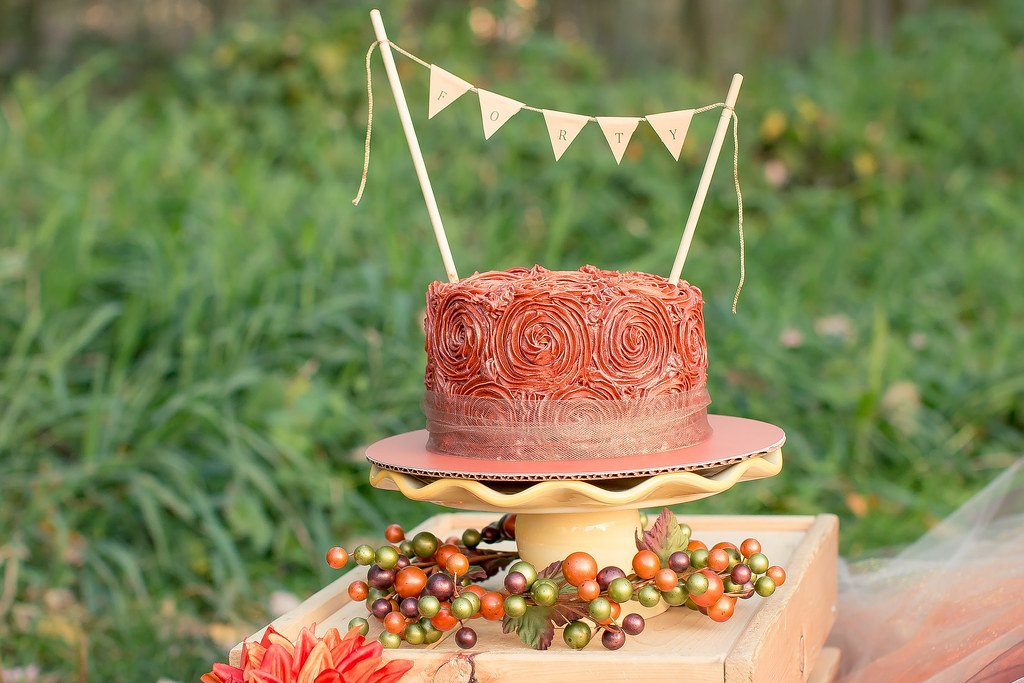
First, a picture of my 40th birthday cake:

IMG_2950

I made this cake for my 40th birthday cake smash photo shoot. We had a ton of fun. But today I'm here to share the recipe with you (also so I'll have the recipe for my own future use).

Chocolate cake 

2 cups almond milk 
2 teaspoon apple cider vinegar
1 1/2 cups coconut sugar
2/3 cup avocado oil (you could sub any neutral oil but this is what works for me)
2 teaspoon vanilla extract
1 teaspoon almond extract ok to just do all vanilla if you don't have almond extract)
2 cups all-purpose flour
2/3 cup cocoa powder, Dutch-processed or regular (or a mix of both)
1 1/2 teaspoon baking soda
1 teaspoon baking powder
1/2 teaspoon sea salt

Preheat oven to 350F.

Mix together the almond milk and vinegar in a measuring cup and set aside for a few minutes to curdle. Add the sugar, oil, vanilla and almond extract to your mixer bowl and mix well. Add the almond milk/vinegar mix and whisk well. 

Add in the flour, cocoa powder, baking soda, baking powder, and salt and beat until mostly smooth. 

Line the bottom of two 9-inch cake pans with parchment paper and lightly grease the paper it as well as the sides of the pans. Divide the batter into the two pans and bake for 32-35 minutes, until a toothpick inserted in the center comes out clean. 

Vegan Buttercream Frosting
NOTE: This frosting does NOT come out white. You will need to color it with gel food colors if you want something other than tan. 

This frosting holds its shape really well even before it has been refrigerated. I made it and had to leave it sitting on the counter for 45 minutes before I piped it onto the cake. Also, the picture of the cake above shows what it looked like after sitting in the refrigerator for a week. It did a good job of keeping the cake pretty moist and the frosting looked and tasted great. This wasn't the plan but my son got sick on the day of the photo shoot so we had to postpone the event.

Make powdered coconut sugar in the dry goods canister of the vitamix or a good food processor. 3 1/2 cups coconut sugar : 3 1/2 Tbsp arrowroot powder (precision on the arrowroot powder isn't imperative, just get close)

1/2 cup room temperature earth balance shortening
1/2 cup room temperature earth balance buttery spread (in the stick)
3 1/2 cups powdered coconut sugar
1 1/2 tsp almond extract

1/4 cup almond milk 
Gel food coloring if you want something other than tan colored frosting. I used burgundy to achieve the color for this cake

Using the paddle attachment for your mixer, beat the shortening and buttery spread until it's combined. Add the rest of the ingredients being aware that a puff of powdered sugar is going to attack your kitchen. I used what I think is the dust attachment for my Kitchenaid mixer (it's a clear plastic thing you can pour stuff through) with a clean kitchen towel laid over the whole thing as soon as I've added the sugar. It's a bit messy but it blends in pretty quickly. Add the food coloring and mix until everything is well blended.

This is thick enough to hold its shape if you want to use a tip and a frosting bag. It's rich and delicious too. Yum!

Thank you for reading,
Julie


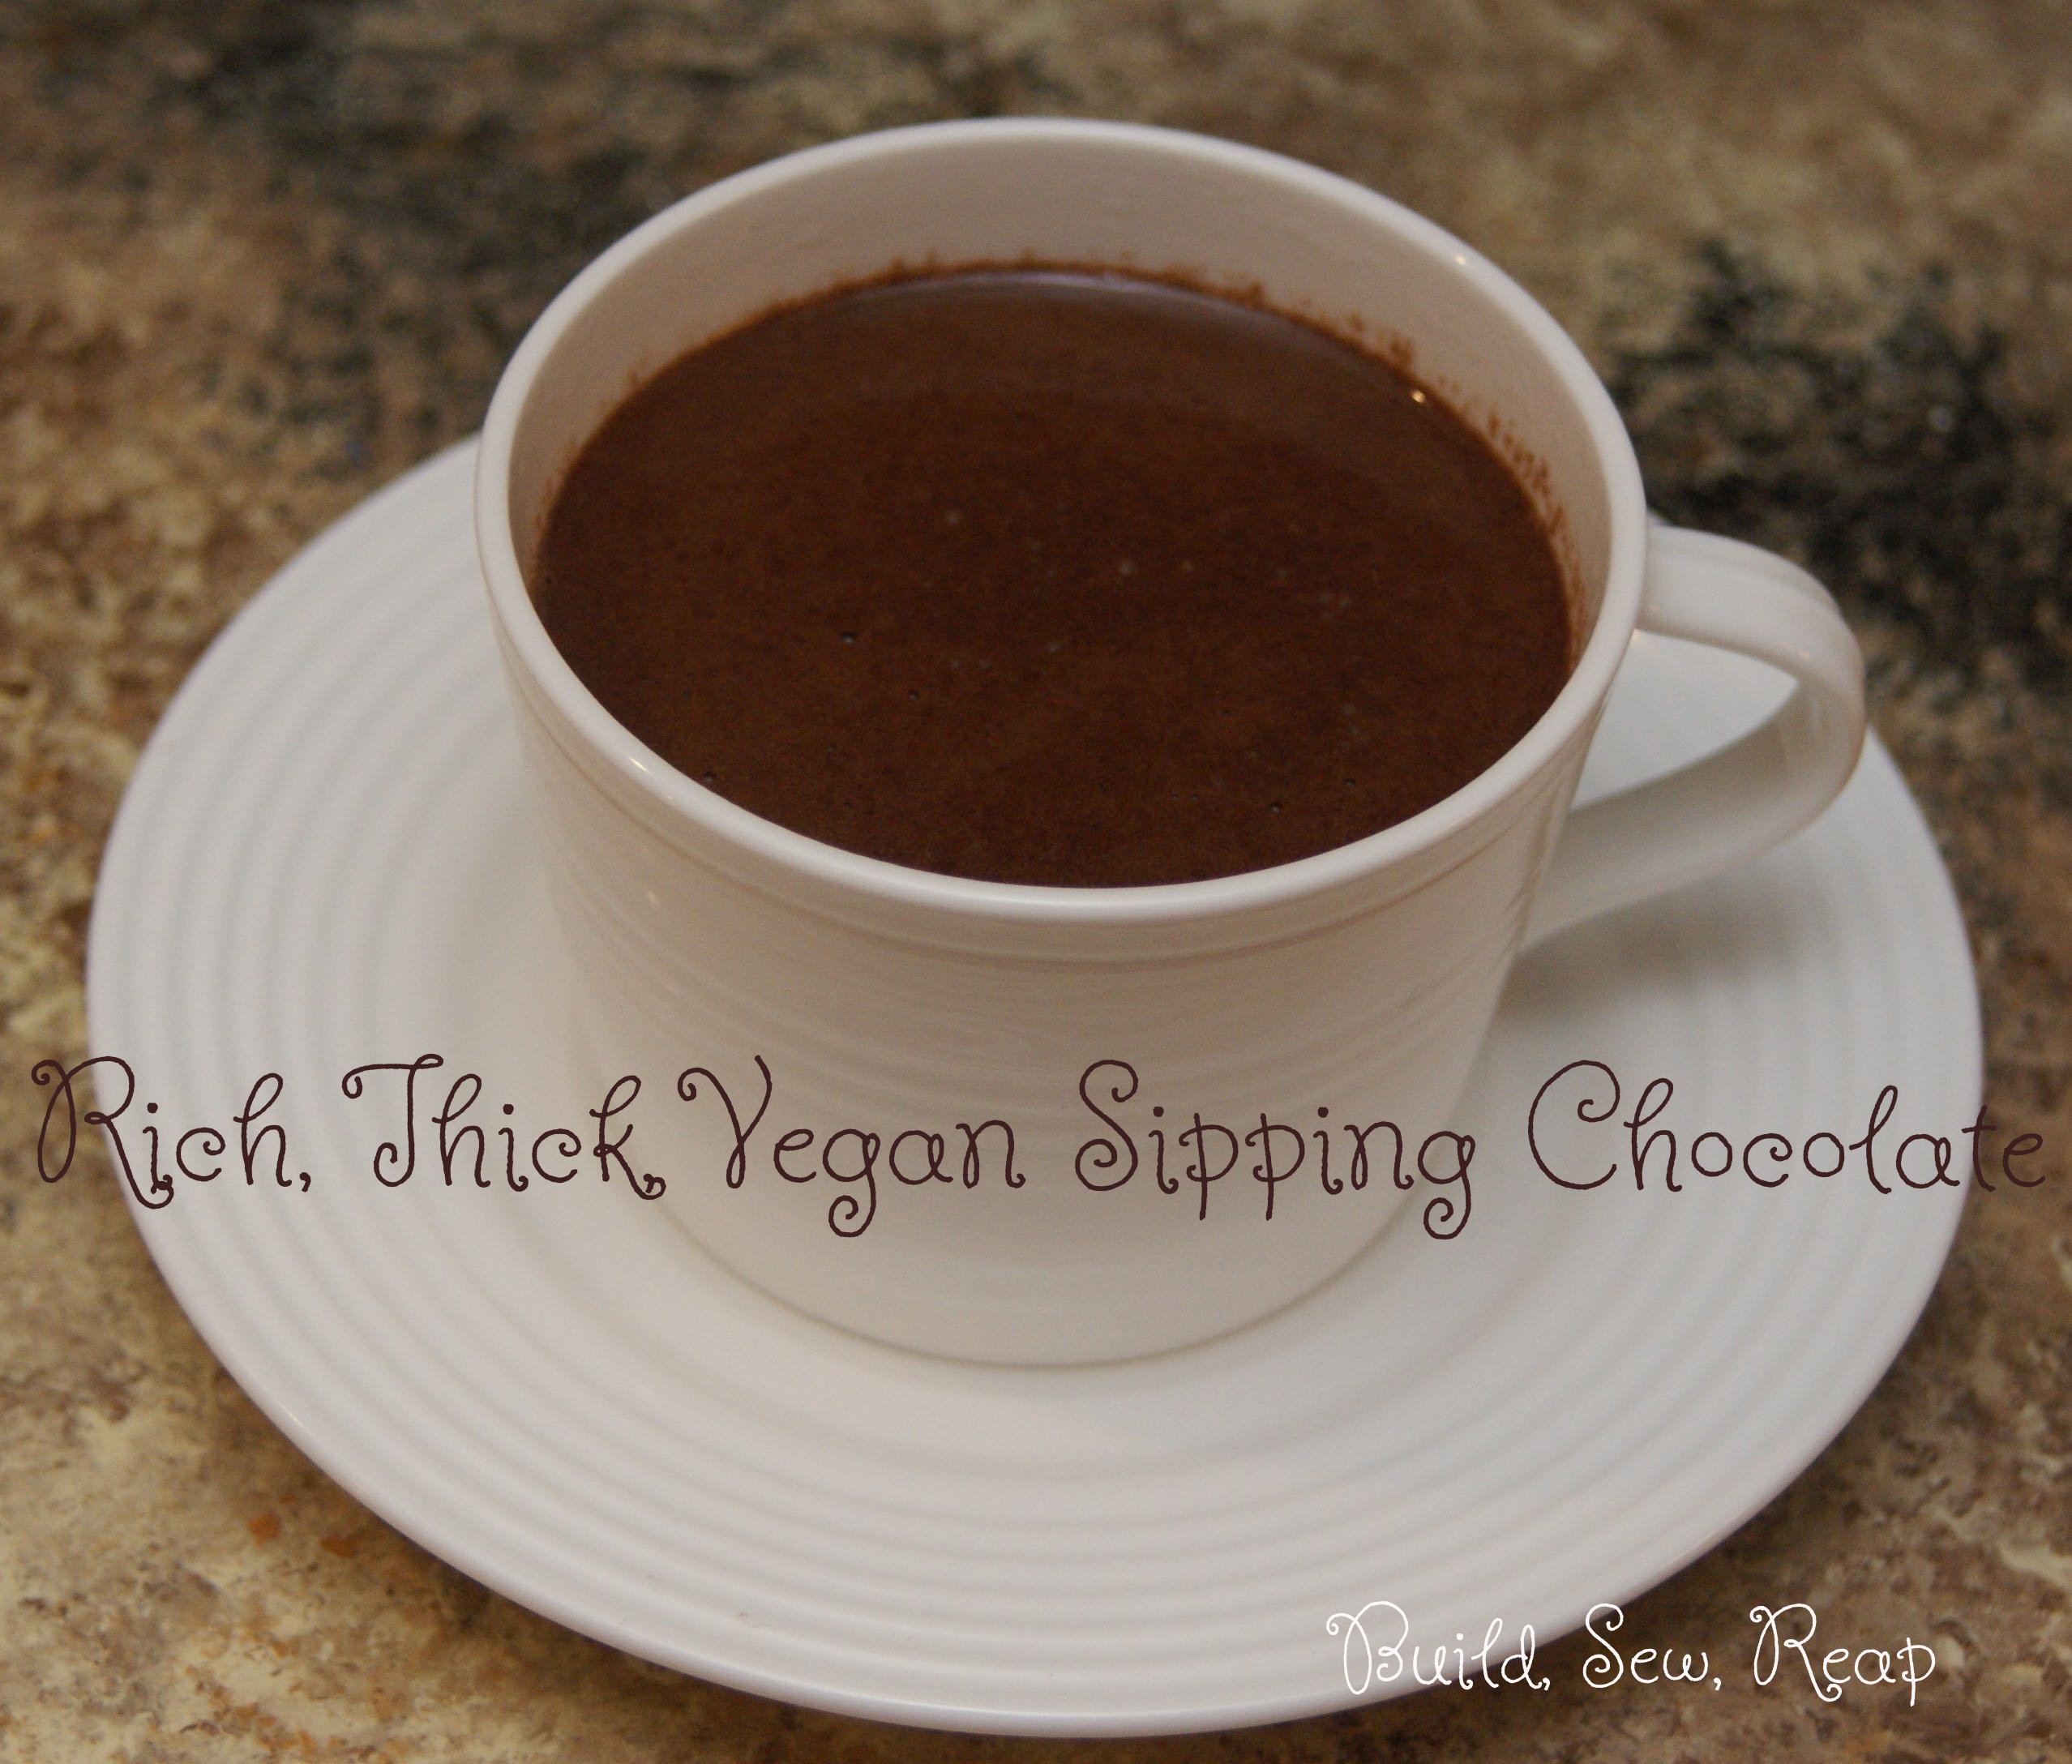
Vegan Sipping Chocolate

I'm a chocohaulic. I pretty much want chocolate all the time, any time of day. One day I was having a particularly bad craving (I'm sure it had nothing to do with having watched Chocolat a few days earlier) so I decided to try to make some rich, thick, dark, tasty sipping chocolate. It didn't take much before I felt like I had created something fantastic.

Ingredients

  • 1 cup plant based milk (I like unsweetened vanilla almond)
  • 2 Tbsp cocoa
  • 2 Tbsp coconut sugar or maple syrup
  • 1 tsp vanilla
  • 2 tsp coconut oil
  • 1/2 tsp cornstarch
  • dash of salt
*Optional: dash of cayenne pepper

Add it all to a pot and mix well with a whisk or an immersion blender. Heat on high heat to just boiling, stirring often. As soon as it starts to boil, turn it down to medium low and keep stirring until it calms down. Watch to ensure it doesn't boil over (although the burning chocolate does smell good when it hits the burner). Keep heating and stirring until it thickens, just a few minutes. When it seems to be thickening, pour it into a mug and allow to cool to sipping temperature. It should thicken as it stands. 

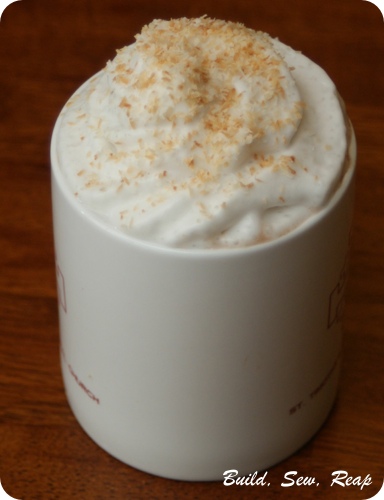
Sipping Chocolate by Julie @ Build, Sew, Reap 

Enjoy!


Thank you for reading,
Julie
_________________________________________________________________________________

I'm sharing this post on:

All Things Fee: Calling All Crafters

Skip To My Lou

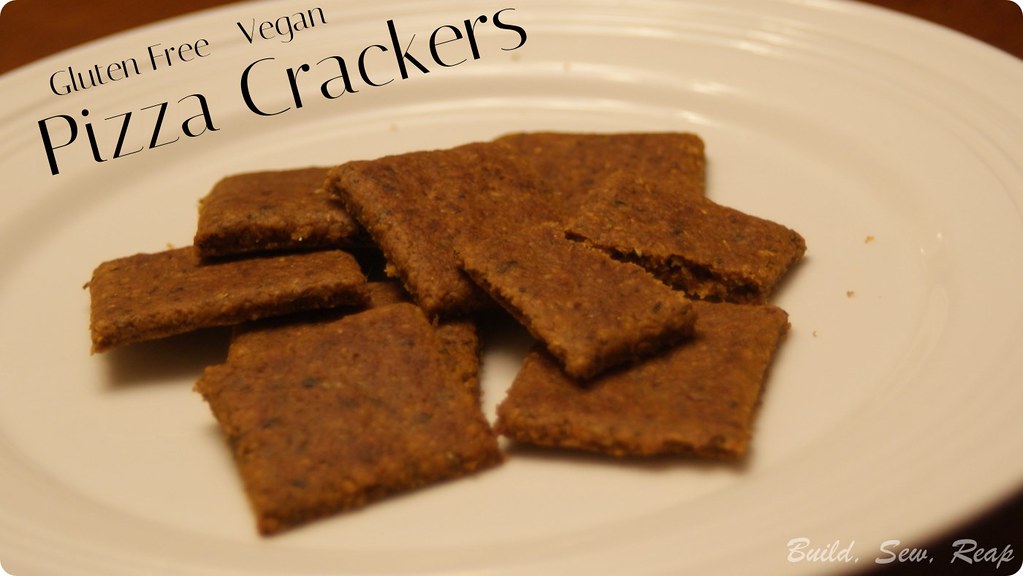
GF Vegan Pizza Crackers

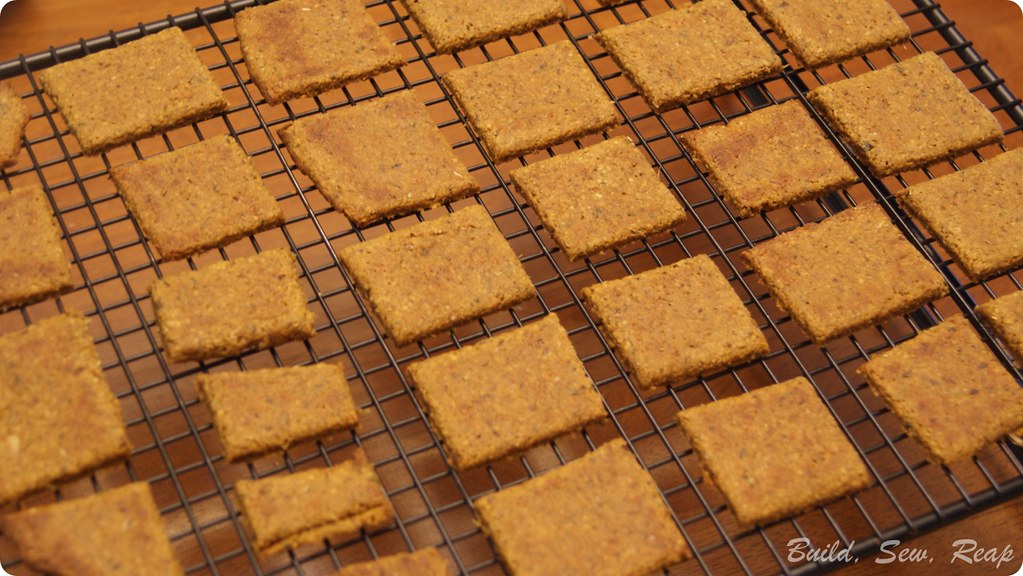
My kids love pizza (who doesn't?) but I hate the extra questionable ingredients in pizza flavored snacks. I set out to make some of my own. The end result - they're tasty AND nutritious!

Pizza Crackers GF and Vegan

Before I get started though, I have to tell a funny story about my 6 year old. The other day he had some peanut butter sandwich crackers that someone had given him. He was eating them in the car and clearly thinking about something. He finally piped up with, "I know how to make these crackers."  I think to myself, "Sure, take two crackers and stick them together with peanut butter." Thankfully I kept my mouth shut because his idea was even better. "First you make the crackers. Then you make the peanut butter. Then you spread your peanut butter on one side of a cracker and stick the other cracker to it." I had a proud moment when I realized my 6 year old thinks crackers and peanut butter come from my kitchen, not just containers at the store.

And on to the recipe . . .

GF Vegan Pizza Crackers
Yields:   crackers / Time: 10 active minutes, 15 minutes bake time
For a printable version, click here.

Ingredients
  • 1/4 cup Tomato Juice
  • 2 Tbsp Balsamic Vinegar
  • 3 Tbsp Olive Oil
  • 1 Tbsp Flax Meal
  • 1 cup *GF Oat Flour (you can grind your own by putting GF oats in a blender and blending until floury) 
  • 1 tsp Salt
  • 1/2 tsp Baking Powder
  • 3 Tbsp Nutritional Yeast
  • 1/2 tsp Onion Powder
  • 1 Tbsp Italian Seasoning
  • 1/2 tsp Garlic Powder
*You can also sub in all purpose flour for a non gluten-free version. The batter definitely comes out more like dough, you can't stir it to the very end as I did with the GF version. Roll them out nice and thin as they puff up in the oven.

Preheat oven to 375 degrees F.

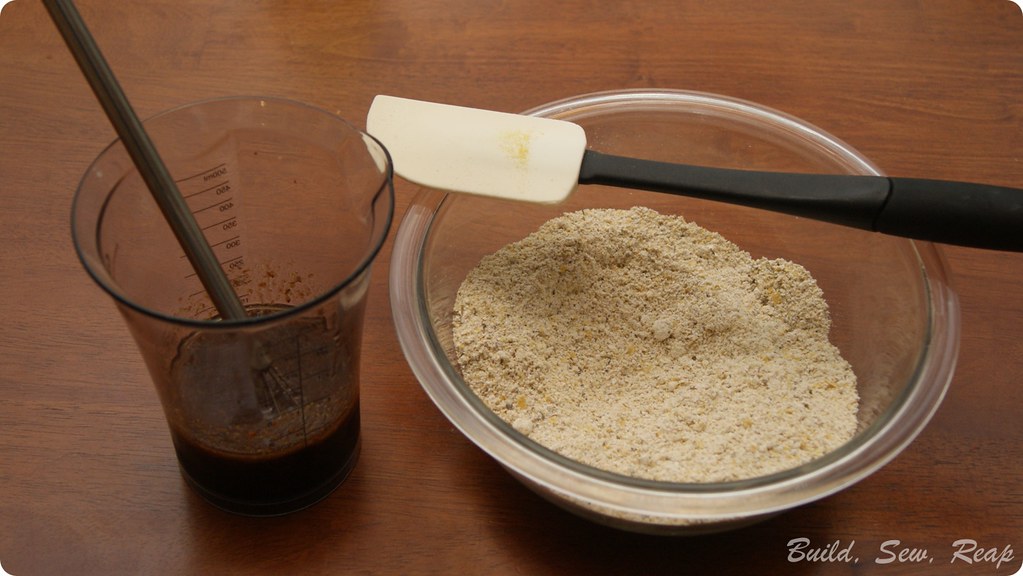
Mix first 4 ingredients in a measuring cup or small bowl.

Mix dry ingredients in a bowl.

Pizza Crackers GF and Vegan

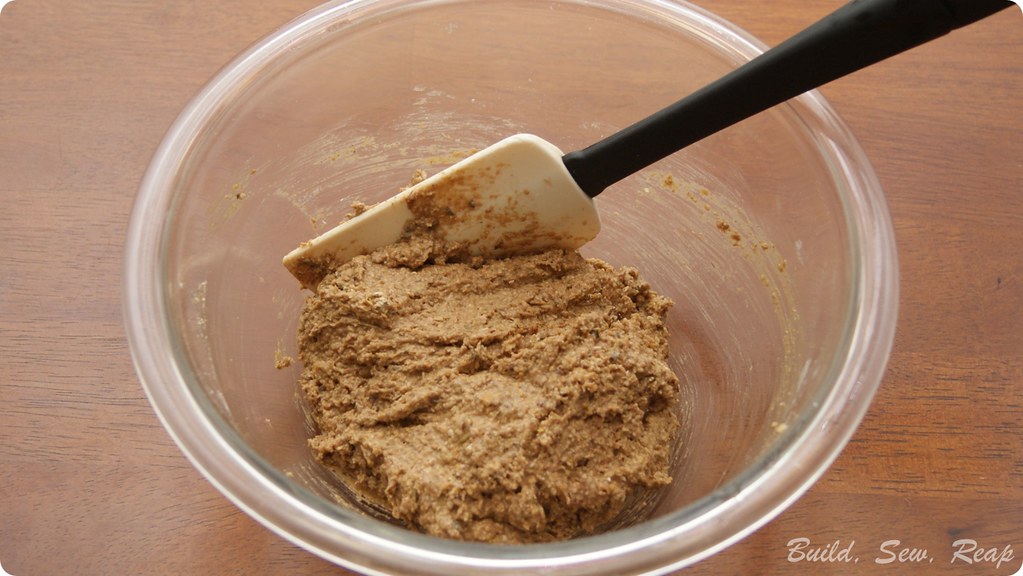
Stir liquid ingredients then pour into dry ingredients and mix. I find that a rubber scraper mixes this best.

Pizza Crackers GF and Vegan

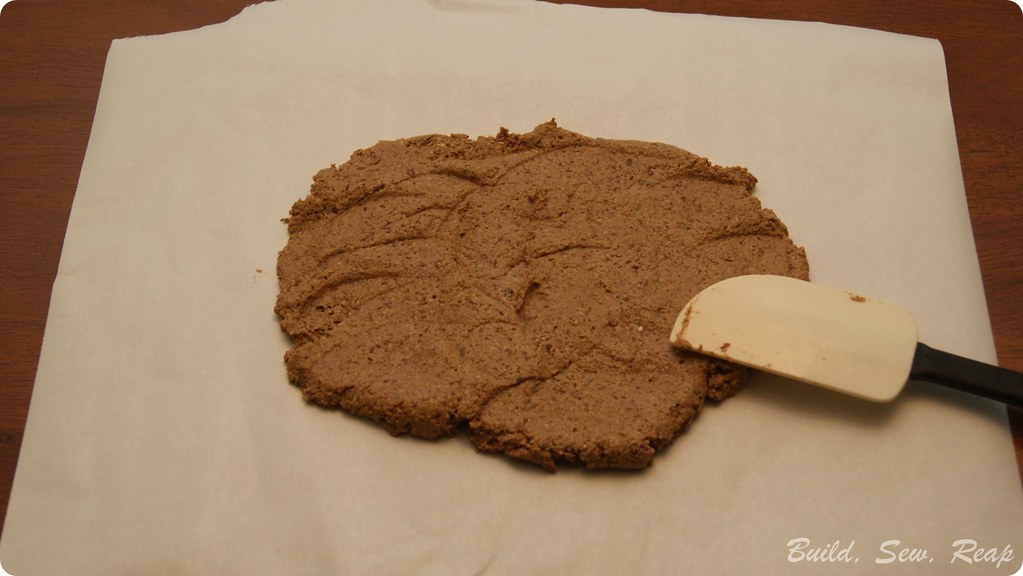
Press out on a piece of parchment.

Pizza Crackers GF and Vegan

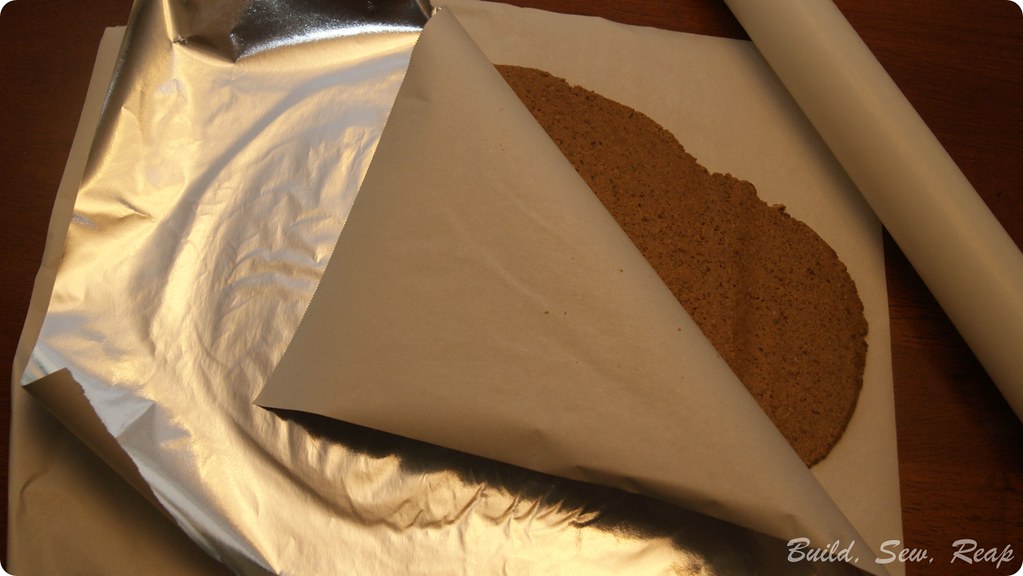
Cover with another piece and roll to 1/4 inch thick. (I use the foil backed parchment, just personal choice)

Pizza Crackers GF and Vegan

Remove top parchment paper and lightly tap in the edges so they aren't significantly thinner than the rest of the dough.

Pizza Crackers GF and Vegan

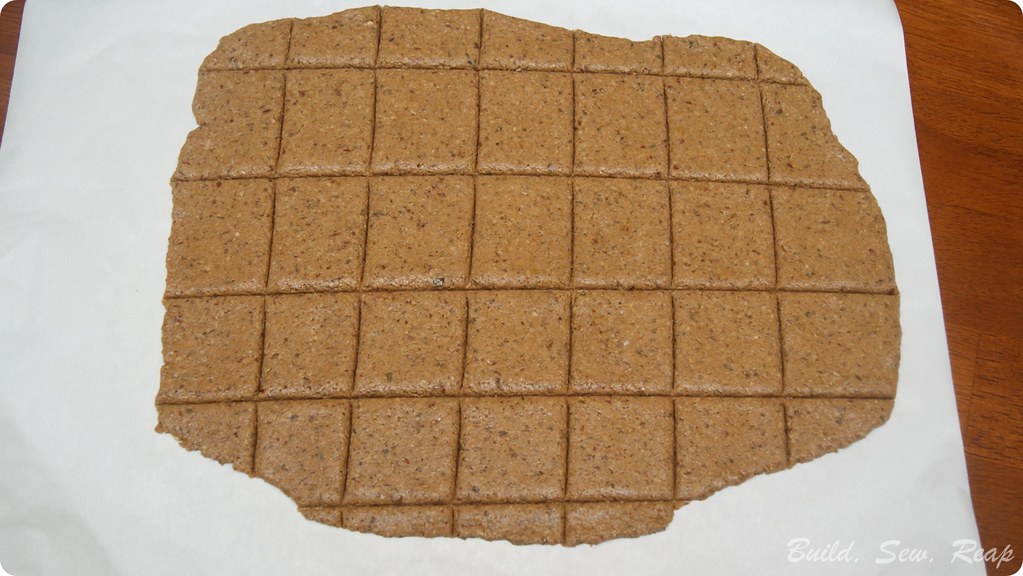
Score into cracker sizes with a pizza cutter. Transfer bottom parchment paper and cracker dough to a baking sheet.

Pizza Crackers GF and Vegan

Bake for 12 minutes.

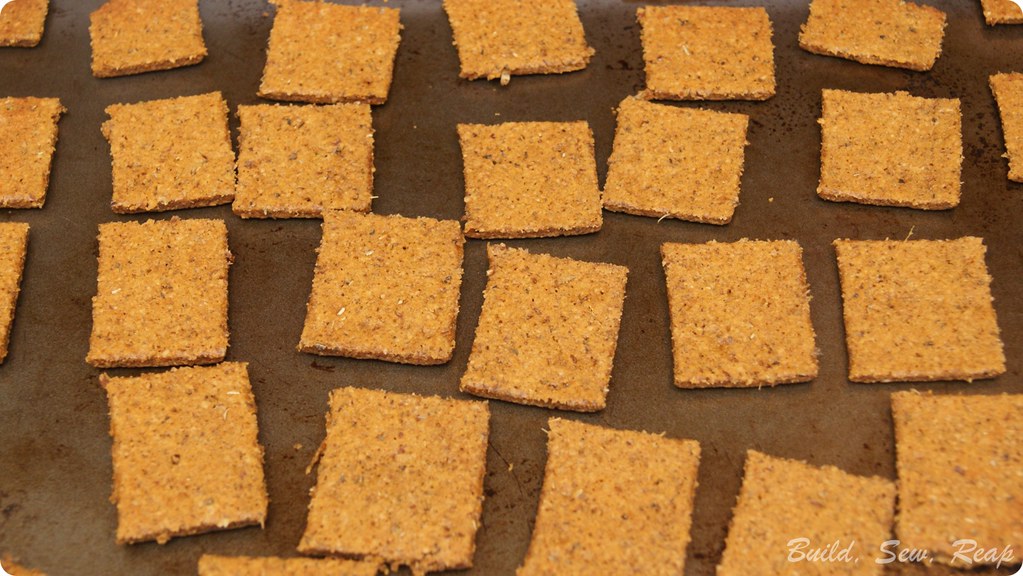
Remove from oven and either flip the crackers individually or turn the whole parchment paper with crackers over and release the crackers upside down on the baking sheet and separate them.

Pizza Crackers GF and Vegan

Discard the parchment and bake the crackers for another 9-10 minutes, until the edges just start to brown.

Cool on a cooling rack and enjoy.

Pizza Crackers GF and Vegan

Have you ever made crackers? I have several go-to recipes that we really enjoy. I love knowing what goes into my kids' snacks and they get pretty excited when I offer to make them.

Thank you for reading,
Julie

I'm sharing at the following link parties:

Our Favorite Relatively Easy Pizza Recipe

Dough

Ingredients:
Pizza Dough by Build, Sew, Reap
  • 1 Tbsp Olive Oil
  • 2 Tbsp honey
  • 1 tsp sea salt
  • 1 Tbsp active dry yeast
  • 1 tsp Italian Seasoning
  • 1/2 tsp garlic powder
  • 1 cup warm water
  • 2 3/4 cups white flour
Instructions:

1.  In mixing bowl, combine the oil, honey, salt, yeast, seasoning and garlic powder.
2.  Add in warm water and stir thoroughly.
3.  Allow to sit for 5-10 minutes, until the mixture becomes a bit puffy.
4.  Add in the flour and mix with the kneading hook for 5-10 minutes until it is well combined and a little beyond.
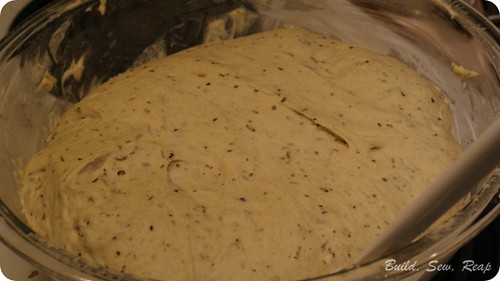
5.  Lightly oil a separate mixing bowl and add the dough to it. Cover with a damp cloth (lint-free) or greased plastic wrap (if you can't grease it, you'll just likely lose a bit of the dough stuck to it later but it isn't a huge problem.
6.  Place in a warm spot for 1 hour or until doubled.
7.  Preheat oven to 400 degrees F.
8.  Remove from bowl and shape on your pizza stone or baking sheet. 
9.  Add desired toppings (see our favorite sauce recipe below)
10. Bake for 18-20 minutes until crust is just starting to turn golden brown and toppings are cooked as you like.

I like to make a double batch then set half of the dough aside to make into breadsticks later in the week. It can sit in the fridge for a few days, molded into breadsticks and tossed straight in the oven, still cold.

Sauce 

Ingredients:
Pizza sauce by Build, Sew, Reap
  • 1 6-ounce can of tomato paste
  • 3 oz water (I just refill the empty can of paste roughly half way)
  • 2 Tbsp nutritional yeast
  • 1 1/2 tsp minced garlic
  • 1 tsp onion powder
  • 1 tsp italian seasoning
  • 1/4 tsp ground black pepper
  • dash of cayenne pepper
  • dash of dried red pepper flakes (optional, we often skip this in the sauce and put them on top of our pizza)
  • 1/8 tsp sea salt
  • 1 Tbsp balsamic vinegar
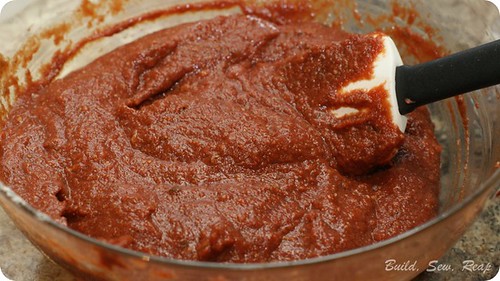
1. Mix it all together
2. Put it on your dough
3. Top with your favorite toppings.
4. Cook per dough instructions.
5. Enjoy

I also make a double batch of sauce a lot of times. I put the extra in the fridge and if we want a marinara sauce a few days later (for pasta, polenta, etc), I just add 1 can of organic chopped tomatoes when I heat it up on the stove. Once it is all warmed up, I use my immersion blender to smooth out the sauce as that's how my family prefers it. The taste is fantastic.


DSC08880
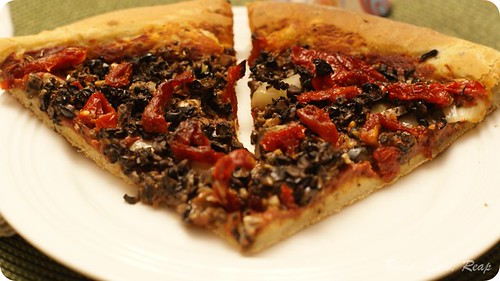
My favorite toppings are mushrooms, olives, sundered tomatoes, 
onions and basil (which I was missing on photo night)

Save yourself some time and chop your toppings up instead of slicing. They cook better and the texture is actually really nice. I use a chopper similar to this one.

Also, this crust can be frozen. Make the dough and let it rise, cook for half the time, cool, wrap well with foil and freeze until you need it. When you need it, just take it out, add the sauce and toppings and bake for another 10 minutes or until toppings are cooked.

Thank you for reading,
Julie


Homemade Chocolates

Today I did a little experiment combining several ideas into one and it was a raging success so I'm here to share it with you.

About 10 months ago, I gave up processed cane and beet sugars. This, in addition to my mostly plant based diet (I do cook with oils), means I make a whole lot of my own food to stay within the parameters I've set for myself. That's just fine with me, I've never felt healthier. Unfortunately, I've also become a bit of a chocolate snob but as long as I have a few minutes to cook it up, I have a wonderful go-to recipe for tasty dark chocolate. Today I'm going to share with you how you can make your own amazing chocolates using just a handful of ingredients that no pantry should be without.

First, let me entice you to read on:

Yummy Chocolates by Build Sew Reap

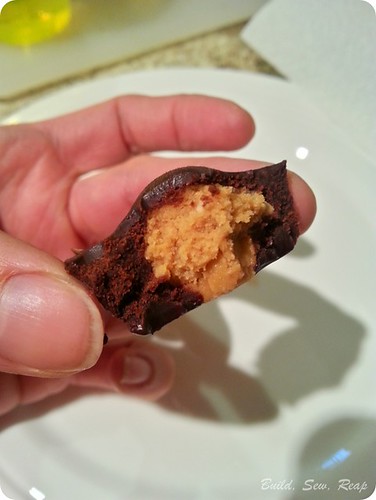
Yes, that's a peanut butter cup. Yes, I made that myself. Yes, I did it in under 10 minutes including cleanup. Yes, you can too.

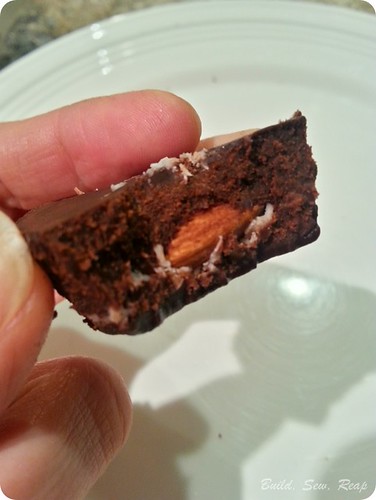
Not into peanut butter cups? How about a homemade Almond Joy?

Yummy Chocolates by Build Sew Reap 12

BTW, when was the last time you thanked a blogger for eating 6 decadent chocolates just so she can get a good photo? Just know, I took one for the team today.

Now for those of you who aren't into filled chocolates. Get yourself one of these and crank out a few of these:
Yummy Chocolates by Build Sew Reap 11

This chocolate can also be poured over ice cream and it solidifies just like Magic Shell.

I could go on and on about how versatile this recipe is (banana + peanut butter + chocolate) but I bet you want me to just go ahead and post the recipe so here it is:

Estimated cook time: <10 minutes + 30 minutes in the freezer

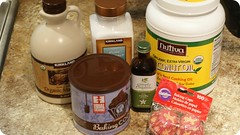
Ingredients for the Chocolate:
Yummy Chocolates by Build Sew Reap8
  • 1/4 cup organic unrefined coconut oil
  • 1/4 cup organic cocoa powder (please buy fair trade)
  • 1/8 cup organic maple syrup
  • 1/2 tsp organic vanilla extract (optional)
  • pinch of sea salt (optional but I like what this adds quite a bit)
Optional fillers:
  • 3-5 drops doTERRA essential oils such as wild orange or peppermint. (Please only use essential oils that can be taken internally, this does NOT include those you can purchase at the grocery/drug store)
  • 1-2 Tbsp full fat coconut milk (from the can, just use the thick stuff up top) for a milk chocolate flavor and texture
  • Natural peanut butter (the stuff with sugar would be too sweet in my opinion plus the natural stuff rolls into a ball easier)
  • Coconut + an almond
  • Banana
  • Peanuts
  • ?!?!? use your imagination!!
Directions (printable recipe here):

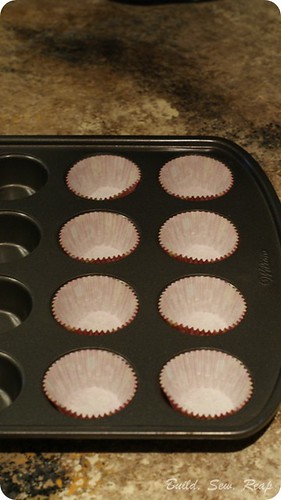
Put mini muffin papers into 8 mini muffin tin holes. If you don't have the muffin tin, you can just use two muffin papers together for each candy and put them on a freezer-safe plate or tray.

Yummy Chocolates by Build Sew Reap7

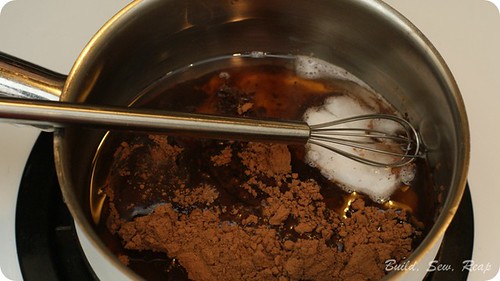
Combine ingredients for the chocolate in a small pan over medium-low heat.

Yummy Chocolates by Build Sew Reap6

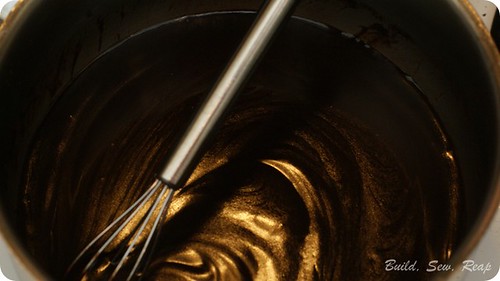
Stir constantly until all ingredients are combined and mixture looks smooth then immediately remove from the heat.

Yummy Chocolates by Build Sew Reap5

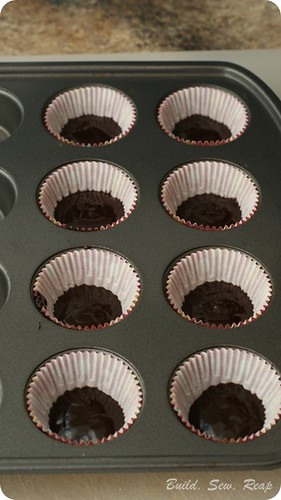
Pour a little dollop into each muffin cup. I think these were each filled a little less than 1/4 of the way.

Yummy Chocolates by Build Sew Reap4

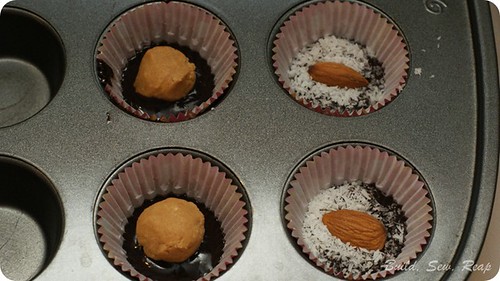
Add your filling.

Peanut Butter: Roll small balls of peanut butter in your hands. If you're using the natural stuff, this should be no problem at all. Put the PB ball in the center of the chocolate.

Coconut & Almond: Sprinkle some shredded unsweetened coconut across the surface of the chocolate. Gently press in one almond per candy.

Yummy Chocolates by Build Sew Reap3

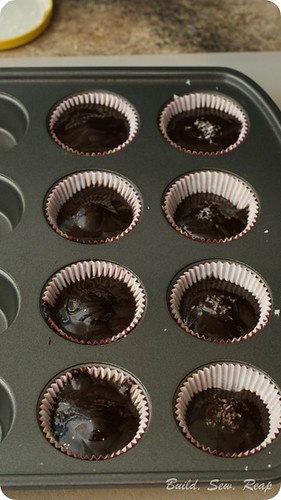
Now pour the remaining chocolate into the 8 cups.

Yummy Chocolates by Build Sew Reap2

Optional: I like to sprinkle a little coconut on the ones containing coconut since I know not everyone is a fan and don't want any surprises. If I make several different varieties at once, I try to use some system to tell them apart once they're finished.

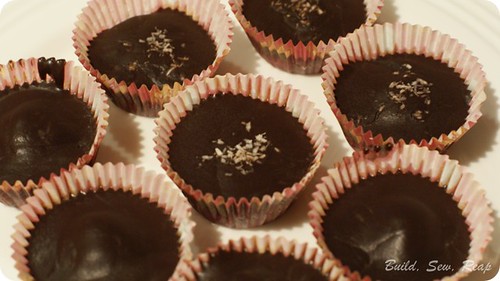
Pop the tray in the freezer for about 30 minutes. When they're firm, you can eat them right away or store them in the refrigerator.

Yummy Chocolates by Build Sew Reap1

Warning: If you're sensitive to caffeine, these are NOT a good late night snack unless you want to stay up all night crafting. I won't judge.

Thank you for reading,
Julie


Almond Joy Hot Chocolate - Vegan Style

I love hot chocolate, as do my kids. I hate buying it when we're out and about though because it is either cow's milk based, full of sugar, expensive or all of the above. When we're at home though, all bets are off and I've become a master at busting out fantastic plant based hot chocolates. Today I got a little extra creative and totally nailed this recipe on the first shot. I was just making it up as I went along and am so glad I documented what I used so I can recreate it.

Almond Joy Hot Chocolate
*Vegan / Plant Based

Ingredients
  • 4 cups of your favorite unsweetened plant based milk - I used organic rice milk
  • 1/4 cup raw cocoa powder
  • 1/4 cup liquid sweetener such as organic agave or pure maple syrup (I used maple)
  • 1/4 tsp Almond Extract
  • 2 Tbsp Creamed Coconut such as this one
Optional Topping to be loaded into a whipper
  • 1 Can Full fat coconut milk (you won't use the whole thing)
  • 2 Tbsp Agave
Directions

Heat all ingredients together over warm heat until the creamed coconut has dissolved. There will be some little pieces of coconut floating in there.

Pour into a mug and enjoy.

Optional - I added a bit of coconut whipped cream (full fat coconut milk from a can + agave + vanilla in my whipper) and a sprinkling of toasted coconut on top.

Plant Based Almond Joy Hot Chocolate by Build, Sew, Reap


HOLY MOLY!!!! (I've been saying that all day long, this stuff is so amazingly good)


Thank you for reading,
Julie


Related Posts Plugin for WordPress, Blogger...