My 7 year old is motivated by money. We believe he's at the age where he can appreciate the value of earning money to purchase the things he wants most. I don't think giving him an allowance will teach him any of the lessons we're working hard to instill in him right now and there are always plenty of tasks to do around the house so I created a system to both motivate him to help out AND help him earn money to buy the things he wants.
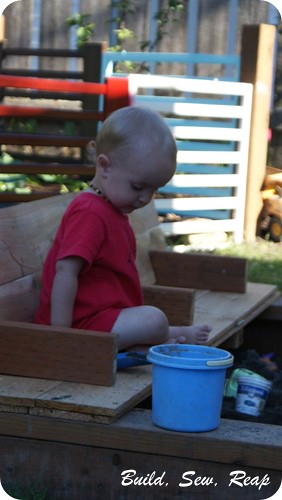
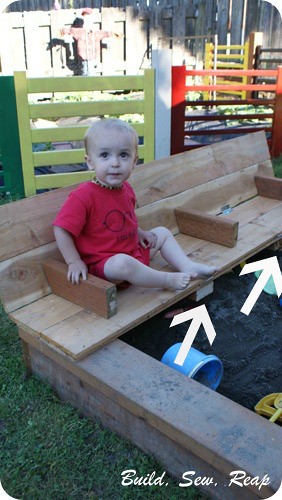
In our house, the kids are mostly responsible for cleaning up their own messes (we help out but generally they're expected to manage their own rooms as well as the messes they create in our common spaces). We try to tackle the general messes as a family but being a stay at home mom means (to me) that most of the deep cleaning falls to me unless I ask for help. I now have a great system for asking for help and a terrific way to keep track of what needs to be done around here.
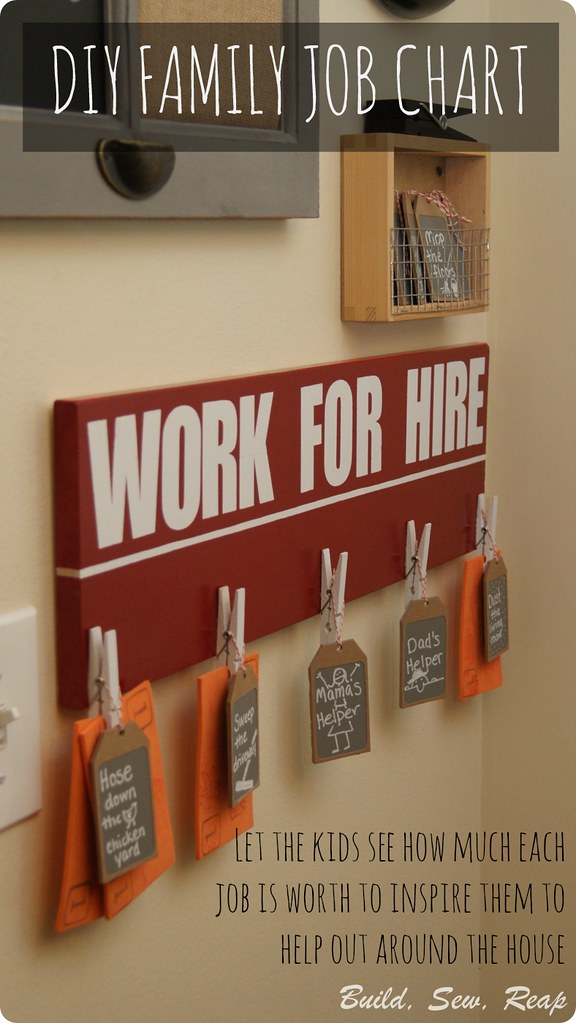
This section of wall has been blank for a couple of years now so I'm really excited to find such a great use for it. We have a little command center now but this job chart is really the shining star of the area.
I painted a scrap piece of wood white with spray paint then used my Silhouette SD to create a stencil for the "Work for Hire" letters. I then spray painted a deep red glossy paint over the board until I got a good solid coat. I also disassembled 5 basic wooden clothes pins and spray painted them white. Once the pieces were all painted, I used Gorilla Glue to attach the clothespins to the board.
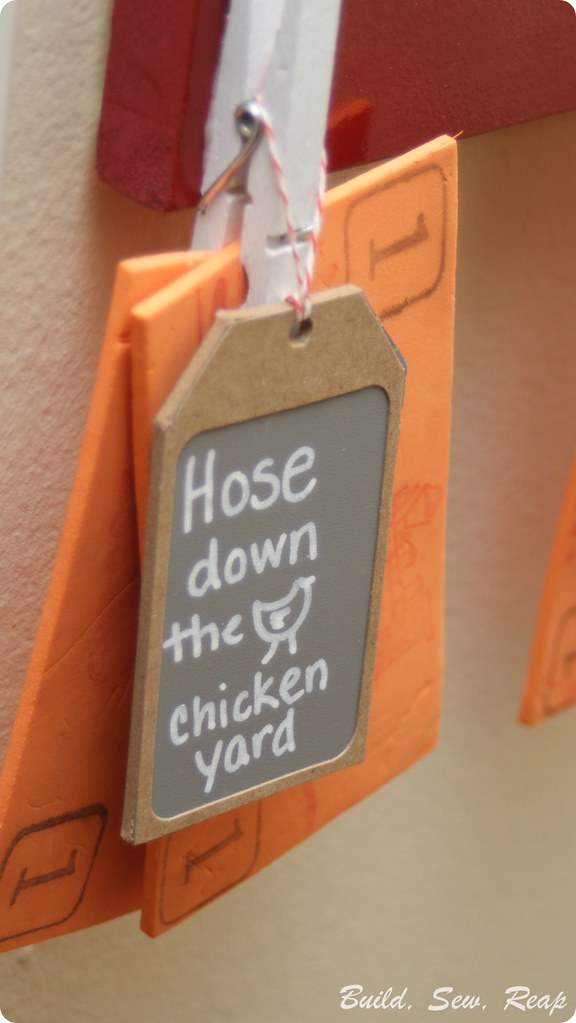
At first I wasn't sure how I'd mark the jobs but today I happened upon a clearance sale at JoAnn Fabrics and Crafts where I found those cute chipboard tags with chalkboard windows on them. I also picked up a couple of white chalk pens for the project. I had the red and white bakers twine which I used to make the loops to hang the tags.
For each task, I hang the chipboard tag and then I clip the appropriate number of Kid Cash bills in the clothespin. Kid Cash can be traded in for real money at purchase time but is a lot easier for me to stomach when it gets lost (it isn't replaceable for him but at least it's not real money if it goes missing).
Not wanting to have to rewrite the tasks out new each time, I picked up more than enough of the little chalkboard tags but wanted to find a way to keep them close to the sign. I headed out to my garage where I pretty much just stood and stared at the shelves until I saw a little Melissa & Doug box among my basket collection. I grabbed it and some hardware cloth which I cut to size and stapled into place and voila! I had a cute little box for my tags.
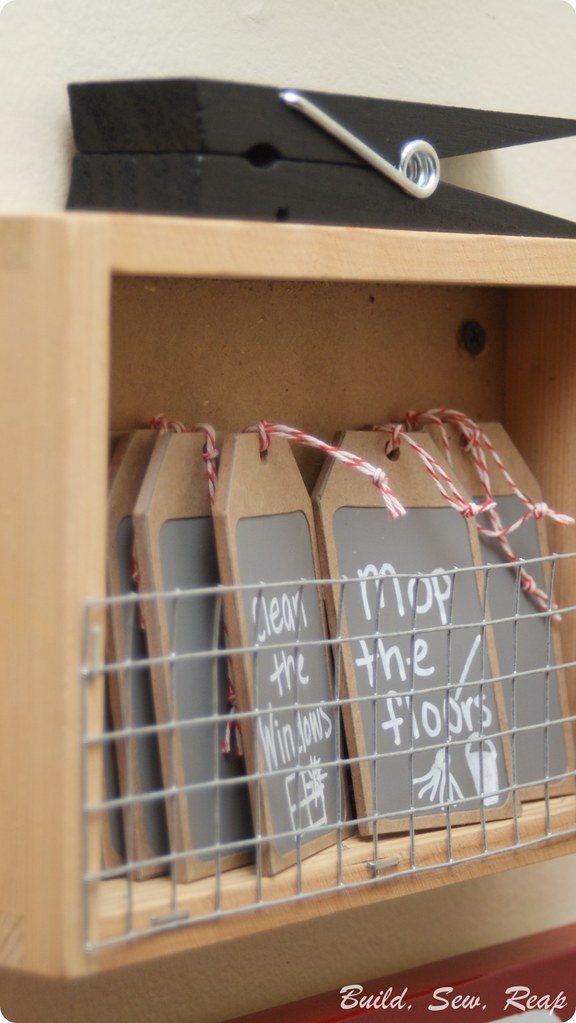
I had also picked up the giant black clothespin and a cute chalkboard/bulletin board combo on clearance at JoAnn today and I thought they balanced out the space nicely. Finally, I grabbed a clock from the kitchen (it was in a dumb spot quite frankly), taped it off and spray painted it black then hung it in the remaining space on the wall.
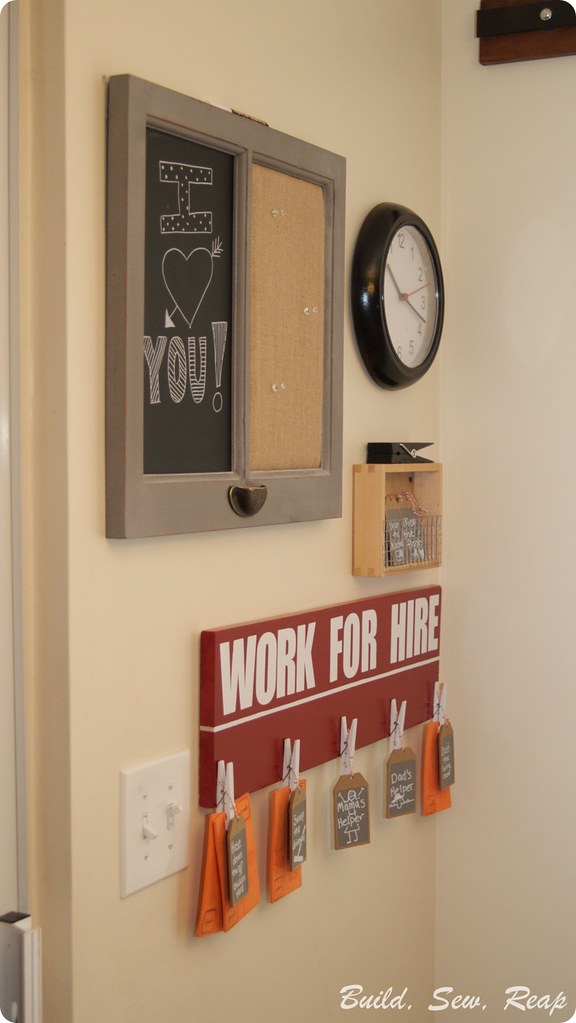
I'm really happy with how this turned out.
How do you encourage your kids to help out around the house? Are they motivated by money like mine is?
Thank you for reading,
Julie
Showing posts with label Kids. Show all posts
Mud Kitchen
I may have mentioned this before but I seem to think my property needs to be some sort of family fun center. I feel like I'm constantly building things so we can all have more fun here. It's as much about the process as it is about the end product though. I just love to build.
One of my recent projects was to convert our broken old wheelbarrow into a mud kitchen for the kids. Once again, as with some past projects, my goal was to purchase as little as possible and use recycled scrap materials.
I had seen versions of the mud kitchen around Pinterest but didn't have the impetus to make it happen until I stumbled upon an estate free (like an estate sale only stuff was all free) and I was able to get a ton of great kitchen utensils and containers for it. Once I had those, I knew I had to get working on the build.
Our old wheelbarrow had a broken handle and while I had fixed it once, it also had a flat tire more often than not and was suffering in a number of ways. I treated us to a great new wheelbarrow with steel handles and a no-flat tire so I didn't hesitate to dismantle the old one.
Once that was in parts, I built a frame around the basin.
I built the frame based on the lumber I had to work with so I made it as long as possible with one section to hold the basin and another section for the work top area (the back side of that has the spray painted circles you see here. Apparently I used that as a dropcloth at some point). I also found a hanging wire basket at the estate free so I mounted that underneath. Finally, one end has a dowel handle that's well secured.
Fast forward to the final product. I used the feet from the old wheelbarrow to support the end opposite the tires and basin. I also purchased two new tires which I fed onto a steel bar and spaced using 1/2 inch PVC pipe. Here are some other angles:
If you have questions about exactly how it all went together, I can be more specific so just leave a comment and I'll follow up. I didn't set out with much of a plan since I had to just work with the materials I already had. That meant lots of strange angles and hinky support systems but it is strong and it can easily be rolled around our yard.
Good for hours of good,clean, dirty, fun.
Happy Summer!!!
Thank you for reading,
Julie
One of my recent projects was to convert our broken old wheelbarrow into a mud kitchen for the kids. Once again, as with some past projects, my goal was to purchase as little as possible and use recycled scrap materials.
I had seen versions of the mud kitchen around Pinterest but didn't have the impetus to make it happen until I stumbled upon an estate free (like an estate sale only stuff was all free) and I was able to get a ton of great kitchen utensils and containers for it. Once I had those, I knew I had to get working on the build.
Our old wheelbarrow had a broken handle and while I had fixed it once, it also had a flat tire more often than not and was suffering in a number of ways. I treated us to a great new wheelbarrow with steel handles and a no-flat tire so I didn't hesitate to dismantle the old one.
Once that was in parts, I built a frame around the basin.
I built the frame based on the lumber I had to work with so I made it as long as possible with one section to hold the basin and another section for the work top area (the back side of that has the spray painted circles you see here. Apparently I used that as a dropcloth at some point). I also found a hanging wire basket at the estate free so I mounted that underneath. Finally, one end has a dowel handle that's well secured.
Fast forward to the final product. I used the feet from the old wheelbarrow to support the end opposite the tires and basin. I also purchased two new tires which I fed onto a steel bar and spaced using 1/2 inch PVC pipe. Here are some other angles:
If you have questions about exactly how it all went together, I can be more specific so just leave a comment and I'll follow up. I didn't set out with much of a plan since I had to just work with the materials I already had. That meant lots of strange angles and hinky support systems but it is strong and it can easily be rolled around our yard.
Good for hours of good,
Happy Summer!!!
Thank you for reading,
Julie
Creepy Oozy Halloween Breakfast (With Bonus Banana Caterpillar)
This is just a silly post but I wanted to share with you. This didn't start out as a Halloween-style breakfast but it turned out to be one and it was a huge hit. I tried to add a face to my son's sunny-side-up eggs one morning but the gel food coloring ran. I went with it and this was the result:
And here's the video of his eggs throwing up. He was thrilled ... because he's 6.
Thank you for reading,
Julie
And here's the video of his eggs throwing up. He was thrilled ... because he's 6.
Thank you for reading,
Julie
Pirate Tooth Fairy Pillow
A few months ago, my 6 year old suddenly had a loose tooth. I felt like it went from a little wiggly to dangling by one tiny root in a matter of days although I think it was really weeks. A friend once told me that these would be the longest days but fastest years of my life. She wasn't kidding. I have a kid who is losing teeth. When did he even outgrow his bassinet?
Anyway, my little tough guy and I took to Pinterest to find just the right tooth fairy pillow to hold his precious baby teeth and he saw a pirate tooth that he fell in love with. He took one look and said, "Wow, cool, I want THAT one." Unfortunately the link to the blog post from the pin doesn't go anywhere so I can't give credit where credit is due.
Here's the one I made based on that picture though:
I just used some scrap felt and a bandana that I had but never used. Here are the parts laid out:
To stitch this together, I first used my sewing machine to attach the mouth, teeth, eye, patch, and tooth on the patch using matching thread. Then I baste-stiched the UN-TIED bandana on his head. I then pinned the tie ends towards his face so they wouldn't get caught wrong when I stitched the two sides of the pillow together. Finally, I stitched the hanging loop to the top edge (when you do this, make sure the loop is facing down with the cut ends up, that way when you turn the project in the end, the loop will be on the outside of the pillow).
I top stitched just the pocket flap with white thread (not in place, this was separate from the tooth pillow). I laid the two tooth pieces with right sides together and stitched along the side where the pocket would be. I opened the two pieces back up and stitched the pocket in place, wrapping it across the seam.
I then pinned the front and back with right sides together and stitched nearly all the way around, leaving a hole along one side to turn the pillow.
I turned the pillow right side out and stuffed it then hand stitched the hole.
He lost his tooth 2 days later.
He tucked his tooth and one of my hair bands in the pocket and had me write a note to the tooth fairy to tell her the hair band should be delivered to Tinkerbell.
Thank you for reading,
Julie
Filling Refillable Pouches
I hate the waste of those little applesauce pouches but the convenience makes them so appealing. I make my own applesauce though I set out to find an easy way to fill the pouches I bought. With this simple solution, you don't have to purchase special pouches either, you can just reuse the ones you have.
Are you ready? You're going to kick yourself for not thinking of this first:
It's so simple. First fill the bottle with yogurt, smoothie, applesauce, etc. Screw on the top and use the pointy spout to fill that little pouch up. No need for the fancy pants zipper seal on the side of the pouch (like mine has, now we just leave them shut). I keep our condiment bottle full in the fridge so I can easily just fill a pouch or two before school.
Thank you for reading,
Julie
Today I'm sharing at the following link parties:
Star Wars Lego 6th Birthday Party
Well, it's that time of year again. My big kid just had his birthday and although I tried *really* hard to tone it down a bit, I think I failed. We did manage to keep the guest list to a reasonably sized group of kids his own age and family but we still went a little nuts with decorations. I'll take you through it from start to finish and hope that it inspires you to take on some fun Star Wars Lego projects of your own.
The invitation:
If you've looked at ideas around Pinterest at all, you've probably seen this type of invitation. It wasn't an original idea but I gave it a few of my own touches.
Since I don't have fancy-pants photo editing software, I found it was easiest to type the text in MS Word then use word art to stretch and skew it to give it the look that it was flying away through space.
As our guests approached the house, the first thing they saw was that there were giant Legos on the roof.
I used scrap wood (mostly 2x4s) and a sliced up wood dowel to create the Lego look.
Each kiddo was handed a pool-noodle lightsaber and they immediately jumped into an epic battle. I think those kids beat one another for at least 30 minutes.
This little Padawan was a little more hesitant to jump into battle.
Once they worked out their aggression, we handed out bubble wands.
I bought bubble wands and spray painted the handles with cheap $.99 spray paint from Home Depot. It worked out great. If I had it to do over again though, I might have shoved a few glow sticks in each one.
Inside the house, there were around 75 giant legos made by wrapping boxes in black, silver, yellow, and red wrapping paper then spray painting using a stencil (and some previously undiscovered graffiti skills) to make them look like big legos. I thought about doing an activity with them but decided against it at the last minute.
I made a bunting using half sheets of brightly colored copy paper and letters that I printed out on my computer then cut out by hand. I used a Lego font I downloaded for free online (please forgive me, I have no idea where I found it).
I made candy-coated pretzel rod Lightsabers and graham cracker, vegan marshmallow, and candy melts (to stick the marshmallows to the graham crackers) Tie Fighters. All food also featured labels held up by Lego Duplos.
At the birthday boy's suggestion, he built a chip bowl out of Duplos as well.
My mom put together this crafty little silverware holder and my dad drew Lego man faces onto yellow Dollar Tree paper plates which were also supported by a structure my mom built.
As I do every year, I created an elaborate cake. Yes, it's far more elaborate than needed for a 6 year old's birthday and featured way more cake than was necessary but I don't have a lot of opportunities to create cakes so I just go all out and over the top when the occasion arrises.
The top layer was a cane-sugar free vegan chocolate cake made from scratch. The middle layer was a gluten free cake made from a mix and the big layer on the bottom was a vegan yellow cake that, quite frankly, didn't turn out so great. The kids didn't mind though.
I was lucky enough to capture a picture of the birthday boy's face when he saw the cake for the first time:
And here are the guest singing the Happy Birthday song to my kiddo:
He loved his party more than I could have hoped for. My husband designed and lead the kiddos on a Jedi training obstacle course in the back yard, we had a piñata full of legos, there was an area for free-building with a HUGE tub of Legos to pull from and lots of happy kids running all around.
In closing, I just have one thing to say:
Thank you for reading,
Julie
The invitation:
If you've looked at ideas around Pinterest at all, you've probably seen this type of invitation. It wasn't an original idea but I gave it a few of my own touches.
(identifying information is blacked out for the blog)
Since I don't have fancy-pants photo editing software, I found it was easiest to type the text in MS Word then use word art to stretch and skew it to give it the look that it was flying away through space.
As our guests approached the house, the first thing they saw was that there were giant Legos on the roof.
I used scrap wood (mostly 2x4s) and a sliced up wood dowel to create the Lego look.
Each kiddo was handed a pool-noodle lightsaber and they immediately jumped into an epic battle. I think those kids beat one another for at least 30 minutes.
This little Padawan was a little more hesitant to jump into battle.
Once they worked out their aggression, we handed out bubble wands.
I bought bubble wands and spray painted the handles with cheap $.99 spray paint from Home Depot. It worked out great. If I had it to do over again though, I might have shoved a few glow sticks in each one.
Inside the house, there were around 75 giant legos made by wrapping boxes in black, silver, yellow, and red wrapping paper then spray painting using a stencil (and some previously undiscovered graffiti skills) to make them look like big legos. I thought about doing an activity with them but decided against it at the last minute.
I made a bunting using half sheets of brightly colored copy paper and letters that I printed out on my computer then cut out by hand. I used a Lego font I downloaded for free online (please forgive me, I have no idea where I found it).
I made candy-coated pretzel rod Lightsabers and graham cracker, vegan marshmallow, and candy melts (to stick the marshmallows to the graham crackers) Tie Fighters. All food also featured labels held up by Lego Duplos.
At the birthday boy's suggestion, he built a chip bowl out of Duplos as well.
My mom put together this crafty little silverware holder and my dad drew Lego man faces onto yellow Dollar Tree paper plates which were also supported by a structure my mom built.
As I do every year, I created an elaborate cake. Yes, it's far more elaborate than needed for a 6 year old's birthday and featured way more cake than was necessary but I don't have a lot of opportunities to create cakes so I just go all out and over the top when the occasion arrises.
The top layer was a cane-sugar free vegan chocolate cake made from scratch. The middle layer was a gluten free cake made from a mix and the big layer on the bottom was a vegan yellow cake that, quite frankly, didn't turn out so great. The kids didn't mind though.
I was lucky enough to capture a picture of the birthday boy's face when he saw the cake for the first time:
And here are the guest singing the Happy Birthday song to my kiddo:
He loved his party more than I could have hoped for. My husband designed and lead the kiddos on a Jedi training obstacle course in the back yard, we had a piñata full of legos, there was an area for free-building with a HUGE tub of Legos to pull from and lots of happy kids running all around.
In closing, I just have one thing to say:
May the Force be with you!
Thank you for reading,
Julie
Fire Truck Toddler Bed
The little dude outgrew his mini crib even though I took one side off to make it more of a toddler bed. I realized this problem when he was already sleeping with his toes through the slats and one arm hanging off the side of the bed. I jumped into action and being me, I couldn't just build him a normal bed, it had to be COOL!
Thanks to my many garden projects revolving around old cribs, I had a spare regular sized crib springs on hand. I also found a free crib mattress listed on my community Buy Nothing site. The next step was to dig into my wood shed and start pulling stuff out. Here's where the pile started but I'll admit that I pulled out lots more scraps of plywood and MDF before the project was over.
I started by building a base using pieces of door jamb that came with the pantry doors.
I also spray painted it with chrome spray paint.
Then I got to building the top part of it. Each piece size and shape depended quite a bit on the wood I had. I just stared at the pile, figured out what would work and jumped in with both feet.
This:
became this:
Then I started adding details and painting.
And I added hinges to the front so we could open it up for easier sheet changes.
Then the details got really really intricate.
And finally, I moved it into his room and he was totally thrilled!!
I also rearranged his room to better suit his new big-boy motif. I moved furniture, cleaned out toys and even sold off the biggest piece of furniture that was in his room. Here is the final look:
For this project, I purchased 2 tap lights, 1 light for the top, and some paint. I accomplished my goal of not buying any wood.
I love looking in his bright and playful room. I'm also thrilled that the colors I picked for his nursery have worked so well as he has grown up a bit. He loves his room too. Every night he tells me he wants to go to sleep in his fire truck bed.
Thank you for reading,
Julie
Burned Out Bulb Holiday Decor
We've put the big size (C9) Christmas lights on our house the past few years but we always have a problem with the filaments disconnecting while in storage because when we pull those strands out each year, many of the bulbs no longer work. This year I couldn't just toss the bulbs, it was just too wasteful. Sooooo, I recruited the big kid and he and I did a little project.
Want to know how to make your own glitter bulbs? Here's what you'll need:
Coat them in white glue or Mod Podge
Roll them in glitter
Watch how when they dry, they change color
Load them into a vase with some white battery operated lights
And enjoy!!
Warning: Despite appearances, glitter is not a child friendly craft material if you don't want to find it on everything you own for years to come.
Thank you for reading,
Julie
I'm sharing here this week:
Want to know how to make your own glitter bulbs? Here's what you'll need:
- Burned out christmas light bulbs (the big ones)
- White glue or Mod Podge
- Glitter
Optional
- Glass vase
- Battery operated lights
- Ribbon to tie on the vase
Here's what to do:
Gather your bulbs
Roll them in glitter
Watch how when they dry, they change color
(they don't really change color, the red ones were the ones I did)
Load them into a vase with some white battery operated lights
And enjoy!!
Warning: Despite appearances, glitter is not a child friendly craft material if you don't want to find it on everything you own for years to come.
Happy Holidays!!
Thank you for reading,
Julie
I'm sharing here this week:

Sandbox lid that converts to benches
Here's another project I failed to blog about in a timely manner but I loved the project so much that I don't want it to get lost.
I had seen these online but couldn't find a tutorial at the time so I just made it up as I went along.
UPDATE: Do NOT use fence boards like I did unless you know of a better way to make the screws through the hinges hold. Any of the screws that didn't go through to a 2x4 didn't hold and there are a couple of places where a 2x4 can't go without messing up how this folds. Get better wood.
Here's the lid:
It isn't rain tight, it isn't supposed to be. The primary goal of a sandbox lid (for us anyway) is to keep animals from depositing little gifts in the sandbox. This sandbox is just a frame surrounding a hole we dug in our yard that we then filled with sand.
Here's the best part though:
The boys absolutely love the benches. They're comfortable and sturdy and the Snickerdoodle can even open and close the sandbox on his own. I need to add some handles to make it easier but haven't gotten around to it yet (I keep forgetting to buy them).
I didn't take step-by-step photos but I can break down the slat and hinge placement for you based on my sandbox design. First of all, I laid out all the slats to ensure 12 of them would fit side-by-side with a slight gap every 2nd board. I'm not sure if this is going to make much sense but I'll walk you through my steps.
The end boards are slightly narrower than all the rest.
This was to ensure boards 3 and 4 (counting in from each side) would overlap 1 and 2 when the top is folded back to form the bench.
Boards 1 and 2 are also screwed into the top of the sandbox ...
... and are attached to two scrap 2x4s each.
These 2x4s underneath keep them from bowing down towards the sand when a little tush sits on the bench. I positioned these 2x4s below where I wanted the hinges to go. This ensured the screws going through the hinge on board 2 would be tighter since they went into the 2x4 as well.
Between boards 2 and 3, I screwed in two hinges so that board 3 could fold back onto board 2.
Before attaching boards 3 and 4 together, I attached hinges between boards 4 and 5. These hinges faced down so they would ultimately fold the opposite direction as the ones between 2 and 3.
I folded 3 back on 2 and then measured and cut the arm wrests and bench supports you see on top of the bench then attached those to boards 3 and 4 (which was already attached to 5).
Finally, I attached longer scrap 2x4s to both hold boards 5 and 6 together as well as to provide support for the back of the bench. When the sandbox is open, these boards rest firmly against the base of the sandbox to support the back rest of the bench.
I hope this helps you figure out how to make one of these for your kids. I used fence boards although I'm not sure I'd recommend that. They warped a bit in the sunshine but look surprisingly straight now that we're in the rainy season. Whatever you use, make sure it is something that will weather well (cedar is a great choice) and seal it with a deck sealer or something similar to extend its life.
Good luck!
Thank you for reading,
Julie
Subscribe to:
Posts (Atom)