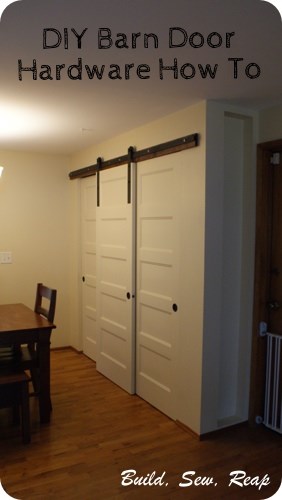
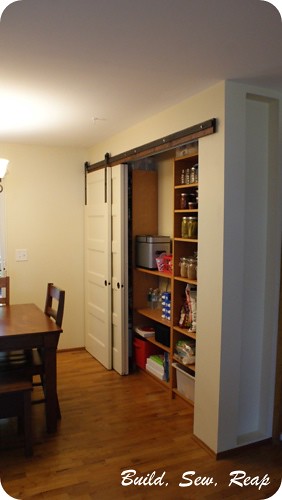
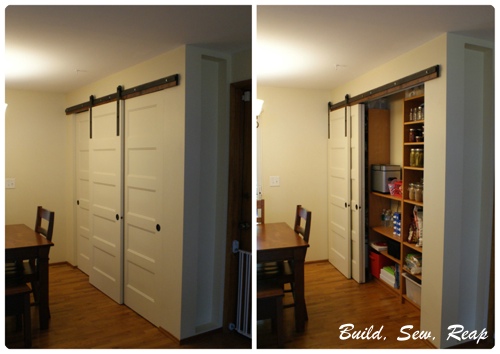
I also wanted all three doors to roll to one side or the other so I could get to the maximum sized opening possible when I need to access the food inside.

Let's start with just the track setup.
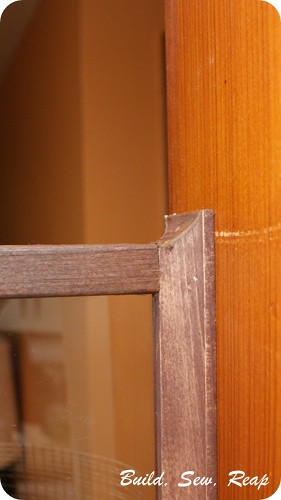
My track is 96 inches long, I wanted it to run wider than the actual opening of the pantry.
Materials:
- 1 - 8 foot long 1x4 stain-grade lumber
- Stain of choice
- 6 - 4 inch long screws that match the stain on your wood
- 2 pieces of 4 feet by 1 1/2 inch by 1/4 inch steel (Lowe's or Home Depot). NOTE, this must be 1/4 inch if you're going to use the same garage door pulley I'm recommending. Of course, if you can get an 8 foot long piece that's 1 1/2 inch by 1/4 inch thick, go for that instead.
- 6 hex lag screw - 4 inch long, 1/4 inch diameter
- 30 standard washers - fits over 1/4 inch bolt/screw
- 6 fender washers - fits over 1/4 inch bolt/screw but larger outside diameter
- 2 strong nails, at least 2 inches long
- Black spray paint (if you want the look I used)
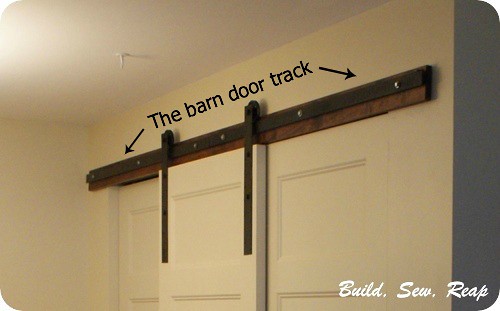
Next came the actual steel track. It consists of two pieces of steel that I purchased at Lowe's that I spray painted flat black. Each piece is 48 inches long, 1 1/2 wide and 1/4 inch deep. I used my regular cordless drill and a good bit to drill three holes in each piece; 4 inches from either end and in the center.
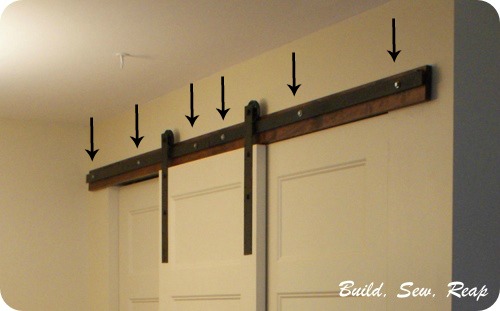
Using lots of clamps, I positioned the steel bars one at a time, end-to-end and marked where I would need to pre-drill through the wood. I positioned the bar 1/2 inch down from the top. I liked the way this looked and it allowed ample clearance for the bolt that will go through the center of the wheel.
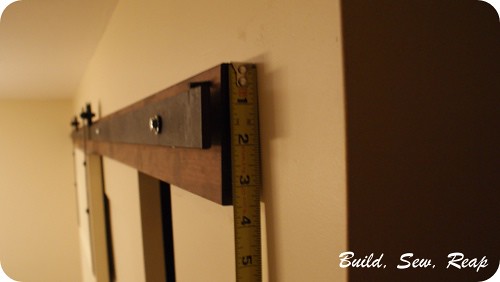
I took the steel back down and drilled 1/4 inch holes through the wood and into the studs (where I hit them). Since I screwed the wood into the studs in an earlier step, it isn't as necessary that the steel be attached to the studs, as long as it is securely attached to the stained wood piece.
Next, I stacked my materials as follows for each screw:
- One four inch long, 1/4 inch hex lag screw
- Standard washer
- Steel bar
- FOUR standard washers
- One fender washer
- Wood
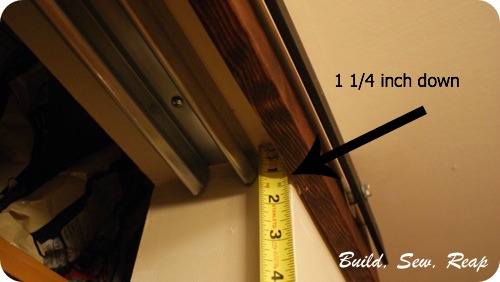
The goal here is to have the center of the track as close to 3/8 from the wood as possible. This was what I determined would make my 1 3/8 inch thick hollow-core door hang straight and glide easily without hitting the other doors. I did a little bit of experimenting with this so if you're using the same materials I'm using, save yourself the balancing act.
I found that I needed to get each one started just a little bit before I could tighten them all down. Remember also that you will have a little bit of wiggle room as you're tightening so take care to ensure your two tracks are perfectly aligned and butted up tightly against one another. I tapped mine with a hammer before fully tightening down all the screws and my doors glide easily over the intersection.
The last step is to create door stops. I wanted something really subtle so I used a nail that I tapped in until I felt like it was really secure and then I used a hack saw to cut the nail off and I painted it black to blend.
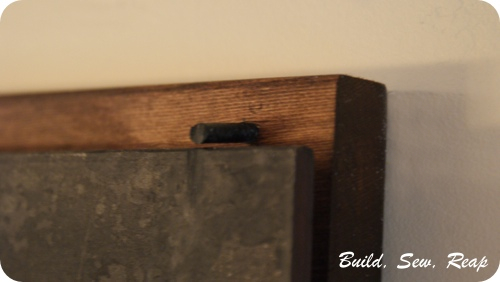
If anyone gets up a bunch of speed with the door, it will fly off the end most likely but I felt like it was secure enough in our household. If you don't feel like this would work in your home, perhaps try using an L bracket to stop the wheel.
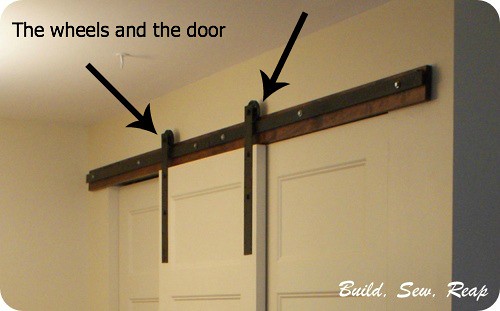
Now let's move on to the wheels and the door
Materials:
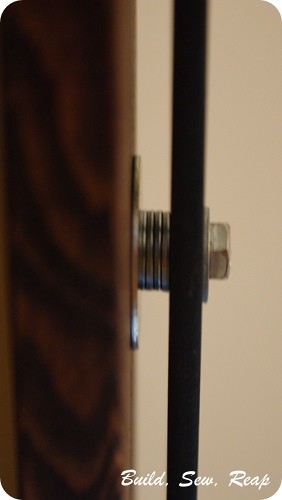
- 2 - 3 inch garage door pulley kits - This idea came from ShabbyLisaW
- 6 standard washers to fit over the bolt included in the pulley kit
- 2 - 18 inch long by 2 inch wide steel flat bars (or 1 - 36 inch long one and a good hack saw)
- 4 - 1 inch long by 1/4 inch hex lag screws
- 4 standard washers to fit over the 1/4 inch hex lag screws
- Flat black spray paint (optional)
- Brown spray paint (optional)
- Glue that can adhere metal to wood
I spray painted all the bolts, washers, wheels and flat bars with a flat black spray paint then just lightly dusted over that with brown to soften the look a bit. Once the paint is dry, assemble the setup as follows:
- Bolt from pulley kit
- Standard washer
- Steel flat bar
- 2 standard washers
- Pulley wheel
- Nut included in pulley kit
The goal on this one was to set the center of the wheel 5/8 inch away from the flat bar.

Next, I used clamps to position the bars on the door while in place. I checked to ensure it rolled smoothly from end-to-end, appropriate gap under the door (matched the other doors) and that it looked good from afar.
Once I liked where it was, I marked the placement very carefully, took the door off the track, and removed the clamps. Then I glued the bars to the door as marked and clamped them back down. Finally, I pre-drilled and screwed the 1 inch lag screws with washers into the door. The lower two didn't make a great connection but they went through glue so while they aren't highly functional, they are stuck in there for good.
I allowed the adhesive to dry per the instructions on the container then removed the clamps and hung the door.
HINT: If you find that you didn't get the bars glued into place exactly right and need to adjust how the door hangs, try loosening up the bolt through the pulley and adjust from up there. There is a little bit of wiggle room there.
Now stand back and enjoy how awesome your new barn door looks!
Thank you for reading,
Julie
I'm sharing this post at the following link-up parties: