Showing posts with label Recipes. Show all posts

Chocolate Peanut Butter Hummus

I have a 5 year old chocolaholic. I can't blame him, I was and still am one as well. I like treating him to chocolate treats but I can't just let him eat candy bars for breakfast so I created this recipe for chocolate peanut butter hummus he can have on his morning toast, drip pretzels into in the afternoon, spread on pancakes for dinner (pancakes are more of a dinner food here, I don't take time to do morning pancakes all that often).

I present to you: Chocolate Peanut Butter Hummus.

It's oil-free, it's vegan, it's tasty, and it's not *super* junky.

Chocolate Peanut Butter Hummus

So here's the recipe:

1 can rinsed black beans
1/2 cup cocoa powder
1/2 cup maple syrup
1/2 cup PB Fit (peanut butter powder)
1/4-1/2 cup water

Chocolate PB Hummus - 1 (1)

Put everything in a food processor or a quart-sized jar. Start with 1/4 cup of water and add water if necessary. Blend until the beans are smooth.

Chocolate Peanut Butter Hummus

Chocolate Peanut Butter Hummus

Enjoy on pretzels, toast, a spoon, or whatever sounds good to you.

Chocolate Peanut Butter Hummus

Chocolate Peanut Butter Hummus

Thank you for reading,
Julie


Quince Butter in the Electric Pressure Cooker

A friend inherited a quince tree in her back yard when they moved into their house. She offered to let me pick however many I wanted as they were just going to waste. I was at her front door the very next morning with paper bags in hand. I picked about half of a grocery sack full of the extremely sour, very hard fruit, with bold dreams of coming home and processing them into something my family would actually like.

I'm proud to report that I totally nailed it! It's not just a spread either, it's also an amazing applesauce type substance that, when paired with whipped maple coconut cream, is to die for.

Quince Butter by Julie at Build, Sew, Reap

I created a recipe from scratch that ended up bringing big smiles to my boys' faces as I served them the spread in little bowls with spoons. This turned out the consistency of thick applesauce with just the right balance of tart and sweet. We enjoyed it on graham crackers and toast too. Oh boy, my mouth is watering just thinking about it right now.

Quince Butter by Julie at Build, Sew, Reap 

Ingredients

1 cup water
5-6 Quince chopped (not peeled)
1 cup maple syrup
Optional: 1 tsp cinnamon

Instructions

Start by putting the cup of water in the electric pressure cooker and turn it on to saute so the water starts to get warm. While that's heating up, chop up the quince, removing any decaying flesh (I had a few bugs to deal with) and the core.

Toss all those in with the hot water, turn off your cooker, lock the lid on, then set it to manual high pressure for 8 minutes.

Now, I did 2 batches, one batch I set up then went to pick up a kiddo from school and let it do the natural pressure release thing for 20 minutes (it kept it warm too). The second time, I ditched the pot for an hour and 20 minutes. The second batch was a little sweeter but I don't think it made a huge difference. I guess the moral of this story is that you should let it do the natural pressure release but beyond that, timing is pretty flexible.

I would expect that you'd have about 4 cups of quince at this point. If you don't, adjust the maple syrup up or down, this isn't an exact science.

Quince Butter by Julie at Build, Sew, Reap

Pour the maple syrup (and optional cinnamon) into the quince then mix it all right there with an immersion blender. If you don't have one, you could try a food processor, whisk, blender, etc. I'd love for you to report back if you need to go another route.

Taste and add more maple syrup if it's not sweet enough for you. This was exactly how we liked it. In fact, we liked it enough to eat it with a spoon.

Quince Butter by Julie at Build, Sew, Reap 

You can certainly stop there and eat all the yummy quince butter/sauce without saving some for later in the season. I figured out that the version with cinnamon is excellent when topped with whipped maple coconut cream (coconut milk from the can + maple syrup in the Isi whipper) then sprinkled with a little more cinnamon. I've had this for dessert (ok, and breakfast) the past couple of days. 

Quince Dessert


Taking it a step beyond

I'm hot water canning all this lovely bounty. I've read that the quince is very acidic (this is obvious from the taste too) but to be on the safe side, I'm hot water canning them for 15 minutes, the same as applesauce. Fingers crossed this does the trick.

Thank you for reading,
Julie


Black bean and corn salad with cilantro lime dressing

This has quickly become one of our favorite salads and it's super easy to make. Here's the catch though - I use doTERRA essential oils in the dressing. I do NOT recommend you use any other brand of essential oils as most advise against consuming since they can't vouch for the purity. I rarely have fresh limes or cilantro on hand so I use the essential oils in their place and it works great. As a bonus, when you eat this salad, you won't get bits of green cilantro leaves stuck in your teeth.

Black bean and corn salad by Julie @ Build, Sew, Reap

While I think I have the dressing pretty well figured out, the salad ingredients list here is merely a guideline. I tend to just open the fridge and start chopping and dumping stuff in. I add whatever I have on hand but the black beans and corn are always the foundation.

Black bean and corn salad - serves 6

Ingredients:
1 can black beans rinsed and drained
1/2 cup frozen corn (no need to cook this, it'll actually make the whole salad nice and cold)
1/4 cup chopped carrots or shredded carrots
6 bunching onions sliced thin
1 cucumber cut into bite-sized pieces
10 grape tomatoes cut in half
1 orange, yellow, or red bell pepper diced

Dressing:
1/4 cup apple cider vinegar
1 - 2 Tbsp olive oil
5 drops doTERRA cilantro essential oil
5 drops doTERRA lime essential oil
1/4 tsp sea salt

Combine all the non-dressing ingredients in a bowl. Mix the dressing in a measuring cup or separate bowl then pour over and mix well. It's important that you pre-mix the dressing as the essential oils should be allowed to blend together with the olive oil so there aren't any super concentrated drops of essential oils on your vegetables. The flavor won't be as nice if you don't pre-blend.

Serve cold. I try to wait until the corn is thawed which is usually the case once I have everything else chopped up.

Thank you for reading,
Julie


Choco-Chickpeas

I like crispy chickpeas and I like chocolate. It seemed obvious I should try to combine the two but I've had two problems with the recipes I've found so far and that's that they either take too long or the chocolate burns. I combined several recipes that have worked to form one perfect recipe for crispy chocolate chickpeas. These don't really save well so just plan on making as much as you'll eat right away.

Choco-chickpeas by Julie at Build, Sew, Reap 

Ingredients

  • 1 can (or 1 1/2 cups) cooked chickpeas, drained and rinsed
  • Cooking spray (I like avocado oil spray as it has no flavor)
  • 2 T Cocoa powder
  • 2 T maple syrup
  • 1 T coconut oil
  • 1/4 tsp ground cinnamon
  • 1/8 tsp sea salt
Directions

Preheat the oven to 425 F

Dry the chickpeas as well as you can. Many people use paper towels but I've found that a clean lint-free dish towel works just as well. This is key to getting them crisp. 

Line a baking sheet with parchment paper. Spread out the chickpeas in a single layer, spray lightly with cooking oil, roll around a bit and spritz again. A light coating on all sides is what you're going for. 

Bake on 425 for 10 minutes. Remove the pan, shake the chickpeas around a bit then put the pan back in for another 10 minutes.

While those are cooking for the second 10 minutes, mix together the other 5 ingredients in a bowl. After the 10 minutes are up, pour the hot chickpeas into this mixture and mix to coat. Pour them back on the covered baking pan and bake for another 7-10 minutes.

Remove from the oven, transfer the parchment paper to a cooling rack. The chickpeas will crisp as they cool. They should be ready to eat in 5-10 minutes but feel free to test one every minute or so. 


Thank you for reading,
Julie


Vegan Chocolate Cake with Vegan Buttercream Frosting

It wasn't the case when I first started blogging but I'm vegan now and I also found out that cane sugar gives me headaches. Between those two issues, it's not super easy to buy cake that fits my dietary restrictions so I've learned to just make my own. With lots of scouring the internet and tweaking other recipes to suit my needs, I've come up with the very best ever no cane sugar vegan chocolate cake with buttercream frosting. This stuff is TO DIE FOR!

First, a picture of my 40th birthday cake:

IMG_2950

I made this cake for my 40th birthday cake smash photo shoot. We had a ton of fun. But today I'm here to share the recipe with you (also so I'll have the recipe for my own future use).

Chocolate cake 

2 cups almond milk 
2 teaspoon apple cider vinegar
1 1/2 cups coconut sugar
2/3 cup avocado oil (you could sub any neutral oil but this is what works for me)
2 teaspoon vanilla extract
1 teaspoon almond extract ok to just do all vanilla if you don't have almond extract)
2 cups all-purpose flour
2/3 cup cocoa powder, Dutch-processed or regular (or a mix of both)
1 1/2 teaspoon baking soda
1 teaspoon baking powder
1/2 teaspoon sea salt

Preheat oven to 350F.

Mix together the almond milk and vinegar in a measuring cup and set aside for a few minutes to curdle. Add the sugar, oil, vanilla and almond extract to your mixer bowl and mix well. Add the almond milk/vinegar mix and whisk well. 

Add in the flour, cocoa powder, baking soda, baking powder, and salt and beat until mostly smooth. 

Line the bottom of two 9-inch cake pans with parchment paper and lightly grease the paper it as well as the sides of the pans. Divide the batter into the two pans and bake for 32-35 minutes, until a toothpick inserted in the center comes out clean. 

Vegan Buttercream Frosting
NOTE: This frosting does NOT come out white. You will need to color it with gel food colors if you want something other than tan. 

This frosting holds its shape really well even before it has been refrigerated. I made it and had to leave it sitting on the counter for 45 minutes before I piped it onto the cake. Also, the picture of the cake above shows what it looked like after sitting in the refrigerator for a week. It did a good job of keeping the cake pretty moist and the frosting looked and tasted great. This wasn't the plan but my son got sick on the day of the photo shoot so we had to postpone the event.

Make powdered coconut sugar in the dry goods canister of the vitamix or a good food processor. 3 1/2 cups coconut sugar : 3 1/2 Tbsp arrowroot powder (precision on the arrowroot powder isn't imperative, just get close)

1/2 cup room temperature earth balance shortening
1/2 cup room temperature earth balance buttery spread (in the stick)
3 1/2 cups powdered coconut sugar
1 1/2 tsp almond extract

1/4 cup almond milk 
Gel food coloring if you want something other than tan colored frosting. I used burgundy to achieve the color for this cake

Using the paddle attachment for your mixer, beat the shortening and buttery spread until it's combined. Add the rest of the ingredients being aware that a puff of powdered sugar is going to attack your kitchen. I used what I think is the dust attachment for my Kitchenaid mixer (it's a clear plastic thing you can pour stuff through) with a clean kitchen towel laid over the whole thing as soon as I've added the sugar. It's a bit messy but it blends in pretty quickly. Add the food coloring and mix until everything is well blended.

This is thick enough to hold its shape if you want to use a tip and a frosting bag. It's rich and delicious too. Yum!

Thank you for reading,
Julie


Brewing Kombucha

I titled this post "Brewing Kombucha" but could have titled it "Kombucha: From a Non Expert" so know that I'm just learning this as I go. What I'm sharing here is just what has been working well for me. For the quick and easy directions to print out, click here.

Making Kombucha by Julie @ Build, Sew, Reap

I started with a hunk of scoby in about 1 cup of home made kombucha from someone who offered it on our local Buy Nothing site. I jumped at the chance to stop spending around $4 for my favorite beverage. This is similar to how I received mine but these are the ones I'm giving to my friends now that my scoby is huge.

Making Kombucha by Julie @ Builds, Sew, Reap

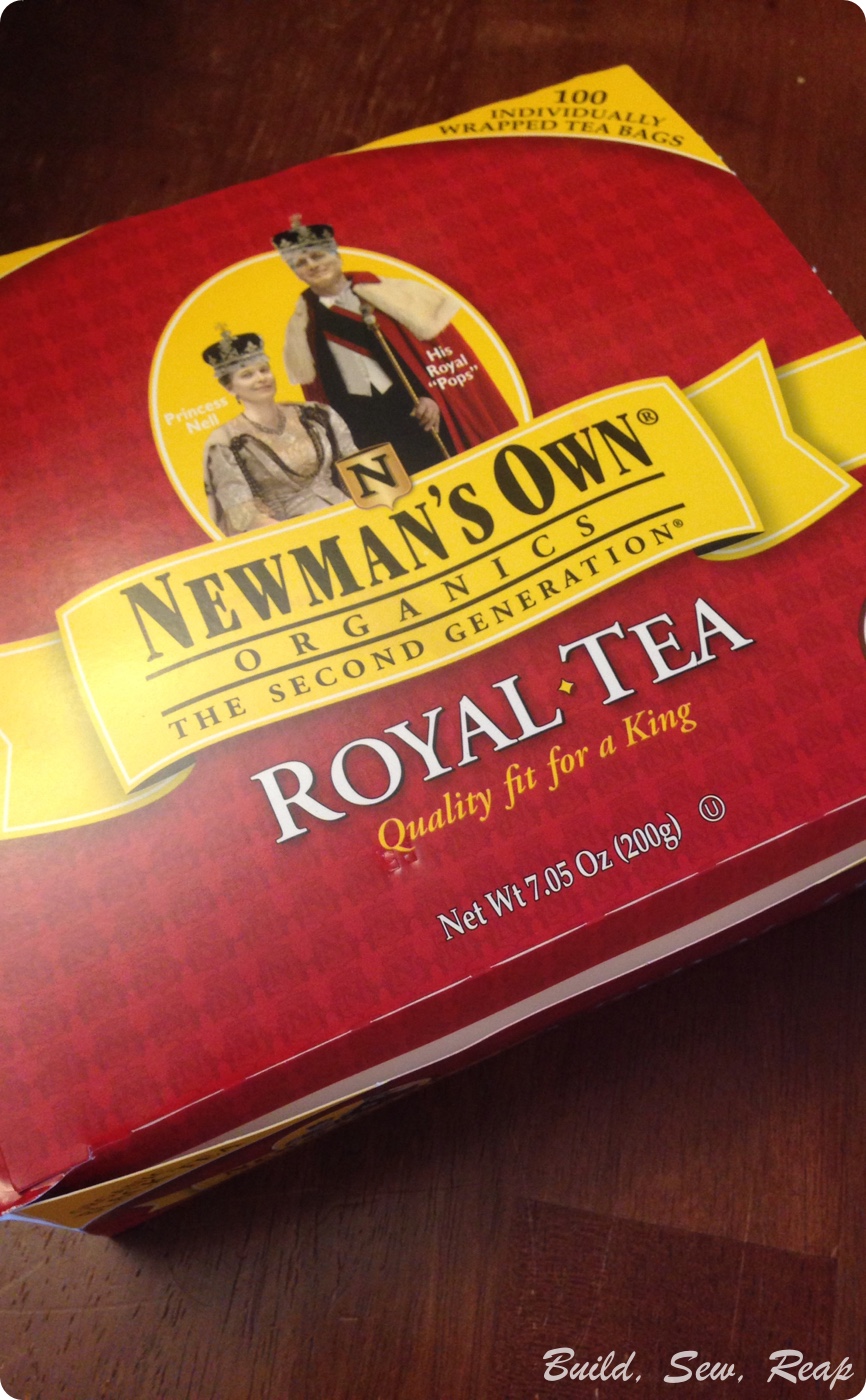
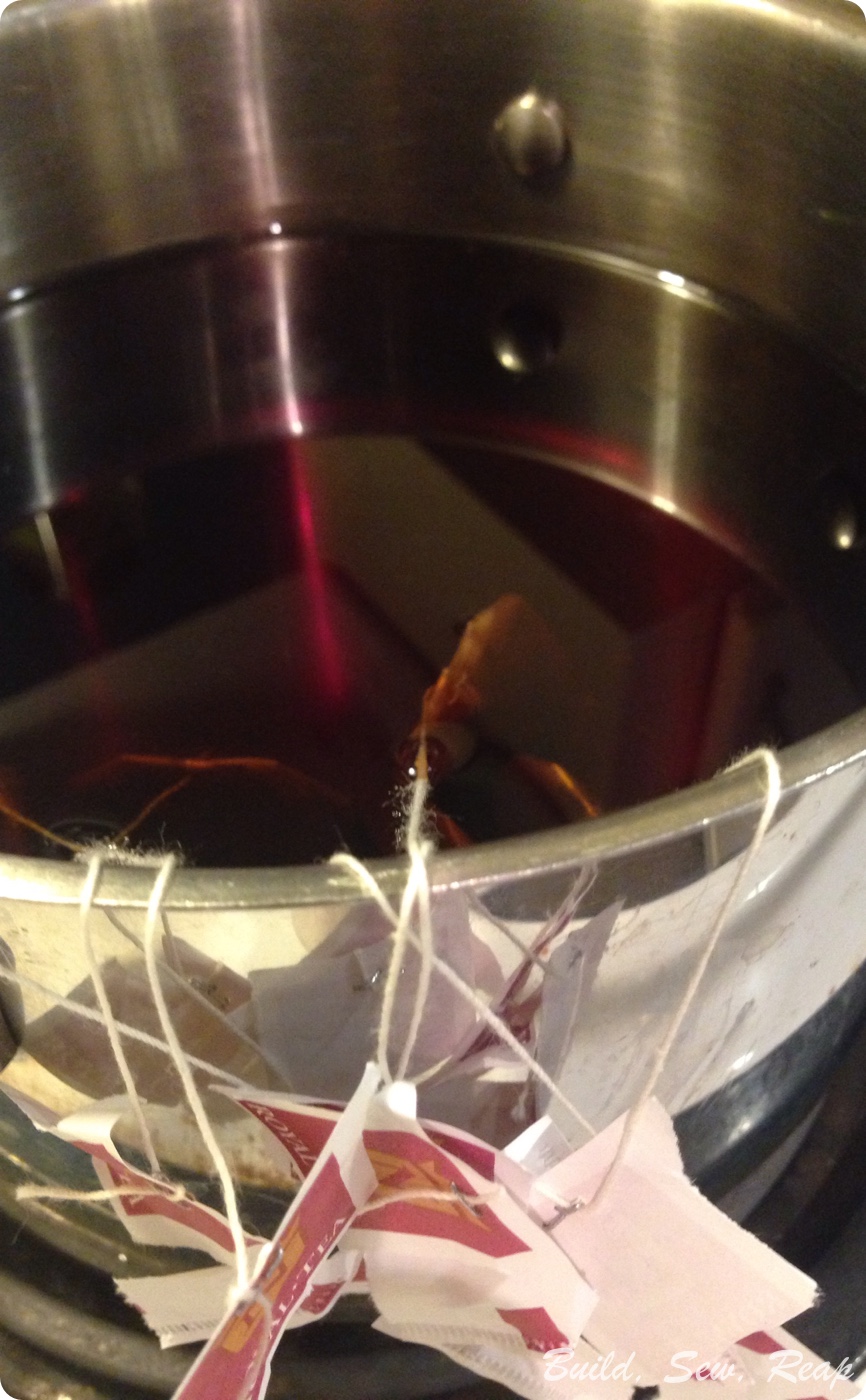
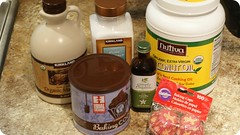
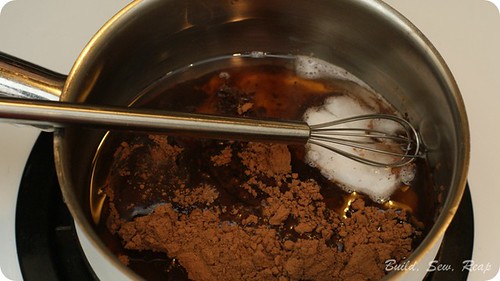
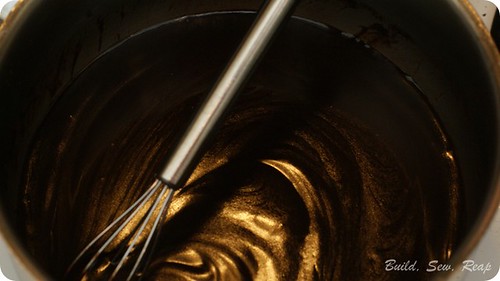
I brought 5 cups of water to a boil and added 1/3 cup of organic white sugar to it. Then I dropped in 6 black tea bags and let it steep until it was room temperature. You don't want to burn the good bacteria when you add it and your scoby together.

Making Kombucha by Julie @ Build, Sew, Reap

I read not to try to use herbal teas or really anything except cane sugar and black or green tea. The herbal teas have oils from their herbs that might interfere with how your scoby works.

Making Kombucha by Julie @ Build, Sew, Reap

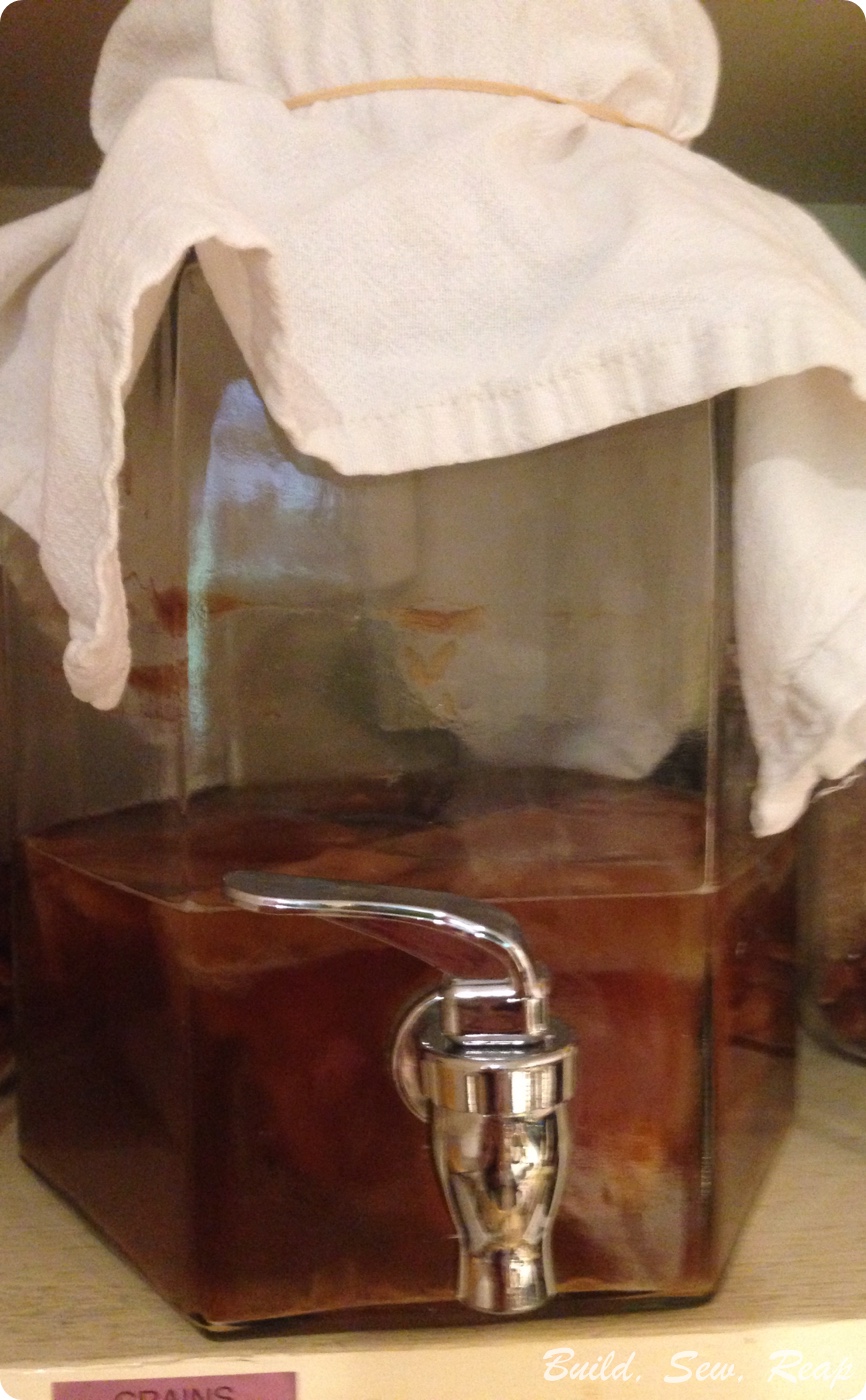
I poured my tea and my new scoby together into a glass container with a spout. My spout looks metal but it isn't. I read that you should keep all metal away from your kombucha once it starts to brew because the metal will react with the bacteria and make it taste weird.

Making Kombucha by Julie @ Build, Sew, Reap
(Technically this isn't a picture from my first round but it looks similar. 
The scoby in this picture is much bigger than the hunk I originally received.)

I used a rubber band to hold a clean cloth napkin over the top. Please note: I don't use fabric softener and while this doesn't ever touch the kombucha, I would recommend that you make sure the cloth you use is as free from chemicals as possible.

I waited about a week before transferring to secondary containers with juice for a second fermentation but you can wait longer or not do a second fermentation at all. This is all preference, taste it and see what you think. If you don't have a spouted container, the best way to taste it is to take a straw, dip it a couple of inches into the liquid (past the scoby, you won't hurt it) then put your finger over the top of the straw and draw it back out. Release the liquid into a cup or straight into your mouth.

Also, keep in mind that once you really get things moving and your scoby grows and grows, you can do much larger batches and get far enough ahead of your consumption to let it ferment longer.

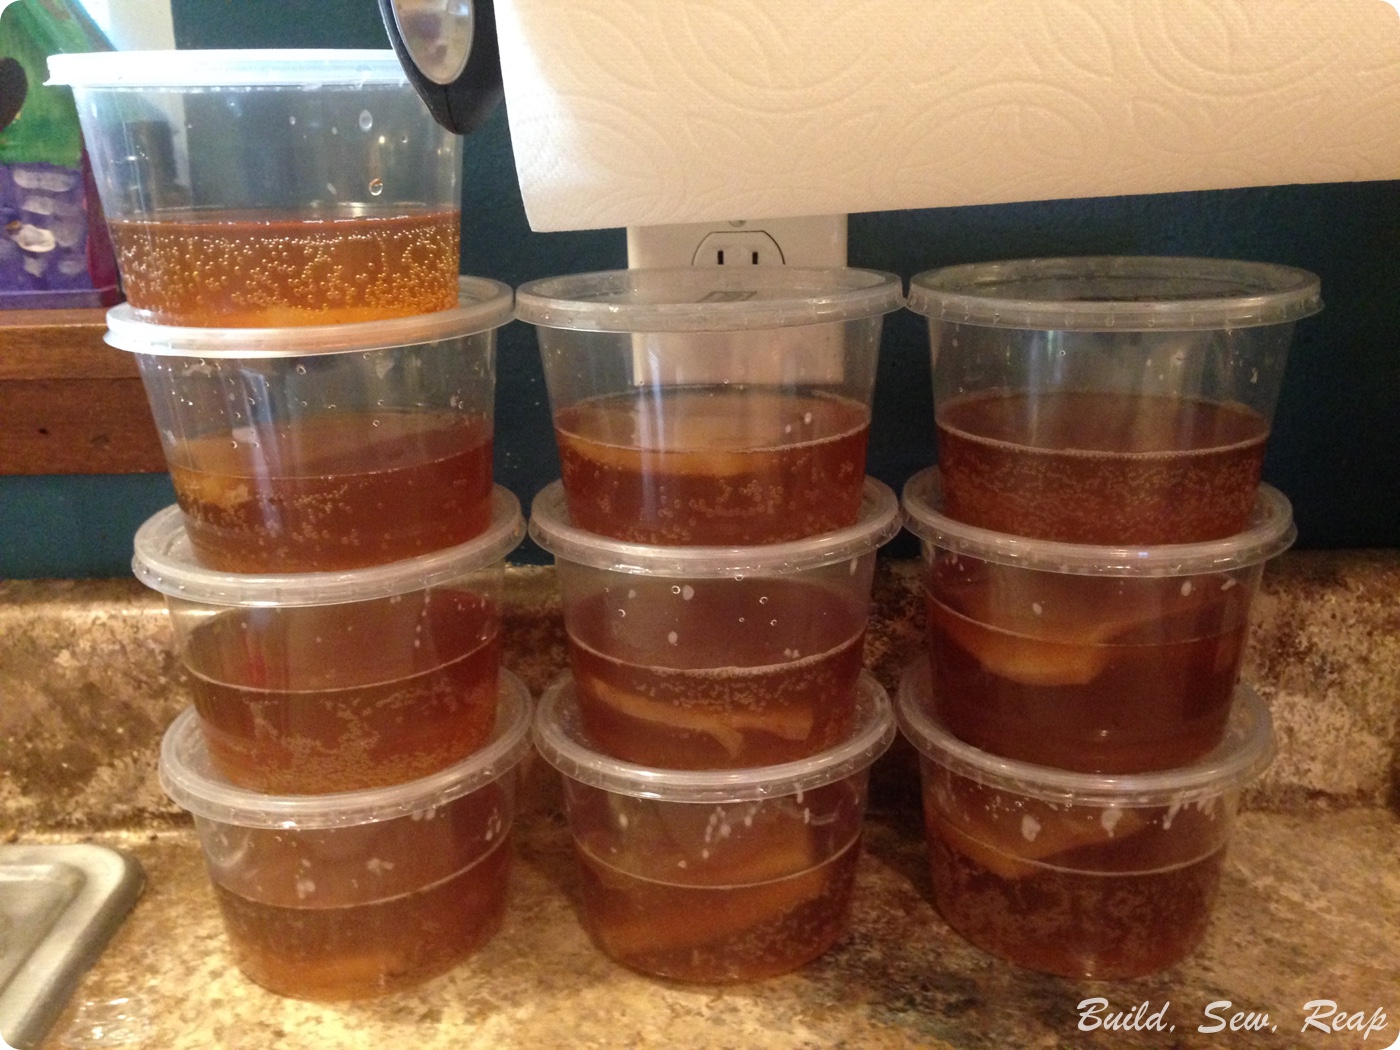
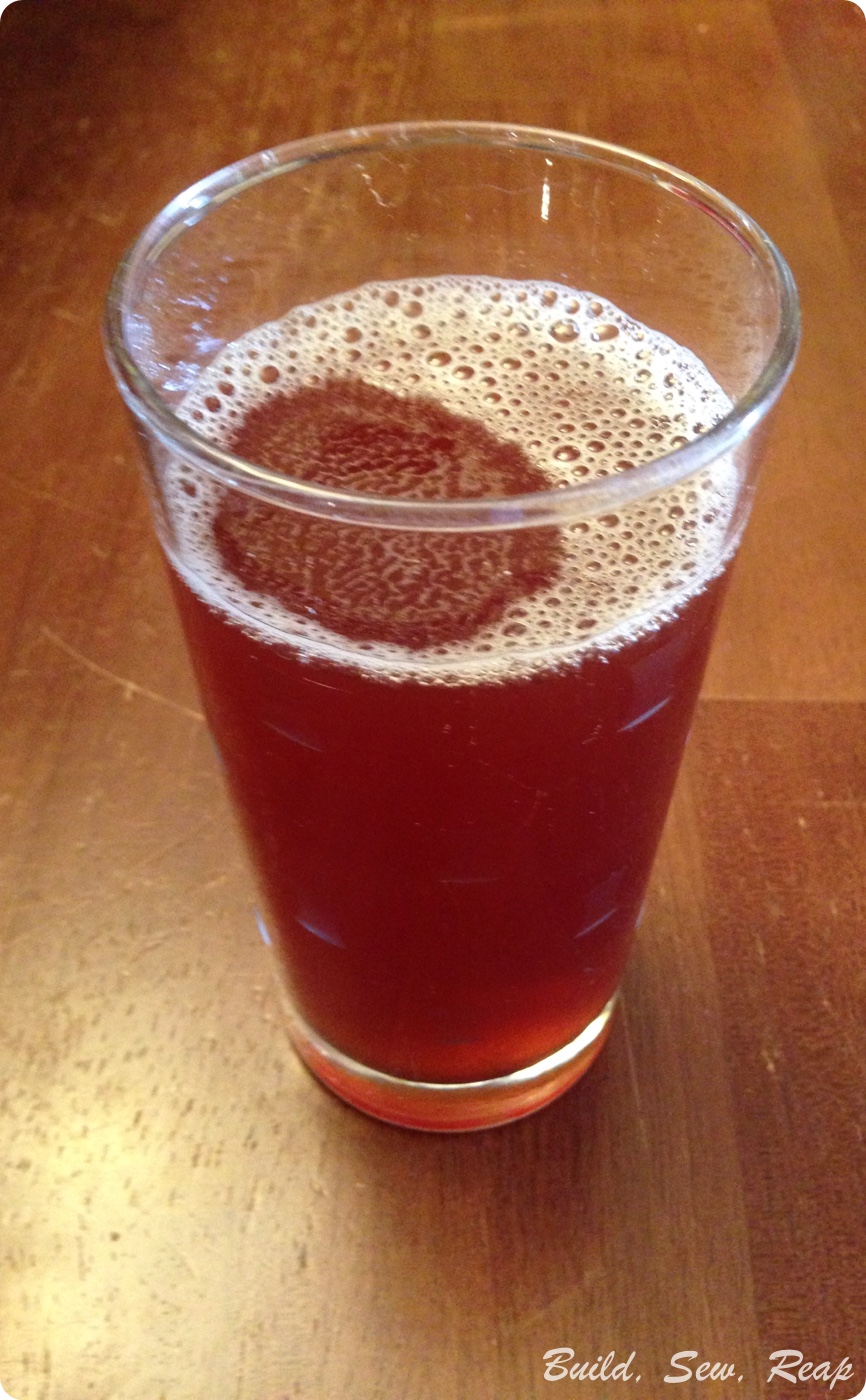
For the second fermentation, I used about a 1:5 ratio of fruit juice (pomegranate has been my favorite so far even though I don't really like it by itself) to kombucha tea. I also learned that you get a much better fizz if you a) put in a few matchstick size pieces of fresh ginger and b) you leave a bit of space at the top of your container. I haven't seen this recommended in any of my reading but I also started cutting off a small chunk of scoby to add into each jar for this fermentation. You can't ever put this scoby back in with the big one though, you don't want to introduce the juice sugars into your initial fermentation container.

Leave a cup or two of kombucha and the scoby in your big container. You use this as the starter for your next batch. In fact, you can start your next batch right away, just add new sweetened tea to the big container and brew away.

Making Kombucha by Julie @ Build, Sew, Reap

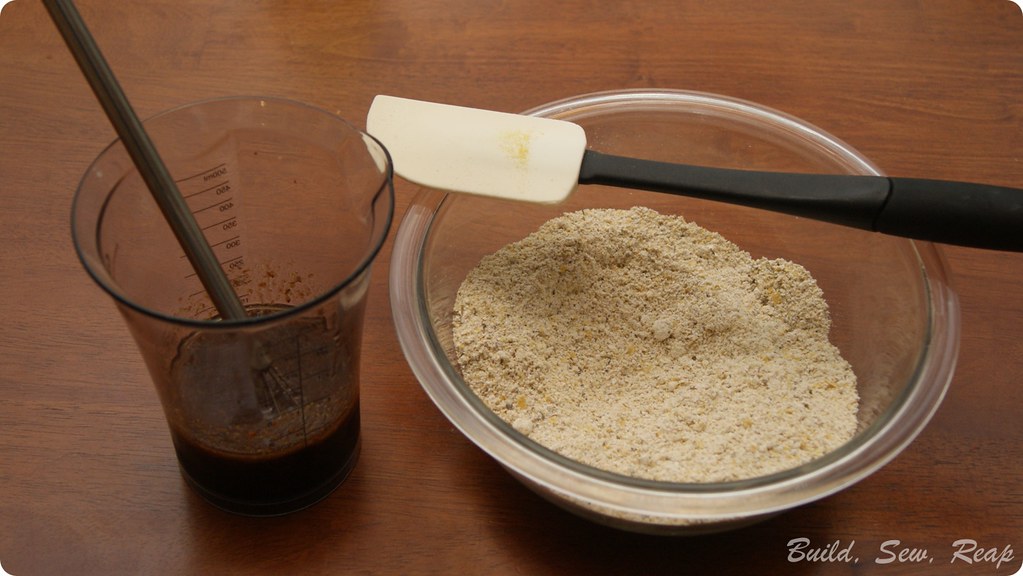
I mark dates and ingredients on each one (oops, forgot what I put in the one in the jar here) so that when I taste it later, if I like it, I know how I made it. I leave these up on a nice high shelf in a kitchen cabinet for at least another week. I also periodically open each lid to let the gasses out. I think this lets it get fizzier but haven't really tracked what this is doing for the process. I've had good results so I assume it's doing some good.  **UPDATE: I let the fizz out of one to transfer to a portable container and it never got fizzy again. I'm going to stop burping my containers and just go straight from second fermentation in the cabinet to fridge (I like ice cold kombucha) to my glass without opening it until I'm ready to consume it.

I like my kombucha ice cold so when I like the flavor and fizz, I transfer it to some saved bottles from my old store bought kombucha habit and keep it in the fridge. UPDATE: See comments above about cutting out the step where I move the liquid after second fermentation to drinking container. I'm going to skip that and not open a container from the start of second fermentation until I'm ready to drink it. Second fermentation still needs to happen outside the fridge but once I think it's likely done, I'll move it into the fridge without opening it.

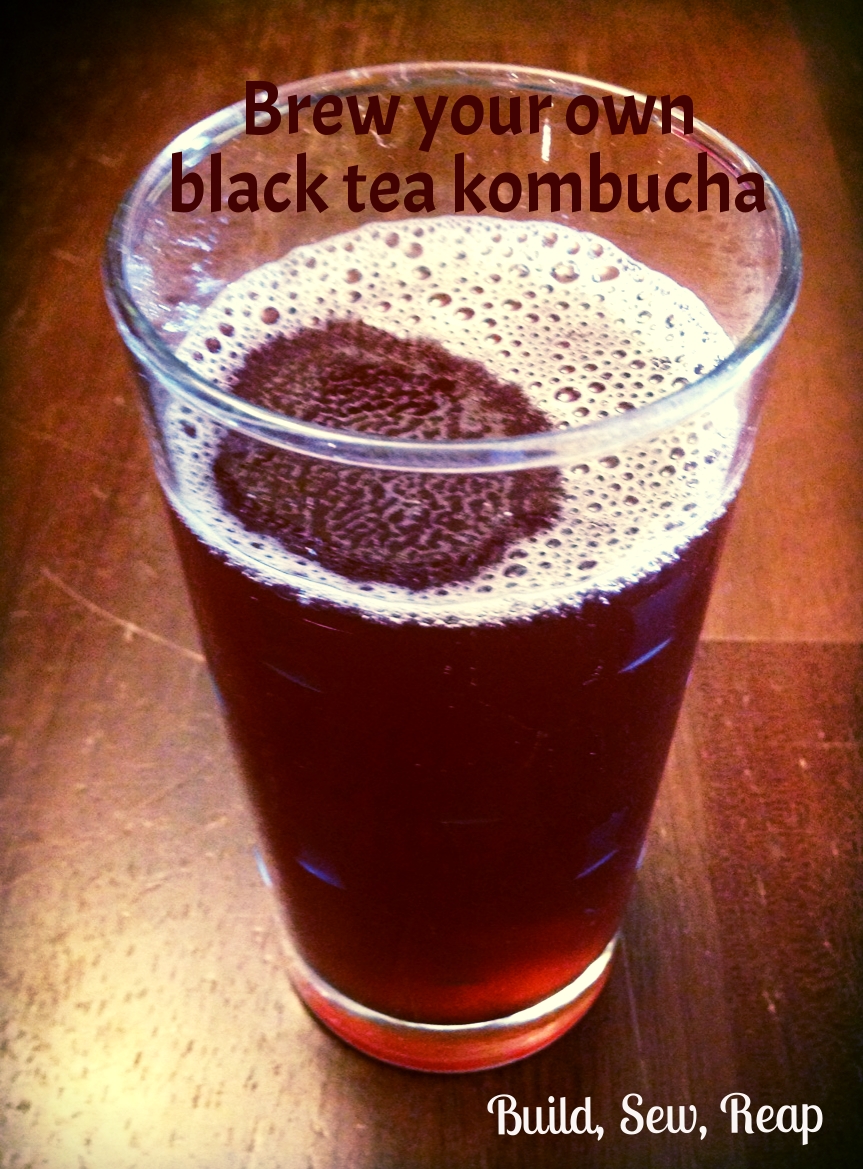
When I want a cold fizzy treat, it is right there for me to enjoy ... and it doesn't cost me $4.

Making Kombucha by Julie @ Build, Sew, Reap

Mmmm, look at the fizz on that!!

OK, so, I also wanted to just bullet a few of the tips I mentioned above as well as some others:
  • Don't use herbal teas
  • Your initial fermentation should just be sugar sweetened tea, no juices or ginger or anything else.
  • Make sure your kombucha and/or scoby don't come in contact with metal
  • It's OK if your scoby sinks to the bottom of the container, it'll still do its job. You'll soon have a new one growing on top of your liquid
  • Black spots are bad, dark brown is probably ok. Examine any weird spots you get, if they look moldy, it's probably best to scrap the batch and start with a new scoby.
  • Brown stringy things hanging from the underside of your scoby are fine. I think that's yeast or something. 
  • When you transfer the fermented tea out of the big container into smaller ones for drinking or for a second fermentation with juice, leave about a cup of it behind and just add more sweet tea to the container. I've done at least 5 batches and still haven't cleaned out the big container. 
  • FRESH ginger appears to make the beverage much fizzier during second fermentation. 
    • Don't try to use the ground ginger from your spice rack. It's disgusting and doesn't make things fizzy. 
  • Leave a bit of space at the top of your containers in the second fermentation.
  • Put a little chunk of scoby in the jars for your second fermentation (this is just my suggestion, I haven't seen it anywhere else online but it's working for me)
  • Don't try to use too much juice, start small. The flavor seems to go a long way.
  • Label your containers, you'll be so glad when you find something you like and you know how you made it.
I think that's all I know about kombucha. There's a ton of information out on the web so google around to see what else you can learn. If you figure out any great tips, please comment here to share with me and fellow readers.

Thank you for reading,
Julie


Vegan Sipping Chocolate

I'm a chocohaulic. I pretty much want chocolate all the time, any time of day. One day I was having a particularly bad craving (I'm sure it had nothing to do with having watched Chocolat a few days earlier) so I decided to try to make some rich, thick, dark, tasty sipping chocolate. It didn't take much before I felt like I had created something fantastic.

Ingredients

  • 1 cup plant based milk (I like unsweetened vanilla almond)
  • 2 Tbsp cocoa
  • 2 Tbsp coconut sugar or maple syrup
  • 1 tsp vanilla
  • 2 tsp coconut oil
  • 1/2 tsp cornstarch
  • dash of salt
*Optional: dash of cayenne pepper

Add it all to a pot and mix well with a whisk or an immersion blender. Heat on high heat to just boiling, stirring often. As soon as it starts to boil, turn it down to medium low and keep stirring until it calms down. Watch to ensure it doesn't boil over (although the burning chocolate does smell good when it hits the burner). Keep heating and stirring until it thickens, just a few minutes. When it seems to be thickening, pour it into a mug and allow to cool to sipping temperature. It should thicken as it stands. 

Sipping Chocolate by Julie @ Build, Sew, Reap 

Enjoy!


Thank you for reading,
Julie

_________________________________________________________________________________

I'm sharing this post on:

All Things Fee: Calling All Crafters

Skip To My Lou

Creepy Oozy Halloween Breakfast (With Bonus Banana Caterpillar)

This is just a silly post but I wanted to share with you. This didn't start out as a Halloween-style breakfast but it turned out to be one and it was a huge hit. I tried to add a face to my son's sunny-side-up eggs one morning but the gel food coloring ran. I went with it and this was the result:

Oozing Halloween Eggs

And here's the video of his eggs throwing up. He was thrilled ... because he's 6.


Thank you for reading,
Julie


GF Vegan Pizza Crackers

My kids love pizza (who doesn't?) but I hate the extra questionable ingredients in pizza flavored snacks. I set out to make some of my own. The end result - they're tasty AND nutritious!

Pizza Crackers GF and Vegan

Before I get started though, I have to tell a funny story about my 6 year old. The other day he had some peanut butter sandwich crackers that someone had given him. He was eating them in the car and clearly thinking about something. He finally piped up with, "I know how to make these crackers."  I think to myself, "Sure, take two crackers and stick them together with peanut butter." Thankfully I kept my mouth shut because his idea was even better. "First you make the crackers. Then you make the peanut butter. Then you spread your peanut butter on one side of a cracker and stick the other cracker to it." I had a proud moment when I realized my 6 year old thinks crackers and peanut butter come from my kitchen, not just containers at the store.

And on to the recipe . . .

GF Vegan Pizza Crackers
Yields:   crackers / Time: 10 active minutes, 15 minutes bake time
For a printable version, click here.

Ingredients
  • 1/4 cup Tomato Juice
  • 2 Tbsp Balsamic Vinegar
  • 3 Tbsp Olive Oil
  • 1 Tbsp Flax Meal
  • 1 cup *GF Oat Flour (you can grind your own by putting GF oats in a blender and blending until floury) 
  • 1 tsp Salt
  • 1/2 tsp Baking Powder
  • 3 Tbsp Nutritional Yeast
  • 1/2 tsp Onion Powder
  • 1 Tbsp Italian Seasoning
  • 1/2 tsp Garlic Powder
*You can also sub in all purpose flour for a non gluten-free version. The batter definitely comes out more like dough, you can't stir it to the very end as I did with the GF version. Roll them out nice and thin as they puff up in the oven.

Preheat oven to 375 degrees F.

Mix first 4 ingredients in a measuring cup or small bowl.

Mix dry ingredients in a bowl.

Pizza Crackers GF and Vegan

Stir liquid ingredients then pour into dry ingredients and mix. I find that a rubber scraper mixes this best.

Pizza Crackers GF and Vegan

Press out on a piece of parchment.

Pizza Crackers GF and Vegan

Cover with another piece and roll to 1/4 inch thick. (I use the foil backed parchment, just personal choice)

Pizza Crackers GF and Vegan

Remove top parchment paper and lightly tap in the edges so they aren't significantly thinner than the rest of the dough.

Pizza Crackers GF and Vegan

Score into cracker sizes with a pizza cutter. Transfer bottom parchment paper and cracker dough to a baking sheet.

Pizza Crackers GF and Vegan

Bake for 12 minutes.

Remove from oven and either flip the crackers individually or turn the whole parchment paper with crackers over and release the crackers upside down on the baking sheet and separate them.

Pizza Crackers GF and Vegan

Discard the parchment and bake the crackers for another 9-10 minutes, until the edges just start to brown.

Cool on a cooling rack and enjoy.

Pizza Crackers GF and Vegan

Have you ever made crackers? I have several go-to recipes that we really enjoy. I love knowing what goes into my kids' snacks and they get pretty excited when I offer to make them.

Thank you for reading,
Julie


I'm sharing at the following link parties:

Pumpkin Peanut Butter Oatmeal

This is my favorite oatmeal flavor combination. It sounds a bit weird but it is so tasty and packed with nutrients and protein.

DSC01231 

Pumpkin Peanut Butter Oatmeal
Serves: 2

  • 1/2 cup rolled oats
  • 1 cup milk of choice (I use almond or rice)
  • 1/8 tsp salt
  • 3 Tbsp pumpkin puree
  • 2 Tbsp peanut butter
  • 1/2 tsp pumpkin pie spice (or just cinnamon if you don't have pps)
  • 1/2 tsp vanilla extract
  • 1 Tbsp maple syrup (less if you don't have much of a sweet tooth or if you're using sweetened peanut butter)
Optional: raisins, dried cranberries or other dried fruit. Fresh fruit slices would probably be good too but add those on top last.

Put everything in a small pot, even the dried fruit (I forgot mine at first, pretend it's in there). 

DSC01223


Heat on medium heat, stirring periodically. When it is almost as thick as you want it, remove it from the heat and let it cool a little. It'll thicken as it cools. 

Pumpkin Peanut Butter Oatmeal

Pour into two bowls (unless you're really hungry like I was today then just eat it all yourself) and enjoy.

Nom nom nom ....


Thank you for reading,
Julie


Our Favorite Relatively Easy Pizza Recipe

Dough

Ingredients:
Pizza Dough by Build, Sew, Reap
  • 1 Tbsp Olive Oil
  • 2 Tbsp honey
  • 1 tsp sea salt
  • 1 Tbsp active dry yeast
  • 1 tsp Italian Seasoning
  • 1/2 tsp garlic powder
  • 1 cup warm water
  • 2 3/4 cups white flour
Instructions:

1.  In mixing bowl, combine the oil, honey, salt, yeast, seasoning and garlic powder.
2.  Add in warm water and stir thoroughly.
3.  Allow to sit for 5-10 minutes, until the mixture becomes a bit puffy.
4.  Add in the flour and mix with the kneading hook for 5-10 minutes until it is well combined and a little beyond.
5.  Lightly oil a separate mixing bowl and add the dough to it. Cover with a damp cloth (lint-free) or greased plastic wrap (if you can't grease it, you'll just likely lose a bit of the dough stuck to it later but it isn't a huge problem.
6.  Place in a warm spot for 1 hour or until doubled.
7.  Preheat oven to 400 degrees F.
8.  Remove from bowl and shape on your pizza stone or baking sheet. 
9.  Add desired toppings (see our favorite sauce recipe below)
10. Bake for 18-20 minutes until crust is just starting to turn golden brown and toppings are cooked as you like.

I like to make a double batch then set half of the dough aside to make into breadsticks later in the week. It can sit in the fridge for a few days, molded into breadsticks and tossed straight in the oven, still cold.

Sauce 

Ingredients:
Pizza sauce by Build, Sew, Reap
  • 1 6-ounce can of tomato paste
  • 3 oz water (I just refill the empty can of paste roughly half way)
  • 2 Tbsp nutritional yeast
  • 1 1/2 tsp minced garlic
  • 1 tsp onion powder
  • 1 tsp italian seasoning
  • 1/4 tsp ground black pepper
  • dash of cayenne pepper
  • dash of dried red pepper flakes (optional, we often skip this in the sauce and put them on top of our pizza)
  • 1/8 tsp sea salt
  • 1 Tbsp balsamic vinegar
1. Mix it all together
2. Put it on your dough
3. Top with your favorite toppings.
4. Cook per dough instructions.
5. Enjoy

I also make a double batch of sauce a lot of times. I put the extra in the fridge and if we want a marinara sauce a few days later (for pasta, polenta, etc), I just add 1 can of organic chopped tomatoes when I heat it up on the stove. Once it is all warmed up, I use my immersion blender to smooth out the sauce as that's how my family prefers it. The taste is fantastic.


DSC08880
My favorite toppings are mushrooms, olives, sundered tomatoes, 
onions and basil (which I was missing on photo night)

Save yourself some time and chop your toppings up instead of slicing. They cook better and the texture is actually really nice. I use a chopper similar to this one.

Also, this crust can be frozen. Make the dough and let it rise, cook for half the time, cool, wrap well with foil and freeze until you need it. When you need it, just take it out, add the sauce and toppings and bake for another 10 minutes or until toppings are cooked.

Thank you for reading,
Julie


Homemade Chocolates

Today I did a little experiment combining several ideas into one and it was a raging success so I'm here to share it with you.

About 10 months ago, I gave up processed cane and beet sugars. This, in addition to my mostly plant based diet (I do cook with oils), means I make a whole lot of my own food to stay within the parameters I've set for myself. That's just fine with me, I've never felt healthier. Unfortunately, I've also become a bit of a chocolate snob but as long as I have a few minutes to cook it up, I have a wonderful go-to recipe for tasty dark chocolate. Today I'm going to share with you how you can make your own amazing chocolates using just a handful of ingredients that no pantry should be without.

First, let me entice you to read on:

Yummy Chocolates by Build Sew Reap

Yes, that's a peanut butter cup. Yes, I made that myself. Yes, I did it in under 10 minutes including cleanup. Yes, you can too.

Not into peanut butter cups? How about a homemade Almond Joy?

Yummy Chocolates by Build Sew Reap 12

BTW, when was the last time you thanked a blogger for eating 6 decadent chocolates just so she can get a good photo? Just know, I took one for the team today.

Now for those of you who aren't into filled chocolates. Get yourself one of these and crank out a few of these:
Yummy Chocolates by Build Sew Reap 11

This chocolate can also be poured over ice cream and it solidifies just like Magic Shell.

I could go on and on about how versatile this recipe is (banana + peanut butter + chocolate) but I bet you want me to just go ahead and post the recipe so here it is:

Estimated cook time: <10 minutes + 30 minutes in the freezer

Ingredients for the Chocolate:
Yummy Chocolates by Build Sew Reap8
  • 1/4 cup organic unrefined coconut oil
  • 1/4 cup organic cocoa powder (please buy fair trade)
  • 1/8 cup organic maple syrup
  • 1/2 tsp organic vanilla extract (optional)
  • pinch of sea salt (optional but I like what this adds quite a bit)
Optional fillers:
  • 3-5 drops doTERRA essential oils such as wild orange or peppermint. (Please only use essential oils that can be taken internally, this does NOT include those you can purchase at the grocery/drug store)
  • 1-2 Tbsp full fat coconut milk (from the can, just use the thick stuff up top) for a milk chocolate flavor and texture
  • Natural peanut butter (the stuff with sugar would be too sweet in my opinion plus the natural stuff rolls into a ball easier)
  • Coconut + an almond
  • Banana
  • Peanuts
  • ?!?!? use your imagination!!
Directions (printable recipe here):

Put mini muffin papers into 8 mini muffin tin holes. If you don't have the muffin tin, you can just use two muffin papers together for each candy and put them on a freezer-safe plate or tray.

Yummy Chocolates by Build Sew Reap7

Combine ingredients for the chocolate in a small pan over medium-low heat.

Yummy Chocolates by Build Sew Reap6

Stir constantly until all ingredients are combined and mixture looks smooth then immediately remove from the heat.

Yummy Chocolates by Build Sew Reap5

Pour a little dollop into each muffin cup. I think these were each filled a little less than 1/4 of the way.

Yummy Chocolates by Build Sew Reap4

Add your filling.

Peanut Butter: Roll small balls of peanut butter in your hands. If you're using the natural stuff, this should be no problem at all. Put the PB ball in the center of the chocolate.

Coconut & Almond: Sprinkle some shredded unsweetened coconut across the surface of the chocolate. Gently press in one almond per candy.

Yummy Chocolates by Build Sew Reap3

Now pour the remaining chocolate into the 8 cups.

Yummy Chocolates by Build Sew Reap2

Optional: I like to sprinkle a little coconut on the ones containing coconut since I know not everyone is a fan and don't want any surprises. If I make several different varieties at once, I try to use some system to tell them apart once they're finished.

Pop the tray in the freezer for about 30 minutes. When they're firm, you can eat them right away or store them in the refrigerator.

Yummy Chocolates by Build Sew Reap1

Warning: If you're sensitive to caffeine, these are NOT a good late night snack unless you want to stay up all night crafting. I won't judge.

Thank you for reading,
Julie


Related Posts Plugin for WordPress, Blogger...