Showing posts with label Decorating. Show all posts

Cabin Progress - Interior edition

I made some HUGE progress inside the cabin over the past few weeks despite having to drag all my materials and tools in on a toboggan. I dragged in over 100 six-feet long cedar fence boards on my toboggan in order to finish the walls but they're [almost] done!! There are a few little spots here and there that need rip-cuts that I wasn't able to accurately do with my saw on site so I'll cut them at home and take the pieces out to install in the next week or so.

So, without further ado, here's the interior of the cabin as well as my current plans for finish work in each picture.

As you walk through the door, this is the first thing you see. Behind this mirror is a medicine cabinet of sorts where we keep everything from toothbrushes to keys to bear spray and sunscreen (don't mix up those last two please). I recently installed a clothesline across this tiny space (that's what the light bulb is hanging from here) so we have an out-of-view spot to hang wet rags and such.


Facing the bench and mirror is a chalkboard. You're going to have to trust me that the height of the chalkboard works in this space. The door is immediately to the left of that. I still need to trim out the window and also want to hang a 2'-3' long coat rack below the chalkboard so my kids can hang up their jackets and hiking daypacks.

There's storage here too. It won't be closed off, I'm getting tired of making (and then having to open) little doors.


Next, moving on to the main gathering space. This is the living room and kitchen rolled into one 10' x 10' space. I need to trim out the windows and will probably put a shelf above each window so it almost looks like I framed them out upside down with the sill on top. I'd like a place for books and treasures. This is kind of low on my priority list at the moment though.


Looking to the left, I have a cedar blanket ladder, hammock swing, and the heater. Of these items, likely the blanket ladder will be the only one to stay in place. I'm going to move the heater to sit just to the right as you enter this room. Above that will be a rack to set/hang things on when they need to dry out fast. I'd like to create a built-in couch or a modular system of some sort. I measured and can create seating that's up to 72" long to put under the window. I'm eager to get started on that project but need to make up my mind what I want it to look like first.


Continuing to pan around the room, here are the stairs and the kids' sleeping cubby. Only one kid fits in there at a time while the other kid sleeps on the floor, or the dog bed, or on the dog. Once I can have the windows open and things dry out a bit outside, I will be painting the rise of those top stairs white and will either paint or stain the drawer fronts. The kids and I made those three drawers today as a little learn and build session. They thoroughly enjoyed the project and now they each have a drawer they can call their own. I'd also like to crate a door of some sort for the sleeping cubby but I can't quite figure out what to do. I'm going to hold off on figuring that out until I've created the seating that will be on the wall on the right side of the picture.

I also see that I'm missing one row of wall board under the window at the top of the photo.


Here's a better look in the sleeping cubby. It's plenty long for my almost 11 year old now but as he grows, we can pull out a storage bin from below, put a pillow or some foam on top of it, and it'll become an extend-a-bed. We will adapt as we need to.


And now, the upstairs. There's another hammock swing upstairs, directly in front of the stairs but not making it difficult to move around. I installed a mosquito net canopy that looks beautiful now but will be super useful when the buggy season really hits. On the wall between the two windows there are two Ikea spice racks to hold books and necessities for those of us who sleep upstairs.


Isn't it dreamy?!?!? We just couldn't get enough of this space once I hung up the canopy.

We will eventually have a low bed frame, short headboard (to keep the pillows from sliding off the bed), and a real mattress but for now, the double height air mattress with a slow leak will have to do the trick. There's some finish work here and there but the upstairs is in pretty good shape overall. 


I'll leave you with one final picture from my trip out there with the kids. They are Sasquatch spotting.


Thank you for reading,
Julie


Patio Storage Cabinets

Happy End of Summer!

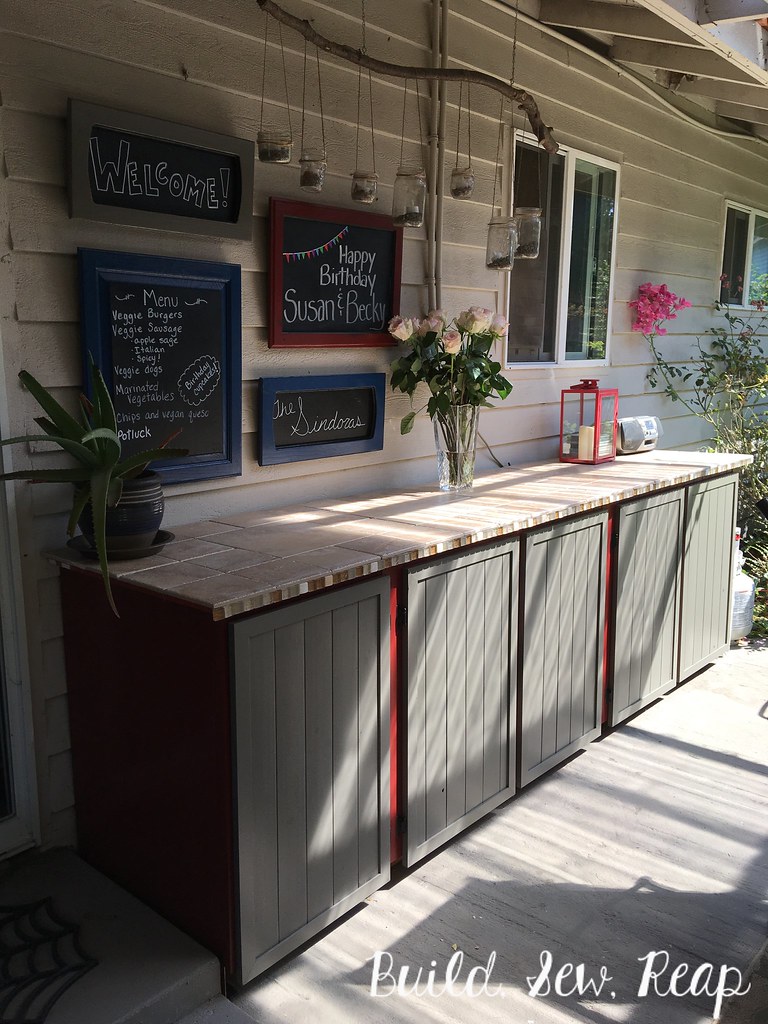
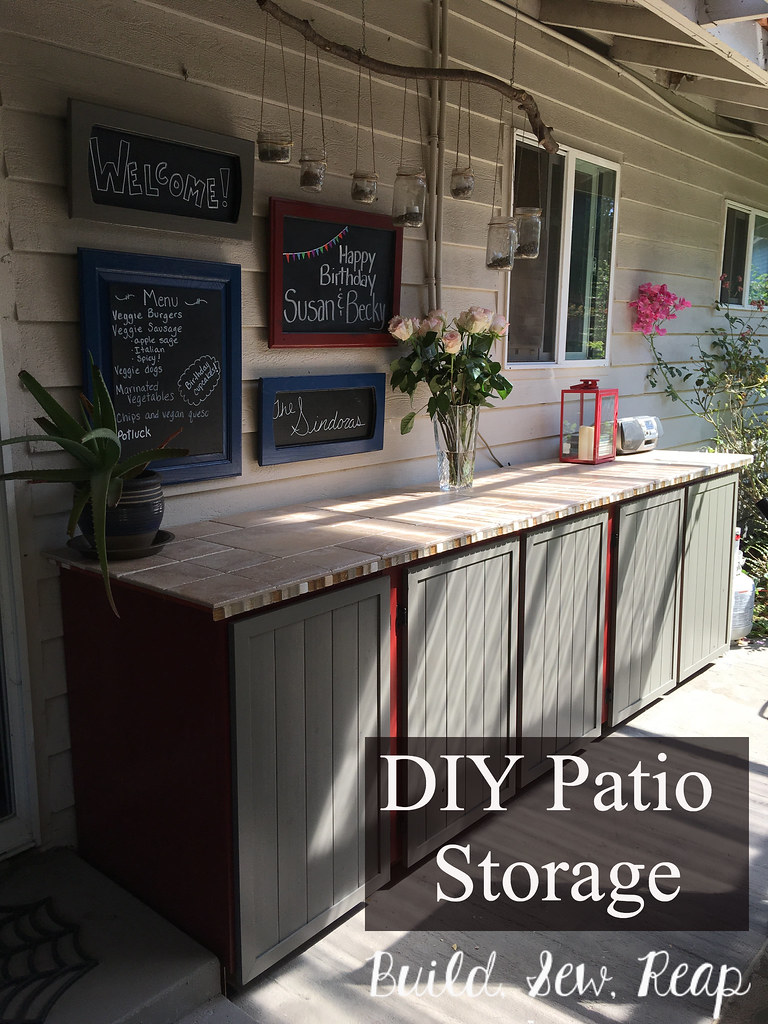
The kids are about to go back to school (here in the PNW, they still start after Labor Day) and summer is winding down. That said, we barely used our back porch this summer, mostly because it was always a mess. That bums me out because I love having the outdoor space and in the past, we've eaten quite a few dinners out there when it's dry. I finally decided to whip it in to shape last week as I struggled to make it look nice before my parents came for a visit. Here's what I created (and below, I'll share the journey):

Patio storage cabinets DIY by Julie at Build, Sew, Reap

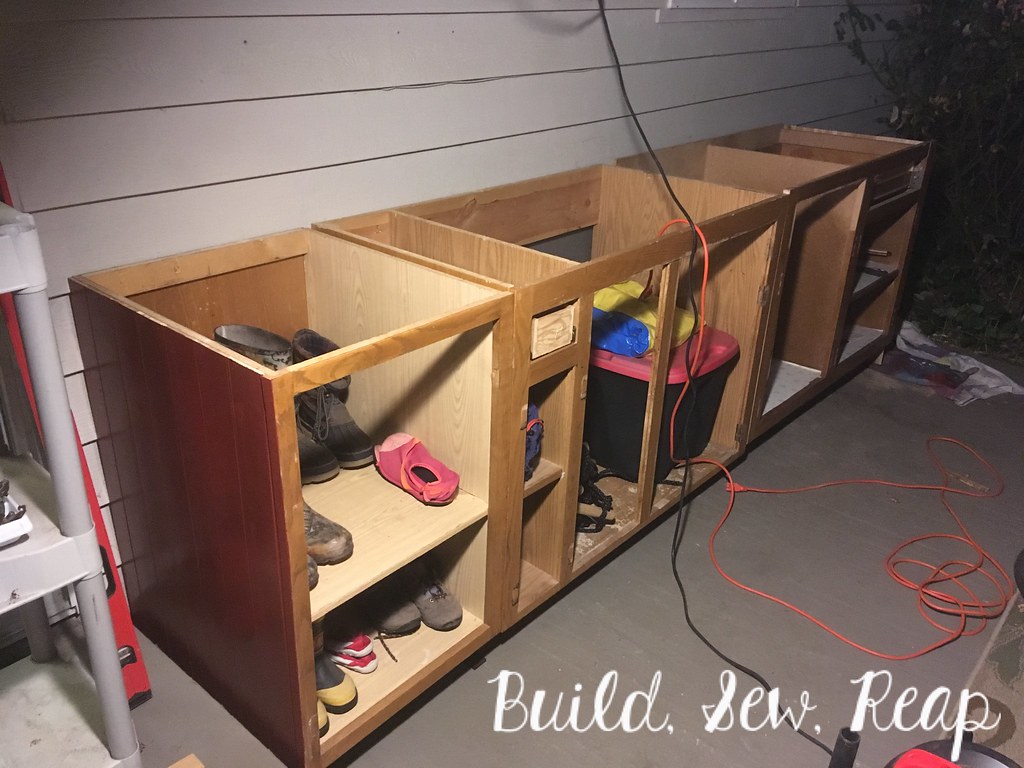
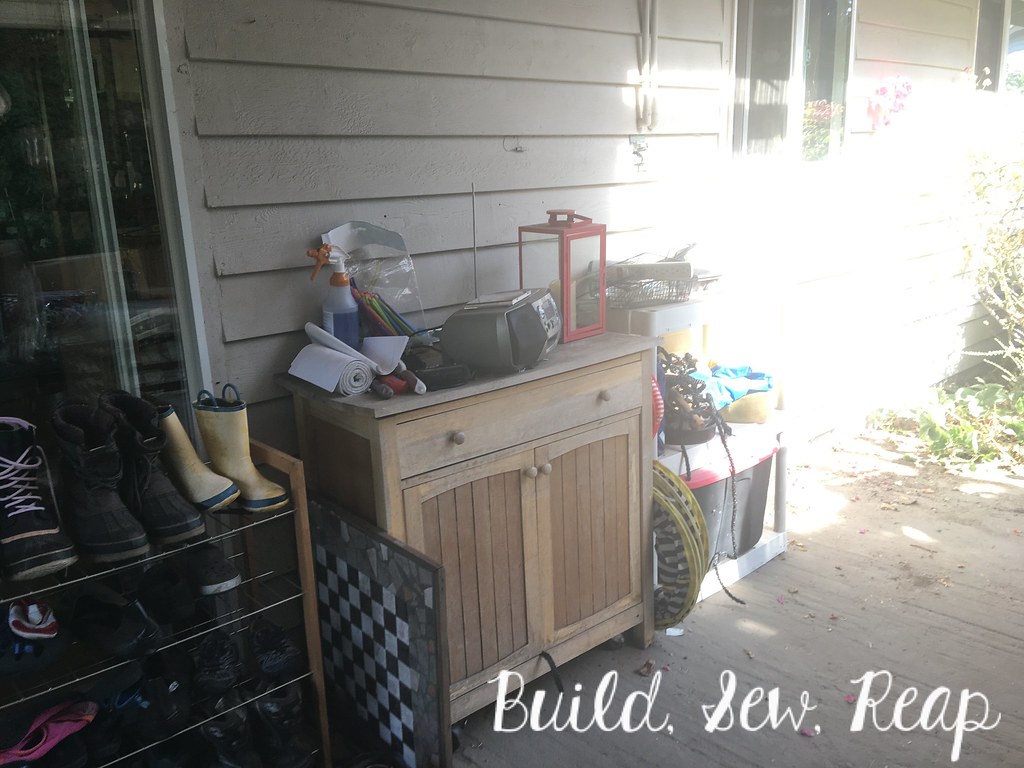
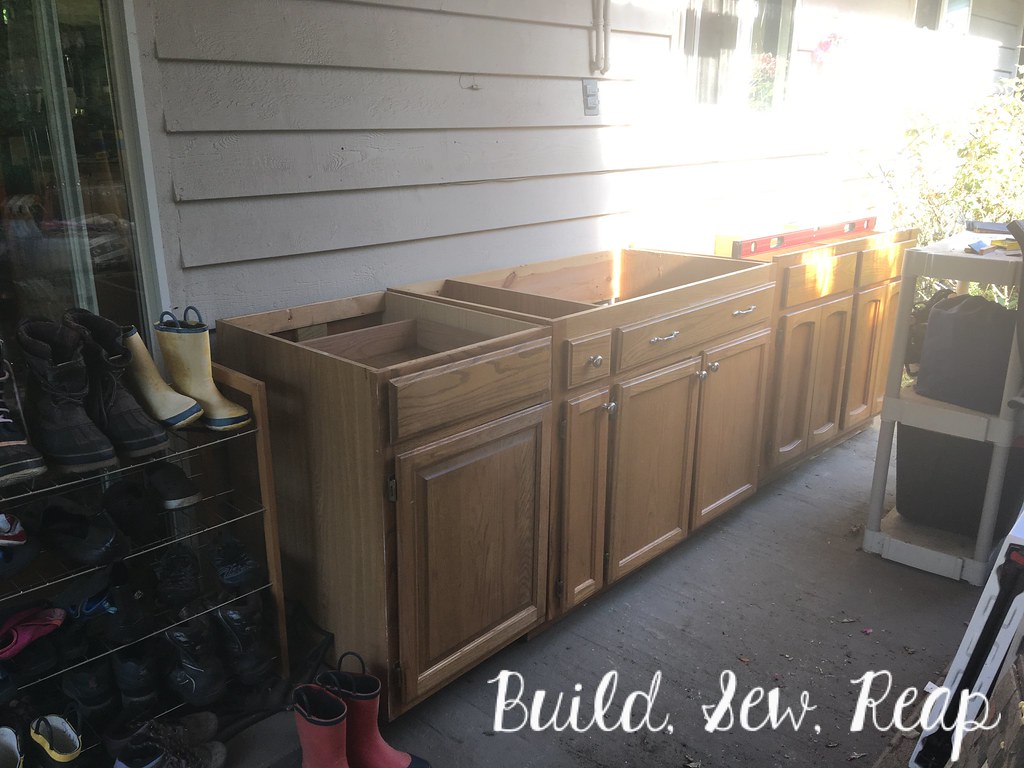
Now let's back up the truck a bit. It occurred to me to stop and take a picture about halfway through the process of clearing this wall. This is where backyard stuff gets stashed because no matter how much our patio roof leaks (and it does, sigh), this area stays pretty dry. So, bearing in mind this is halfway through tidying up, you can imagine how bad it always looked:

Patio storage cabinets DIY by Julie at Build, Sew, Reap

To make matters worse, that shoe holder there was visible from the dining and living areas so we were constantly looking at the backs of the pile of shoes. Yuck!!

I measured the space and realized that I could custom build 10+ feet of cabinets along that wall. I was going to build 100% from scratch using scrap lumber and 2x3s for support but upon measuring, realized that standard base cabinets would fit great in the space. I wanted a really uniform, custom look across the front and knew I didn't want to spend the money on a set of custom cabinets so I headed to my local Habit for Humanity building materials reseller and picked out three base cabinets to suit the space. They were all different and not quite what I wanted but I saw their potential.

Patio storage cabinets DIY by Julie at Build, Sew, Reap

The 9 year old and I got right to taking off all the doors that evening.

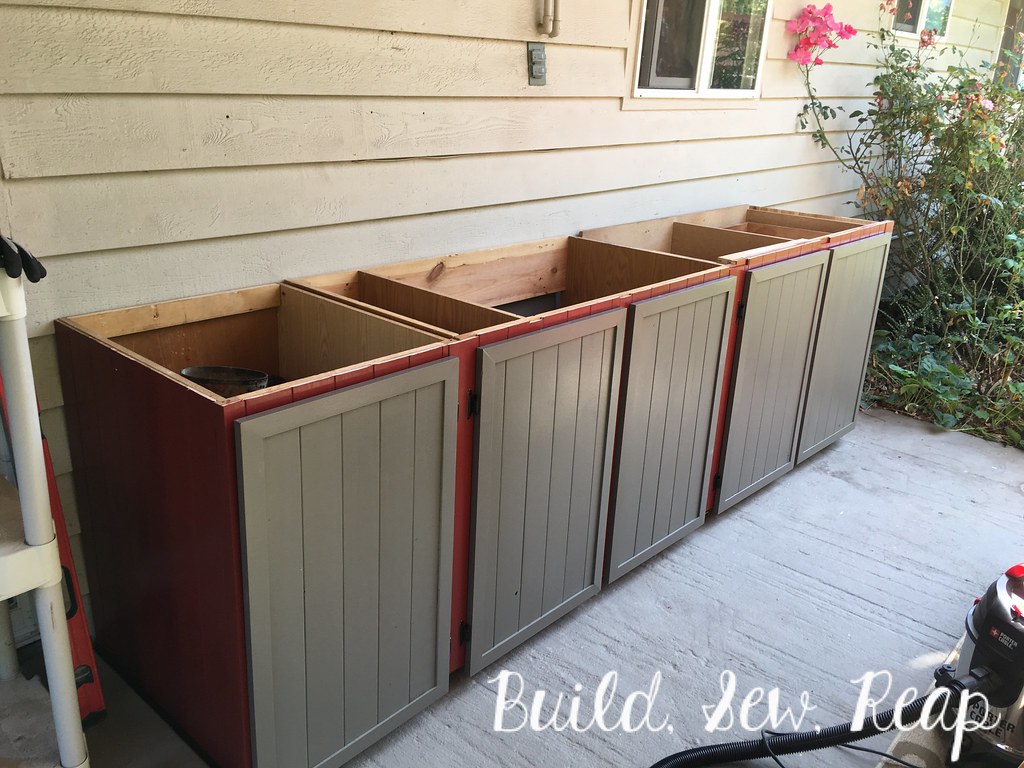
Next, I cut out a few cross beams, created a new center beam for the middle cabinet (it's centered based on the entire cabinet unit, not based on the opening which worked out well), paneled the side using tongue and groove cedar planks, and painted that section.

Patio storage cabinets DIY by Julie at Build, Sew, Reap

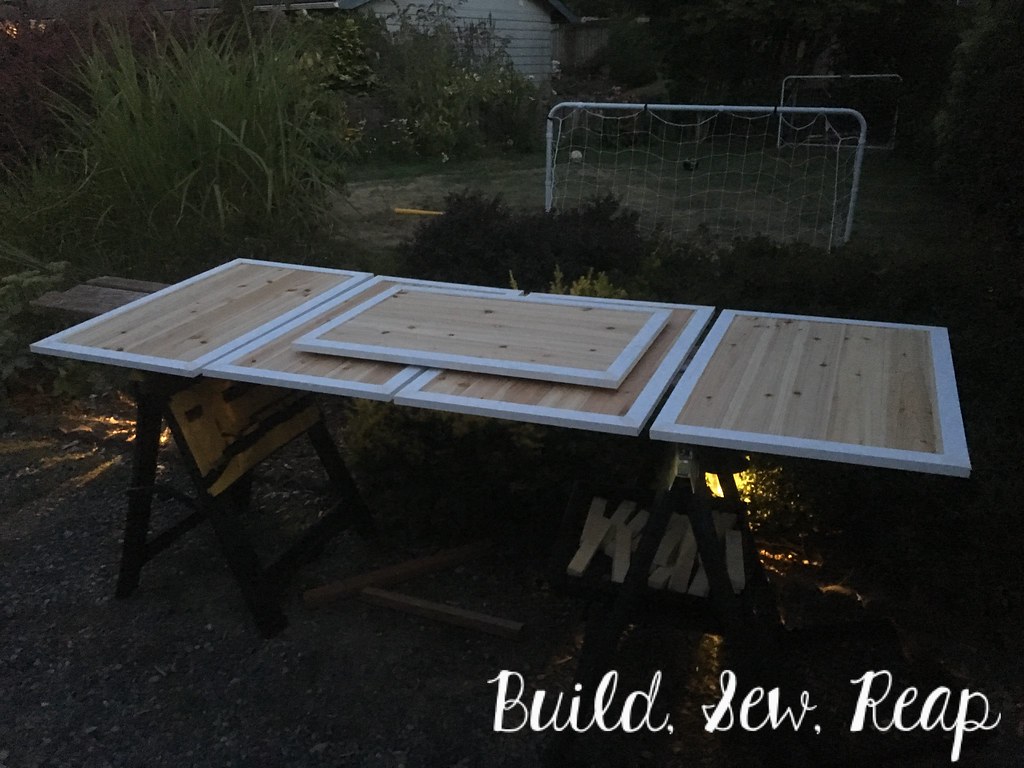
Creating the doors was pretty simple. I used pre-primed 1x2 wood (not MDF, actual wood for this outdoor application) and more of these cedar planks. This is the same product I used for the fireplace surround build.

Patio storage cabinets DIY by Julie at Build, Sew, Reap

As you can see, I did a lot of the work in the evenings after the kids went to bed. Lighting isn't ideal for photos but it's when I have time to work.

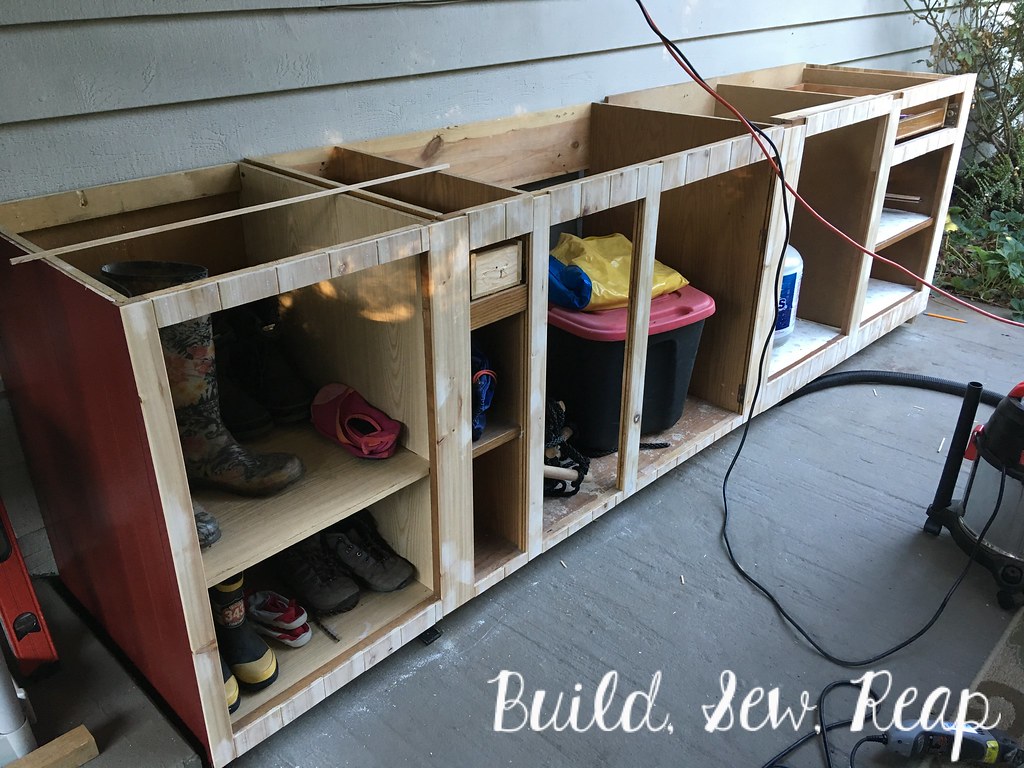
Seeing that I had enough scrap cedar, I measured and cut all the custom pieces to re-face the cabinets. This made them look like one big unit AND gave them a more polished look. It also gave me a better surface to paint. I used my nail gun to attach them then filled each hole, sanded, and prepped the surface for red paint. You'll likely notice some don't go all the way to the top edge, that's because if I'd cut them to the right length, I wouldn't have had enough full length pieces so I opted to make them all a little short.

Patio storage cabinets DIY by Julie at Build, Sew, Reap

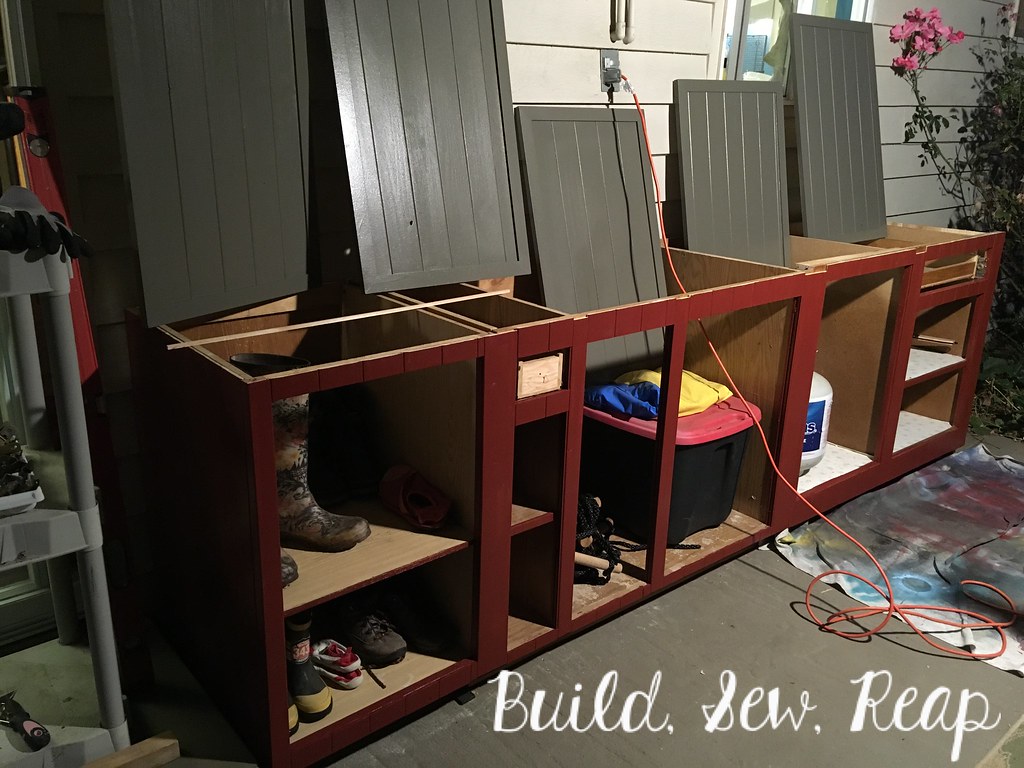
I painted the base cabinets red like our front door and shutters and the doors the same grey as our fireplace.

Patio storage cabinets DIY by Julie at Build, Sew, Reap

I let them dry over night then put the doors on the next morning. Woohoo!!

Patio storage cabinets DIY by Julie at Build, Sew, Reap

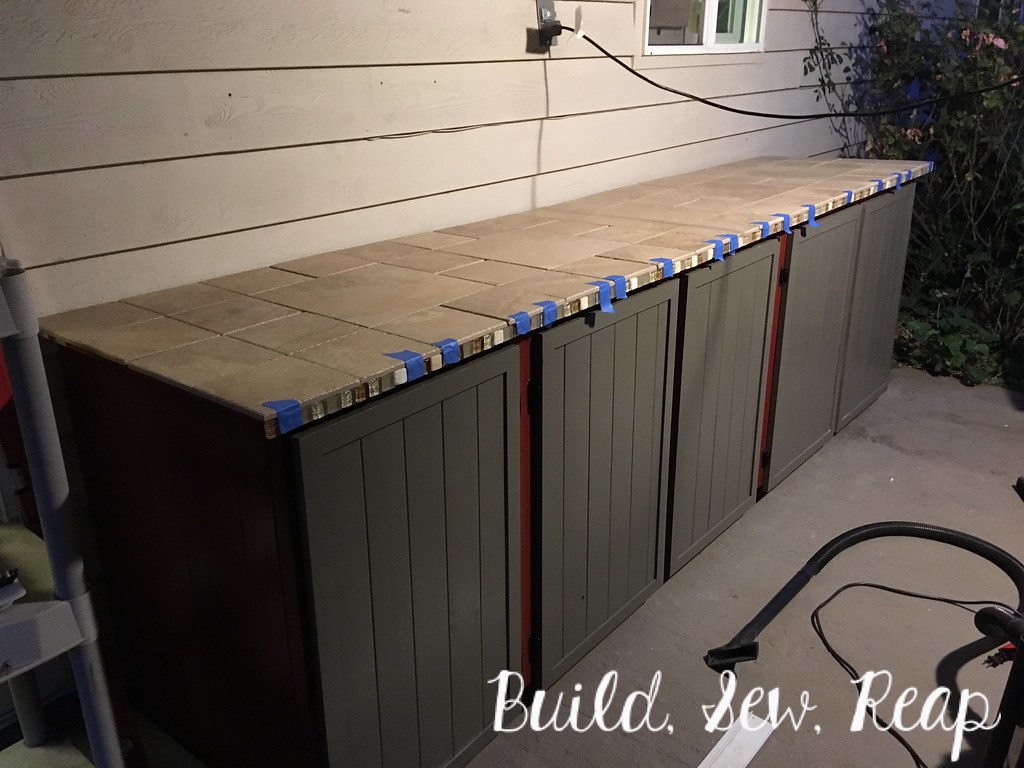
I topped the cabinets with some scrap OSB (possibly not the right product for the job but it's what I had) then to give it extra stability in our damp environment, I screwed down cement board before using tile left over from my bathroom remodel 8 years ago to give the top a durable surface.

Patio storage cabinets DIY by Julie at Build, Sew, Reap

The thinset needed two days to fully set so I left it alone until it wasn't squishy anymore then used the last of the grout powder from the bathroom to grout the tiles just in time for us to put everything away to make our patio useful.
Patio storage cabinets DIY by Julie at Build, Sew, Reap

I moved the stick-and-jar hanging chandelier over from above the table (I never really loved it there after I made it) and love it in the new location. I also turned 4 of the old cabinet doors into chalkboards to hang above the new cabinets. The second cabinet from the end now holds our plug-in cooler for entertaining (and secret beer storage, shhhhh). It really all came together nicely in the end and the porch is so much tidier with places for all the shoes, toys, and grilling accessories we had piled along the wall.

Thank you for reading,
Julie


Work for Hire Family Job Chart

My 7 year old is motivated by money. We believe he's at the age where he can appreciate the value of earning money to purchase the things he wants most. I don't think giving him an allowance will teach him any of the lessons we're working hard to instill in him right now and there are always plenty of tasks to do around the house so I created a system to both motivate him to help out AND help him earn money to buy the things he wants.

In our house, the kids are mostly responsible for cleaning up their own messes (we help out but generally they're expected to manage their own rooms as well as the messes they create in our common spaces). We try to tackle the general messes as a family but being a stay at home mom means (to me) that most of the deep cleaning falls to me unless I ask for help. I now have a great system for asking for help and a terrific way to keep track of what needs to be done around here.

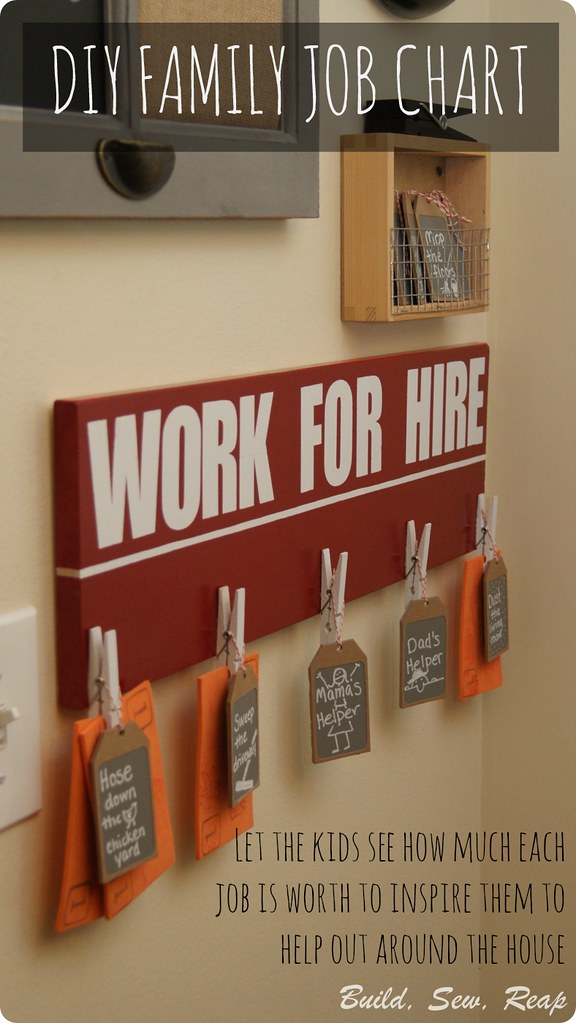
Work for Hire Family Job Chart by Julie at Build, Sew, Reap

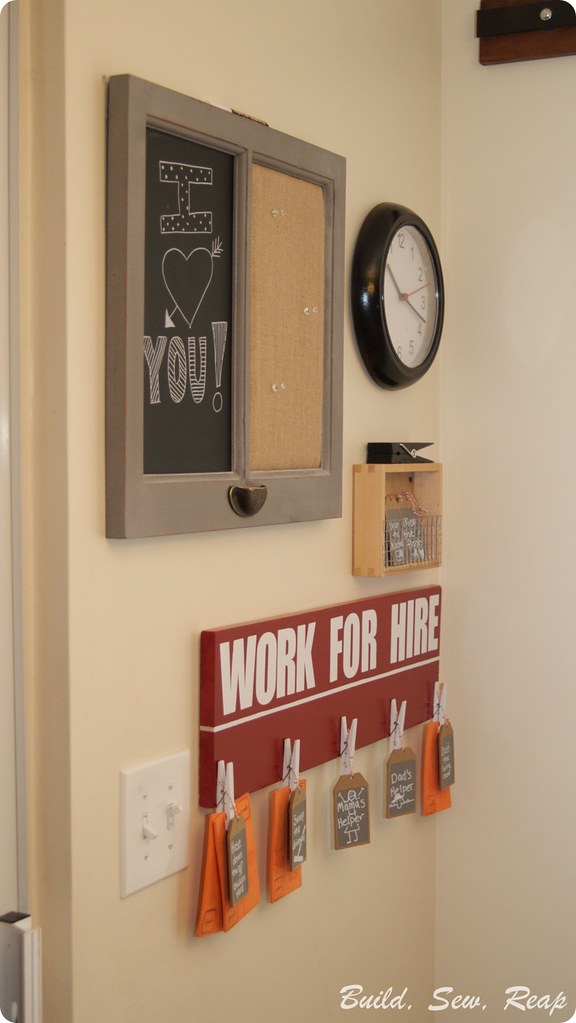
This section of wall has been blank for a couple of years now so I'm really excited to find such a great use for it. We have a little command center now but this job chart is really the shining star of the area.

I painted a scrap piece of wood white with spray paint then used my Silhouette SD to create a stencil for the "Work for Hire" letters. I then spray painted a deep red glossy paint over the board until I got a good solid coat. I also disassembled 5 basic wooden clothes pins and spray painted them white. Once the pieces were all painted, I used Gorilla Glue to attach the clothespins to the board.

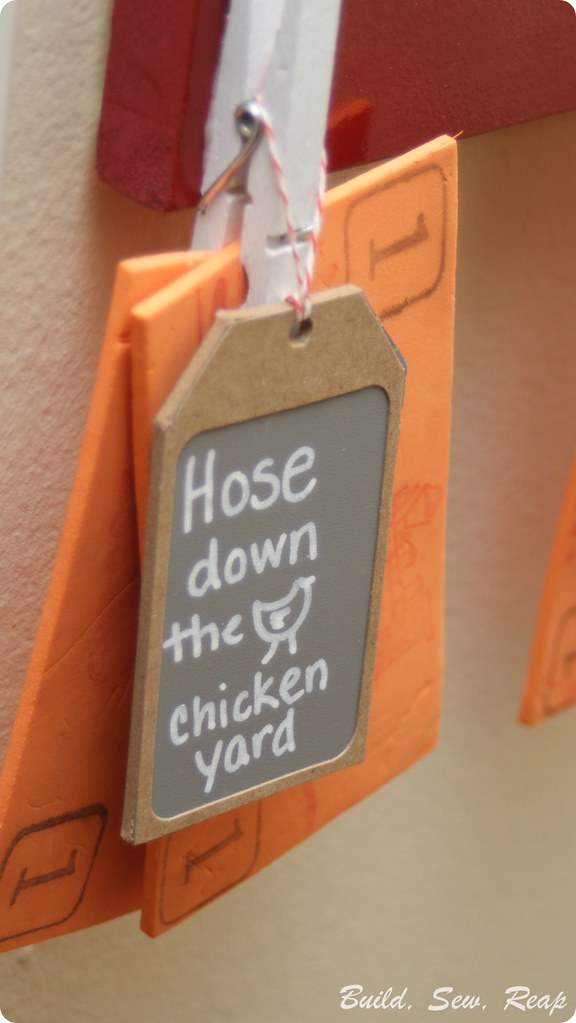
At first I wasn't sure how I'd mark the jobs but today I happened upon a clearance sale at JoAnn Fabrics and Crafts where I found those cute chipboard tags with chalkboard windows on them. I also picked up a couple of white chalk pens for the project. I had the red and white bakers twine which I used to make the loops to hang the tags.

For each task, I hang the chipboard tag and then I clip the appropriate number of Kid Cash bills in the clothespin. Kid Cash can be traded in for real money at purchase time but is a lot easier for me to stomach when it gets lost (it isn't replaceable for him but at least it's not real money if it goes missing).

Work for Hire Family Job Chart by Julie at Build, Sew, Reap

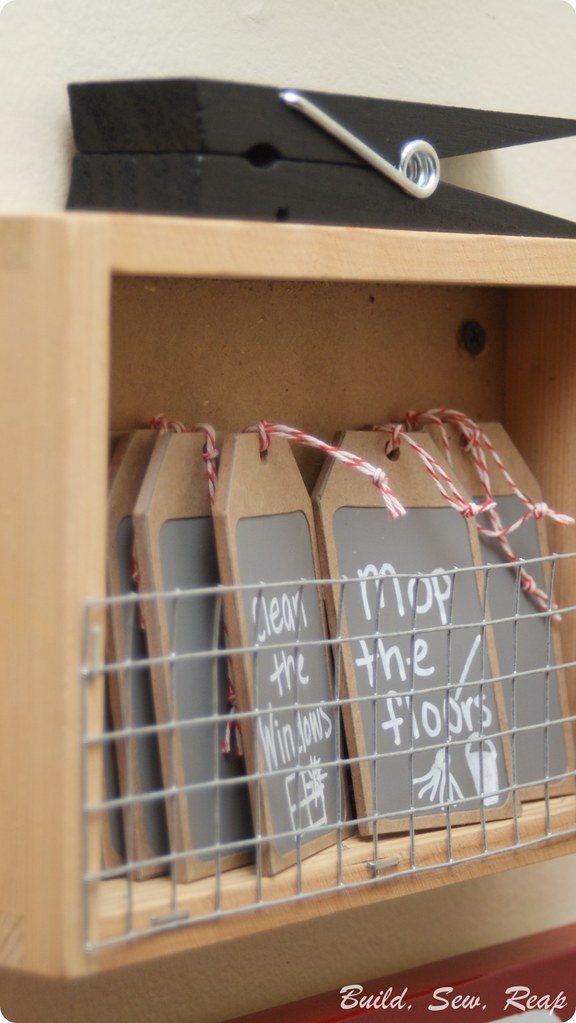
Not wanting to have to rewrite the tasks out new each time, I picked up more than enough of the little chalkboard tags but wanted to find a way to keep them close to the sign. I headed out to my garage where I pretty much just stood and stared at the shelves until I saw a little Melissa & Doug box among my basket collection. I grabbed it and some hardware cloth which I cut to size and stapled into place and voila! I had a cute little box for my tags.

Work for Hire Family Job Chart by Julie at Build, Sew, Reap

I had also picked up the giant black clothespin and a cute chalkboard/bulletin board combo on clearance at JoAnn today and I thought they balanced out the space nicely. Finally, I grabbed a clock from the kitchen (it was in a dumb spot quite frankly), taped it off and spray painted it black then hung it in the remaining space on the wall.

Work for Hire Family Job Chart by Julie at Build, Sew, Reap

I'm really happy with how this turned out.

How do you encourage your kids to help out around the house? Are they motivated by money like mine is?

Thank you for reading,
Julie


Tardis Cat Condo

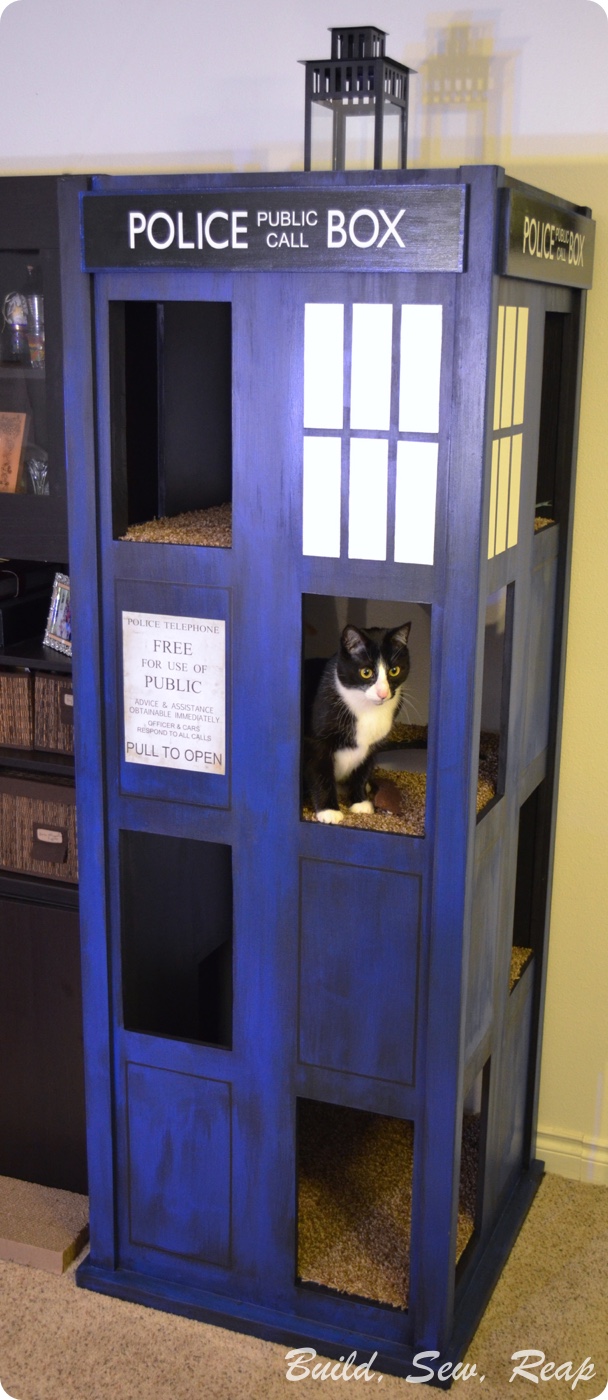
The couple that fostered our kittens before we adopted them loves Dr. Who. In fact, one of our kittens is named Amelia because we decided to keep what they had named her. I've known Dani, kitten foster mom and Dr. Who fan, for a few years and we are friends on Facebook so when she posted a picture of a TARDIS cat condo, I couldn't help but comment that I could make one for her.

Fast forward a few weeks and I got the call, well, text. She wanted a cat condo that looked like a TARDIS. I agreed.


TARDIS Cat Condo by Julie @ Build, Sew, Reap
*I also made their cat a bow tie.

I didn't take a lot of pictures as I went along. I used ripped 2x4s for the structure then 2 full sheets of 1/2 inch MDF for the outside as well as trim. My guess is if you're desperate enough for this same piece, you can probably work out how to make one for yourself but feel free to contact me directly on email or Facebook with questions.

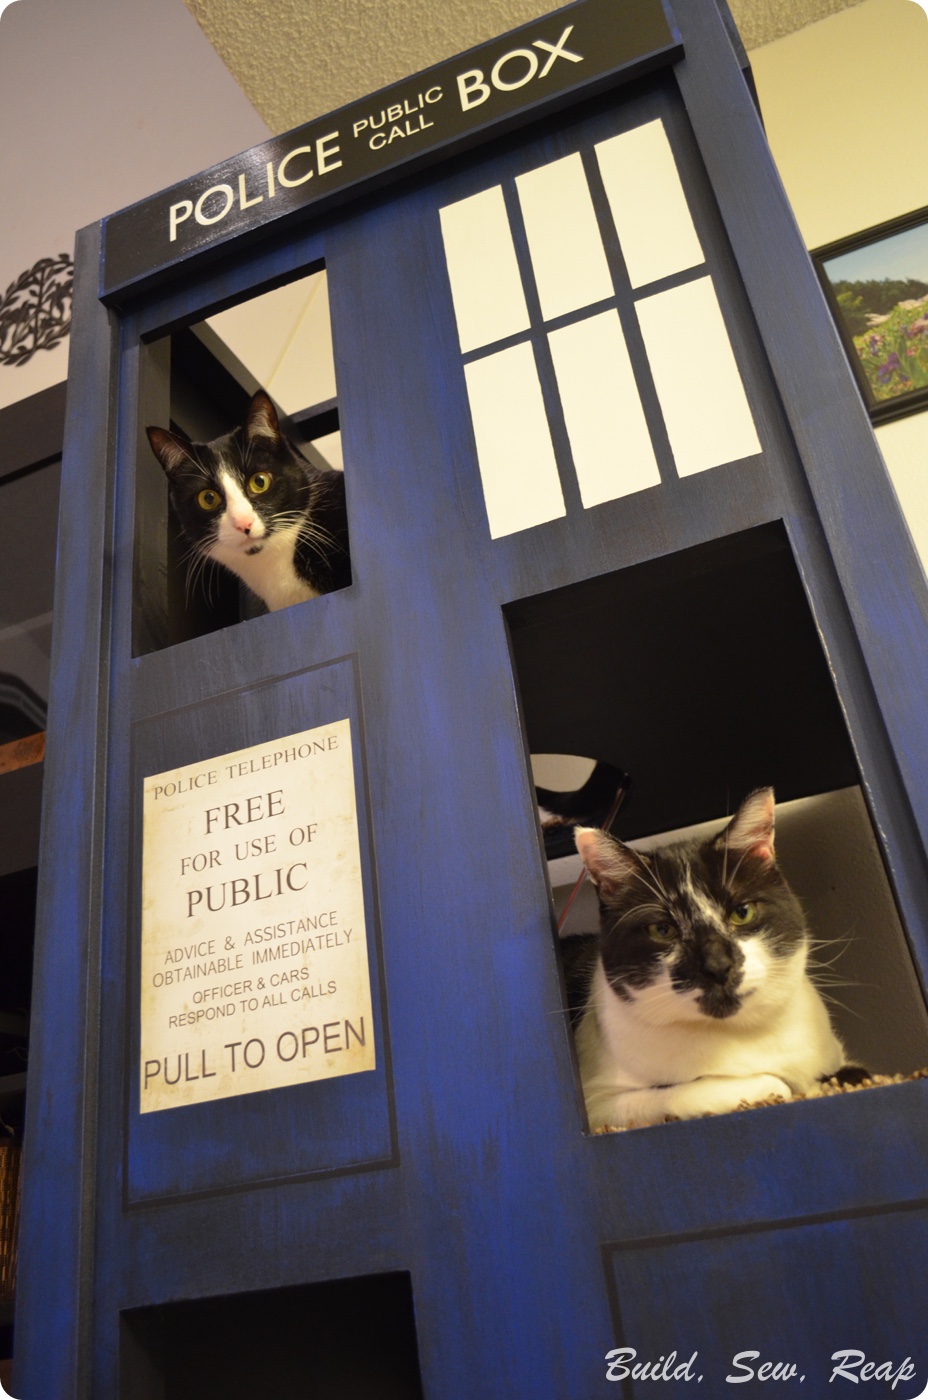
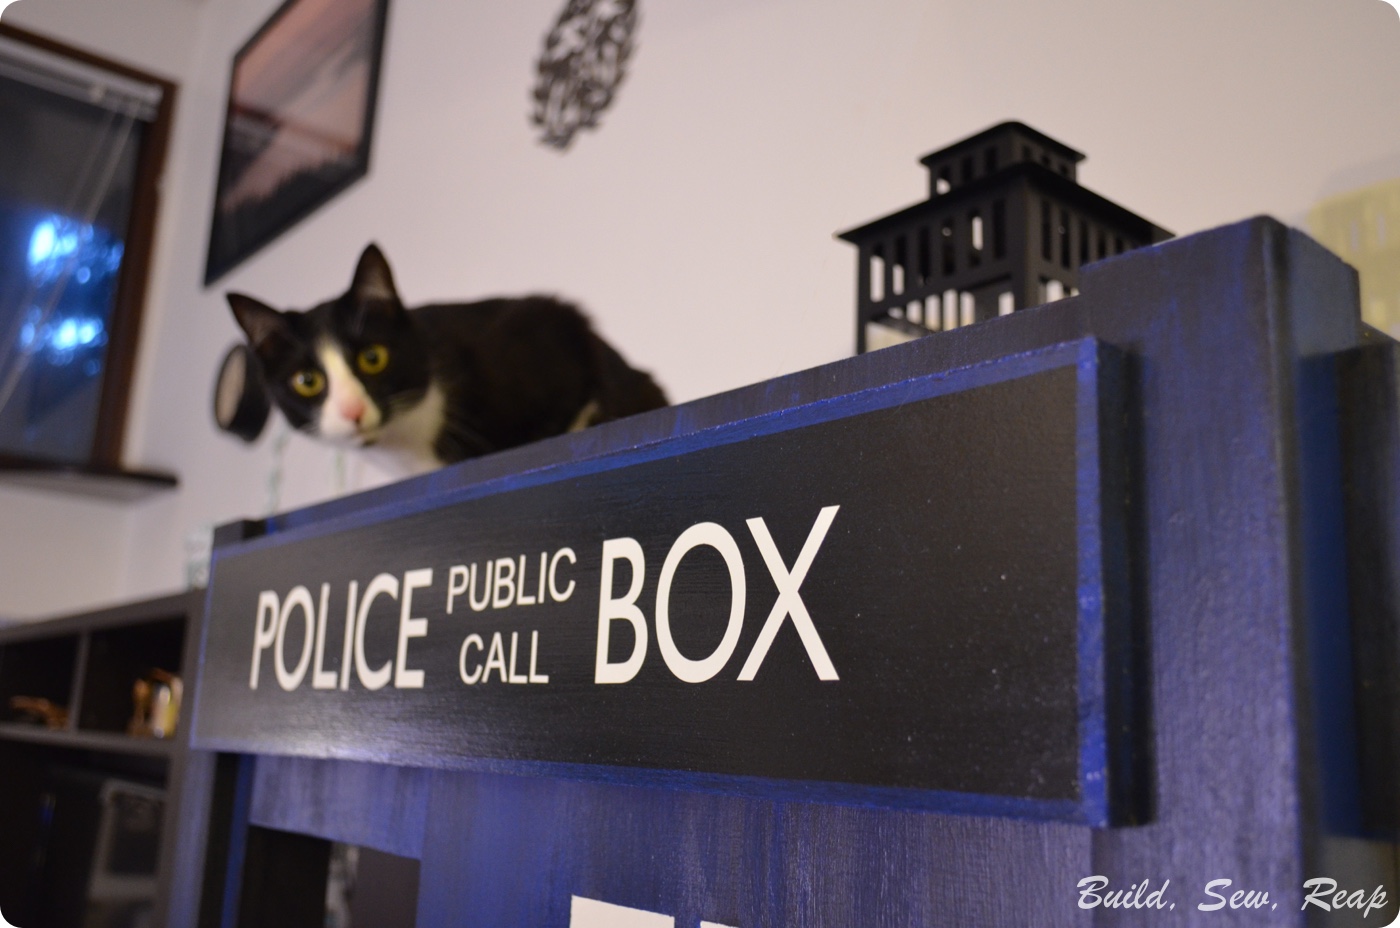
Here are some other fun shots though. A special thanks to Caleb Richmond for his awesome photography.

Tardis Cat Condo by Julie @ Build, Sew, Reap

Tardis Cat Condo by Julie @ Build, Sew, Reap

And one final picture from a total ham of a cat:

TARDIS Cat Condo by Julie @ Build, Sew, Reap

Thank you for reading,
Julie

_________________________________________________________________________________

I'm sharing this post on:

All Things Fee: Calling All Crafters

Skip To My Lou

Shipping Crate Trash to Treasure

There are few things I like more than a good challenge. You might recall the fire truck bed I made for the little dude a few months ago. The challenge there was to use materials I already had on hand or that I could acquire for free. I did have to buy paint and lights but all the wood, the bed springs, and the mattress came from either my wood shed, the garden, or the local buy nothing site. When I realized I'd have to buy paint and wanted to buy lights, I found some old clothes I could sell to raise money for those supplies so I still broke even.

I dream about participating in a show similar to Project Runway but for woodworking. They'd give weird materials and strange parameters and tell the contestants to create. YES PLEASE!!! I think there was something similar but we gave up cable so I'm all kinds of out of the loop now.

Anyway, without further ado, here's the latest project:

Shipping Crate Trash to Treasure

So here's the story ....

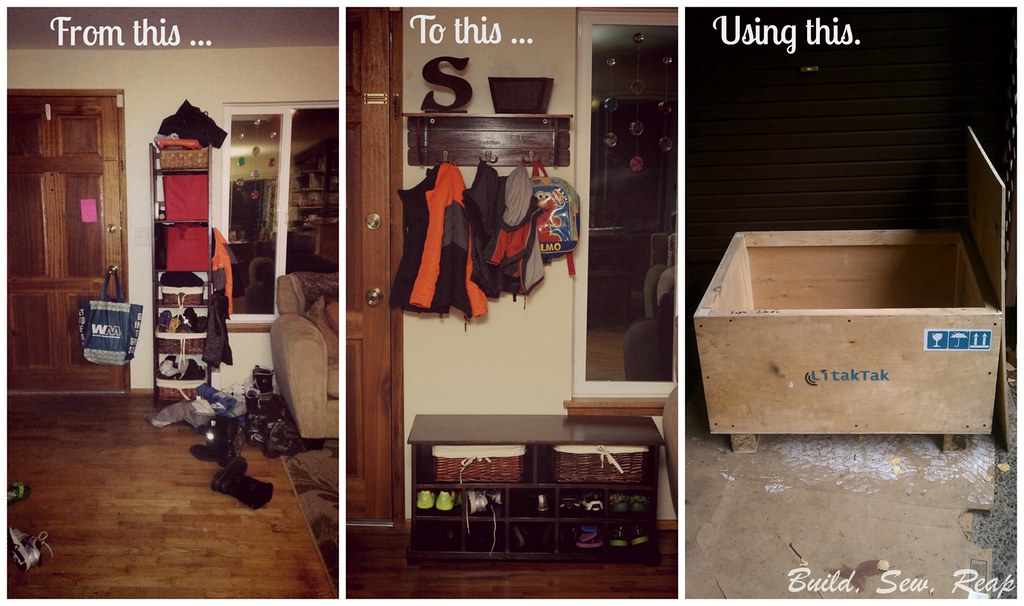
I hated this:

IMG_0738

Yes, that's our front door and yes, that's our living room. When you walk into our home, there you are, right in our living room and right where the kids play. In an attempt to contain the shoes, gloves, hats, coats, etc, I put this tall shelving unit with baskets next to the door. The kids and I each had baskets for our stuff and you can see how well that was working. This picture wasn't even taken on a particularly bad day, the shoe explosion was awful. I started dreaming of a better solution, a piece of furniture that could contain the mess. I drew out plans but then scrapped the idea because I didn't want to spend the money on the lumber I'd need.

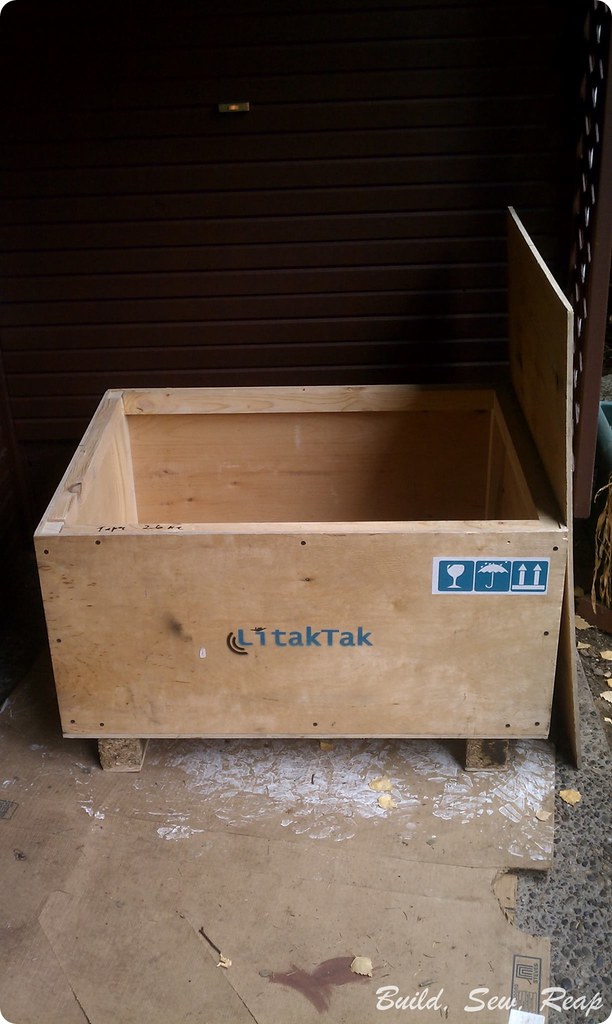
Then someone listed this on our local Buy Nothing group page:

Shoe Storage Crate Before

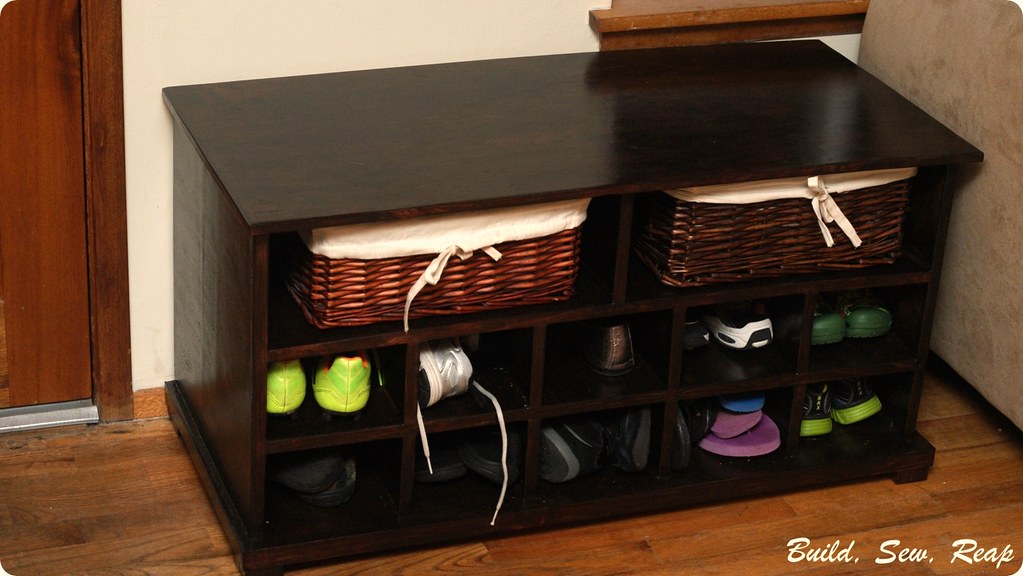
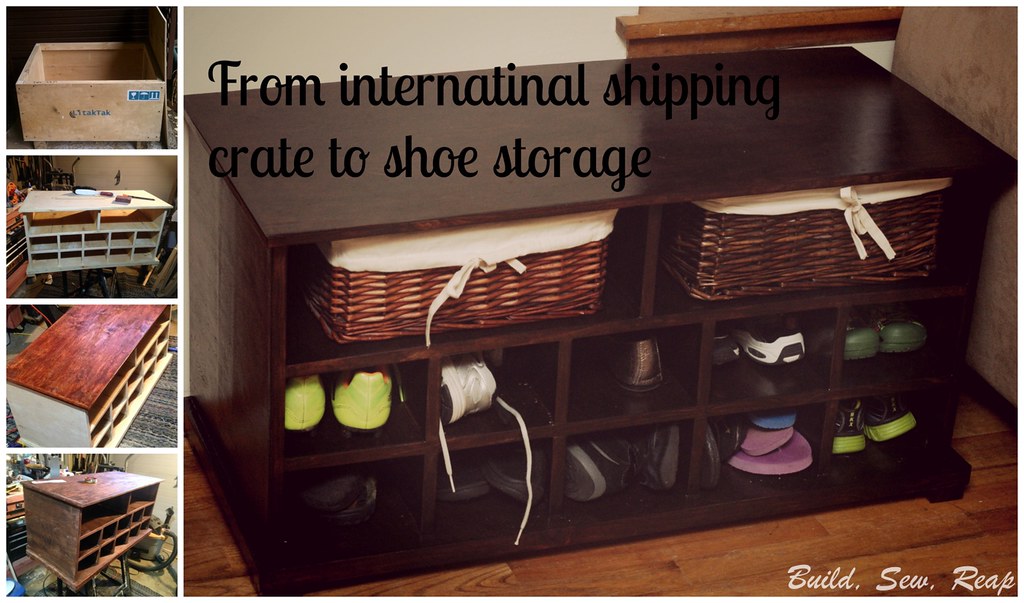
The owner of the box had ordered something from Russia that was shipped within this box so it was strong but had endured a bit of abuse along the way. The weird thing though, was that it was exactly the width I had determined my shoe storage bench should be. She asked us each to post what we would do with the box if she gifted it to us and while there were lots of great projects to consider, I think she appreciated that the dimensions were really close to what I was going to do and she picked me.

I decided I wanted to build my entire shoe storage bench using wood from this box only.

I took the whole box apart, drew up new plans to work with the wood I now had and started building.

IMG_0550

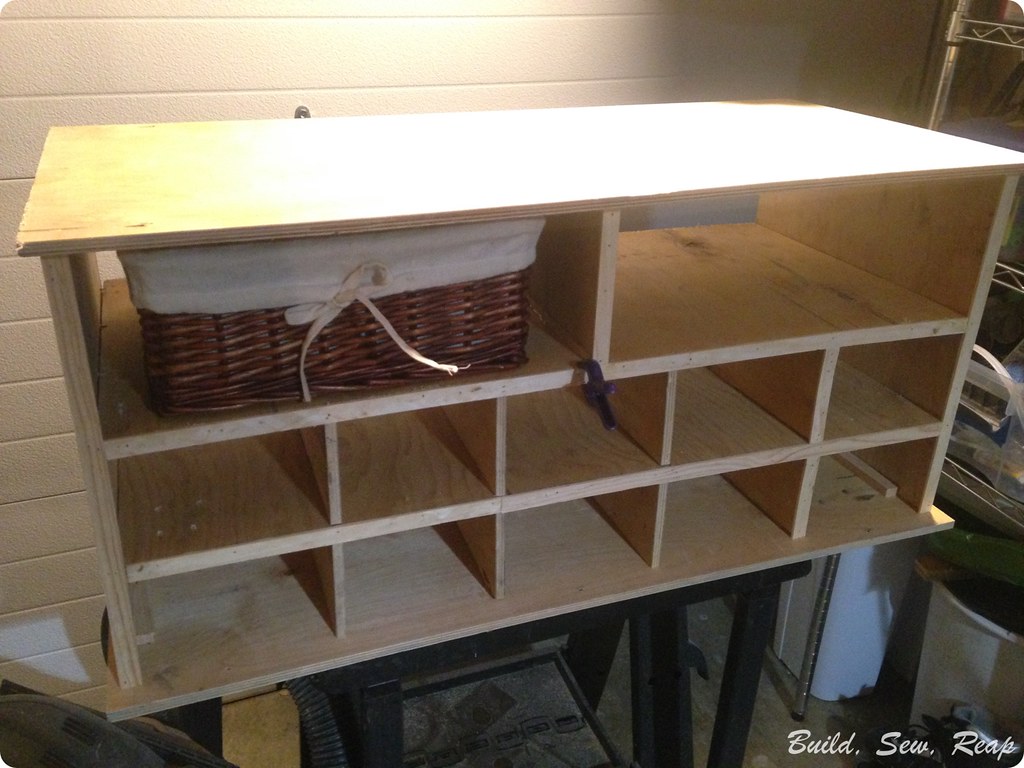
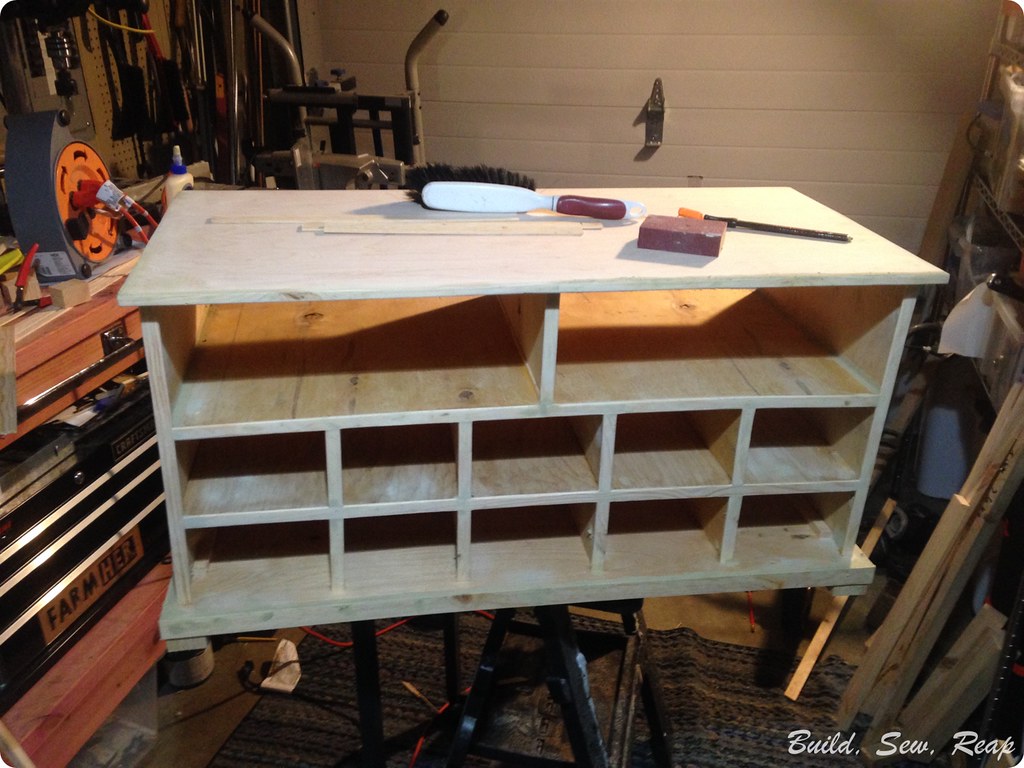
The box had pine 1.5" by 1.5" support posts in each corner and that wood was really in great shape so I ran it through my table saw to cut facing pieces to cover up the ends of the plywood. I also filled the bazillion holes the wood came with as well as the ones I created, with what was supposed to be stainable wood filler. I also added feet cut from the original corner support posts and a skirt around the bottom edge. Then I sanded the heck out of it all with the hand sander where I was able to and by hand where I couldn't get the hand sander.

Before Stain

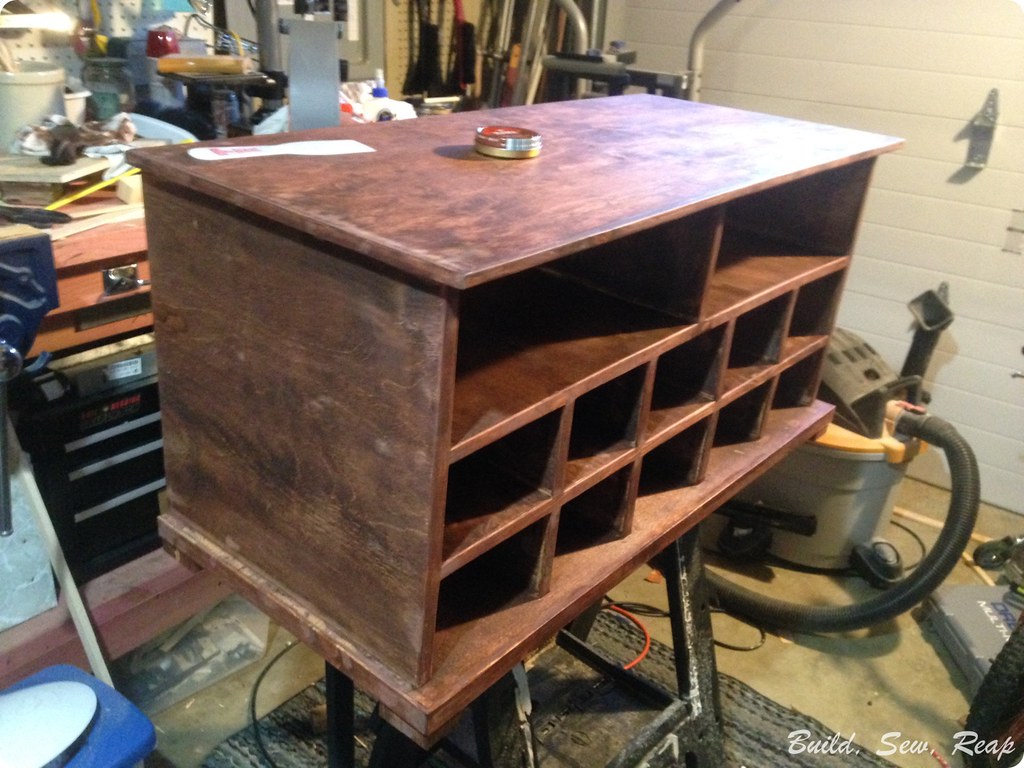
Then I stained it with an oil based stain. Brush on, wipe off.

IMG_0648

Uh oh, the stain didn't stick to the wood filler. I tried not to panic.

IMG_0647

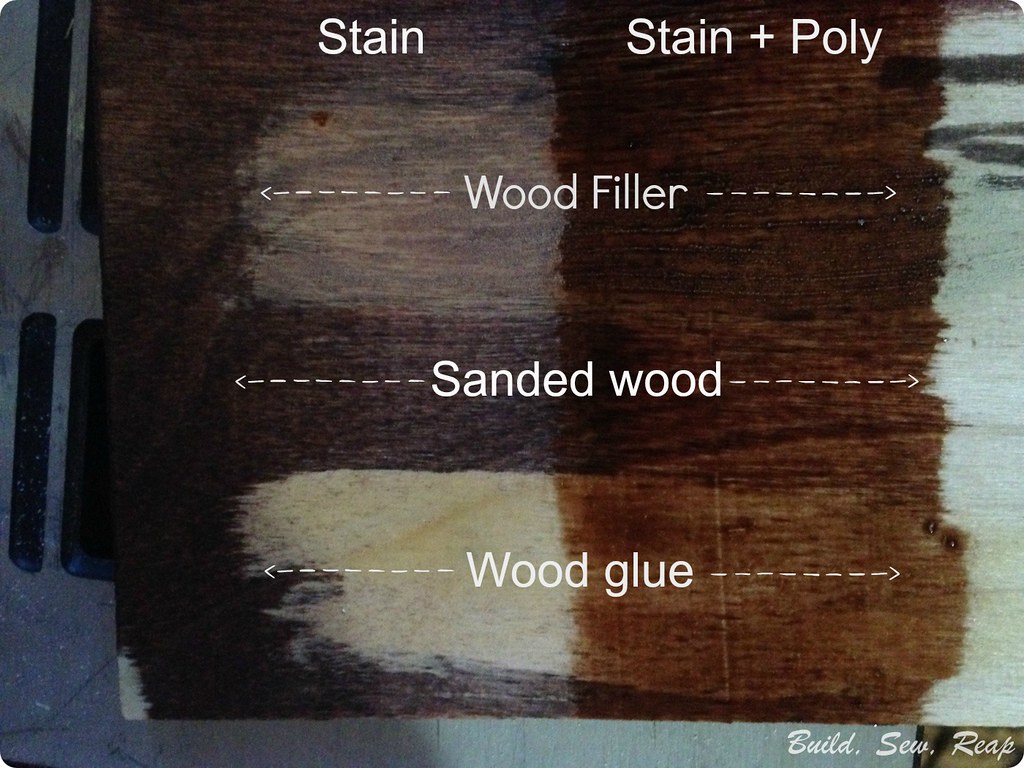
Now, normally I would not endorse the stain+poly products but in this case, I needed something that would sit on top of the wood, not sink in. I performed a test where I wiped wood glue (another area that was giving me trouble) and wood filler across a scrap of plywood. I stained a portion then used some stain + poly on another portion just to ensure it would perform as expected. This is with just one coat so I knew it would cover fine in the end.

Shipping crate trash to treasure

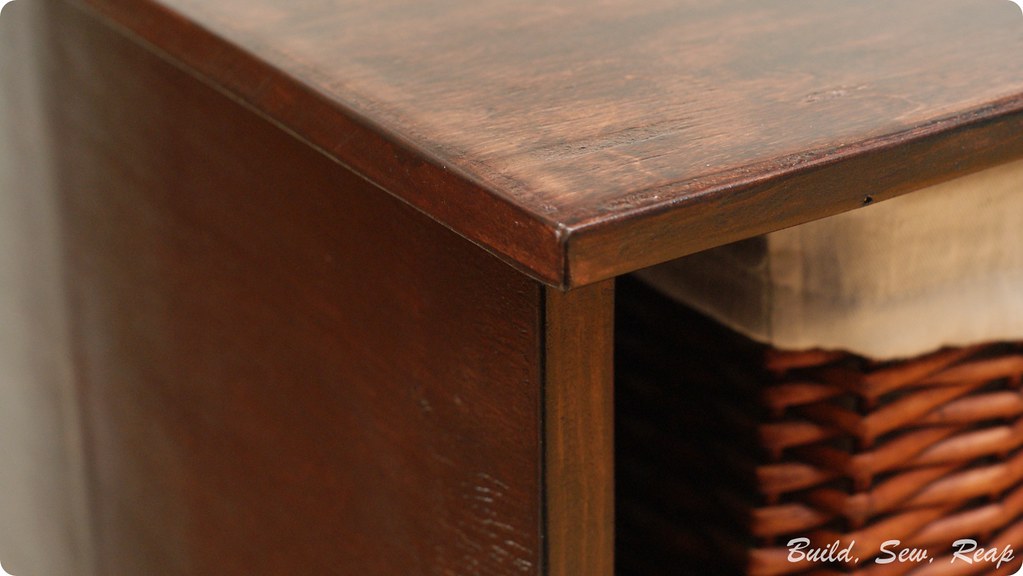
Based on my test (above), I knew I would need 2+ layers of color to fully cover everything and create an even tone across sanded wood, wood filler, and glue. In the end, I did 2 layers of stain + poly and one layer of satin finish clear polyurethane to protect the piece.

DSC02982

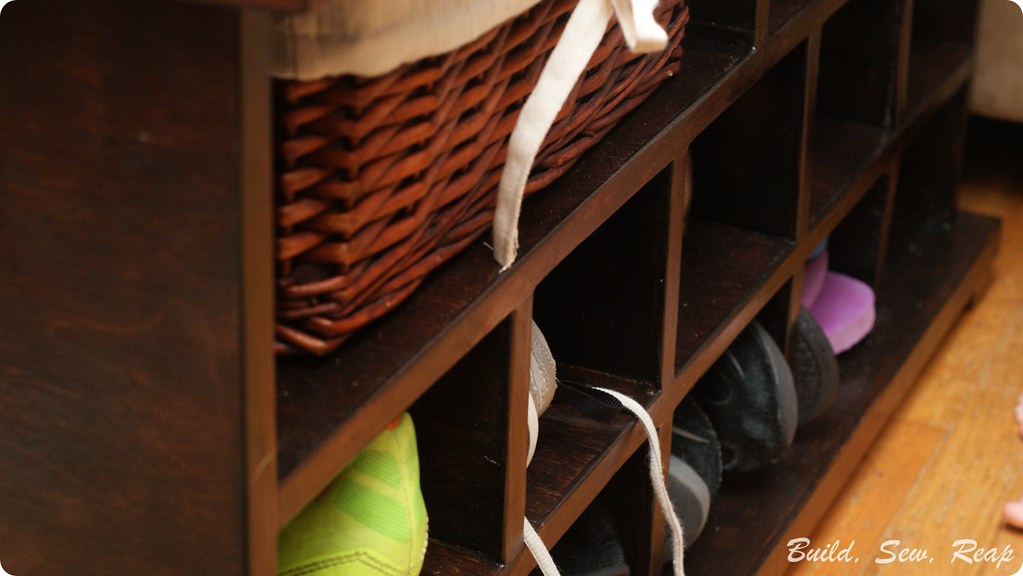
I love this piece. I even love that it isn't perfectly straight because the wood was just a tad warped in places. It has charm.

DSC02992

DSC02990

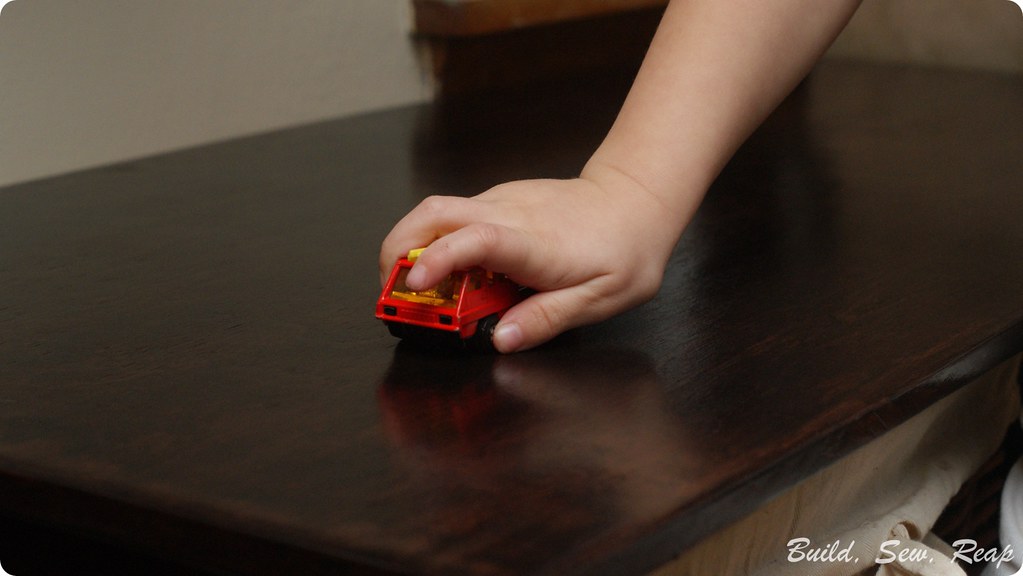
The kids like it too.

DSC02988


Shipping Crate Trash to Treasure


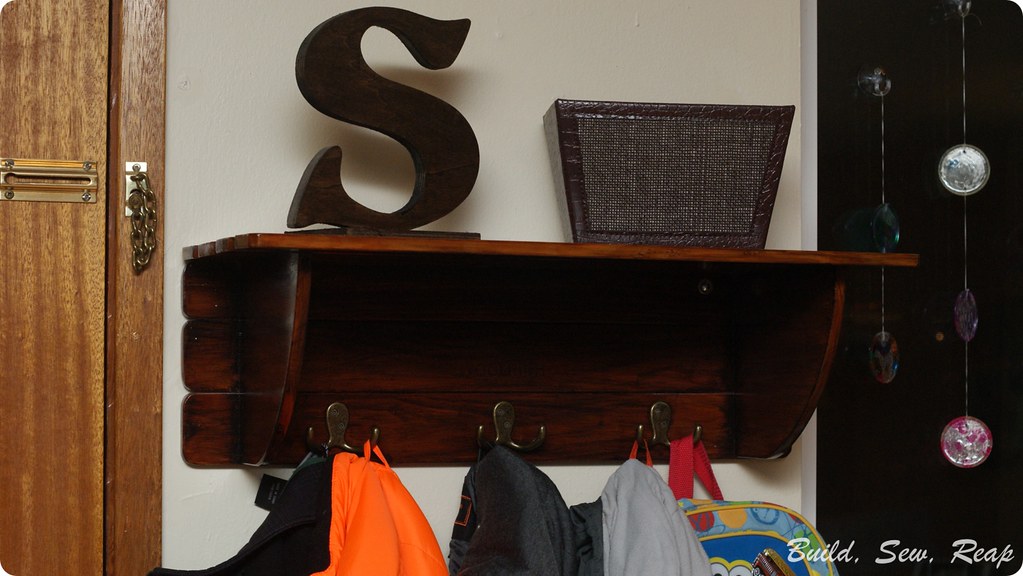
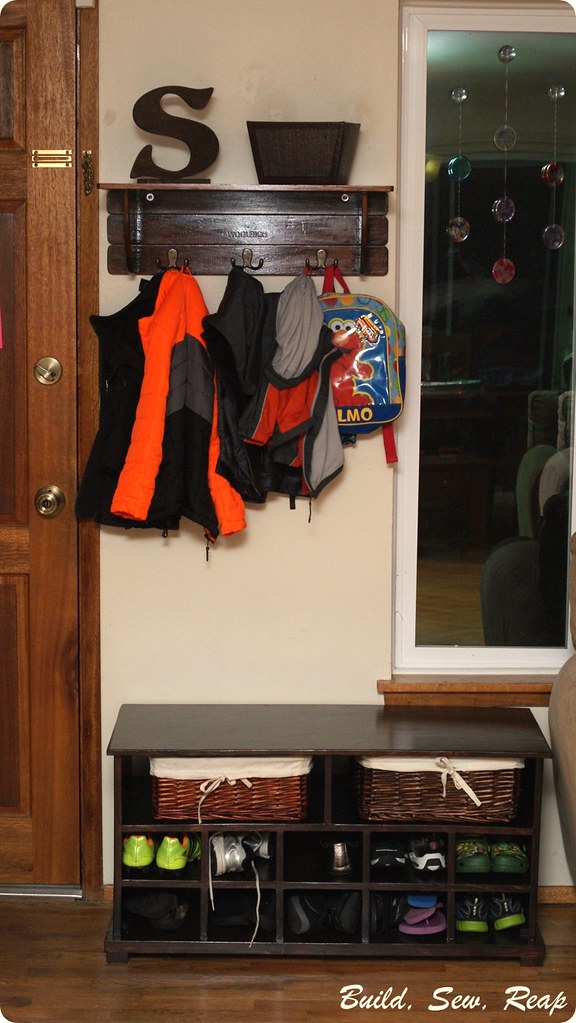
As I finished it up, I remembered we had a shelf with hooks that we had once used in the big dude's nursery way back when. I pulled it down and stained it a bit darker to coordinate with the shoe cubby piece. I also dug up an "S" (our last name starts with the letter S) in my craft supplies and stained that as well.

DSC02980

Here's what our shoe area looks like now:

DSC02977

Yep, that'll do.

Shipping Crate Trash to Treasure

Do you enjoy turning trash into treasures? Do you have a local Buy Nothing site? If you've blogged about projects like this, feel free to link up in the comments.

Thank you for reading,
Julie


Mailboxes to Store Garden Tools

This year I got tired of wandering from one end of our property to the other only to realize I needed a pair of garden gloves and a tool or two that were back where I started. We have multiples of just about every handheld outdoor tool so I picked up a couple of old mail boxes from my local buy-nothing Facebook group and installed them where I needed them most.

The first one is by the main garden, in the side yard. I also love how it works with the other decor I've acquired.

Garden Mailbox

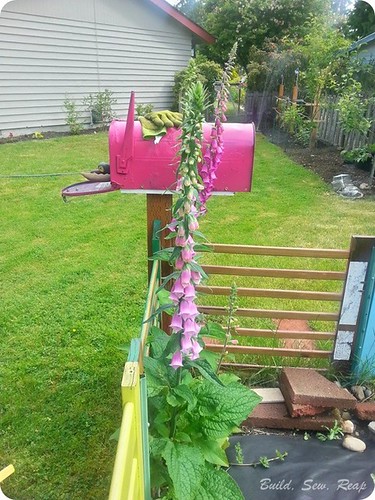
This one is in the back garden, near the corn plot (aka squirrel food), zucchini, cucumbers, blueberries, quinoa, some pumpkins, apple and cherry trees, potatoes, edamame, and raspberries. See how I might like some tools over there? It was just a coincidence that this awesome volunteer Foxglove was the same color as the mailbox. I painted the box before the flowers emerged.

Garden Mailbox

I love how they turned out.

Thank you for reading,
Julie

Bookcase Cat Climber

Did I tell you we got kittens this summer. O-M-G they're so adorable and sweet. A friend was fostering their litter when I first fell in love. Having lost our 19 year old cat back in the spring, I was really missing having a fur baby (or two) around the house. We were able to adopt our babies through Meow Cat Rescue and I got to pick out the babies I liked best from the litter while they were still staying with my friend. I picked good ones too.

I knew before they came home that they'd need a cat climber. I wanted something they could climb quickly to get away from the kiddos but also something with some scratching space on it. I wanted it to be in a location where they could watch us moving about the house.

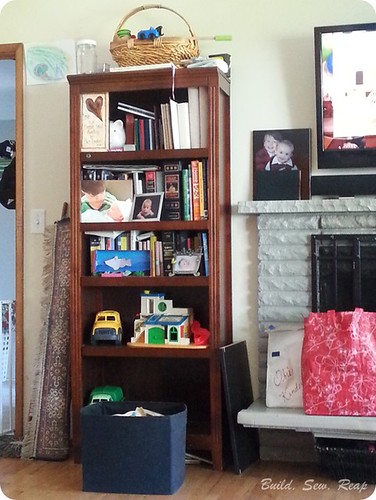
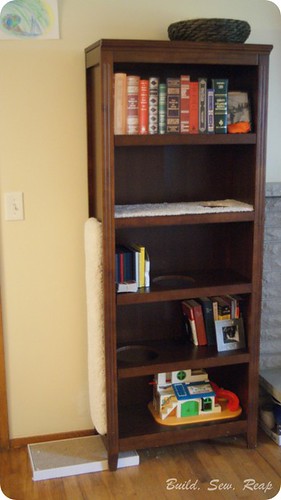
Well, the location was easy but it would mean displacing a bookcase. This bookcase:

20140702_152913


I'm going to be honest here, I don't miss that AT ALL!!! The thing was though, that bookcase matches one across the room and I like it. Our house is small so matching furniture does wonders for keeping it from looking too crowded. I also didn't want some carpeted monstrosity right there so I hit Pinterest looking for attractive cat climbers I could build.

I found nothing I loved. Nothing I wanted as a focal point in our living space. This is easily viewable from the dining room, kitchen, living room and hallway.

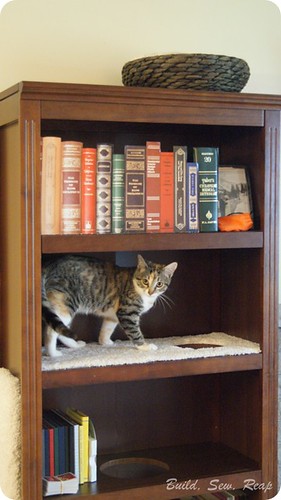
Then it hit me! Get rid of the clutter and make THIS the climber.

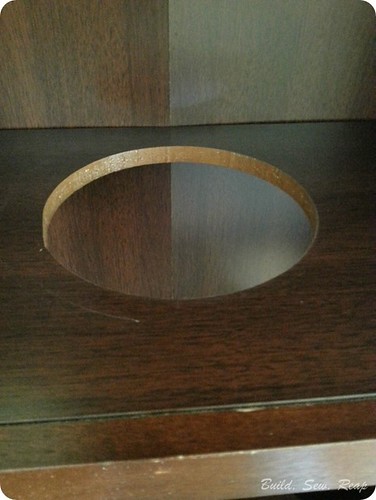
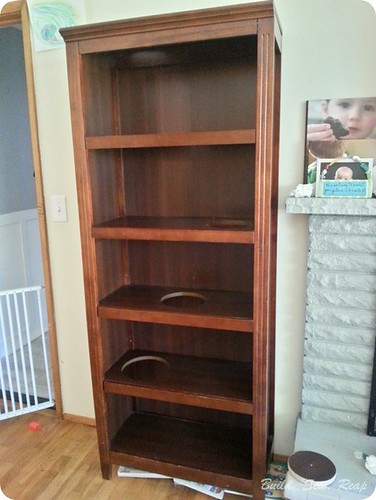
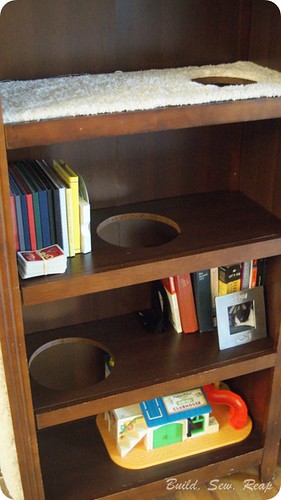
I cleared off the clutter and cut a hole in each shelf.

20140706_132111_HDR

I used the hole guide on my Dremel Trio tool.

Then I stepped back to assess what I'd done.

20140706_132100_HDR

I loaded it back up with just a few books and games as well as a scrap of carpet I got from a friend.

DSC01376

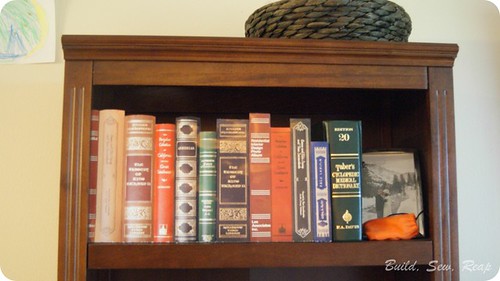
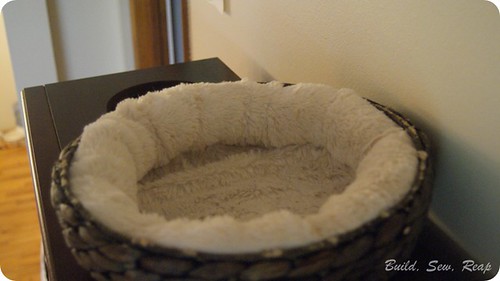
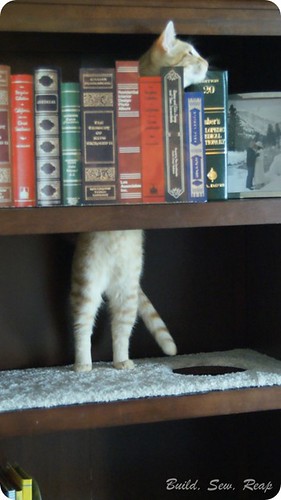
Oh, I was very happy with where this was going. I found a photo of book spines, printed them out on photo paper, mounted them to cardboard then taped on an "L" bracket and put them (as well as a real book) on the top shelf to give the kitties a pass-through to the top of the shelf. I also put a cool basket up top. Don't worry, it's on some no slip padding so it doesn't slide off.

DSC01377

DSC01379

DSC01375

Teddy investigated and approved it. (Nom nom nom)

DSC01309

Eating Books

Amelia tested it out too.

DSC01381

I also added a carpet-covered strip of wood to one side so they can sharpen their claws on it.

DSC01380

I see one or the other (or both) up there every single day. The carpeted layer is just high enough that they can escape the 2.5 year old's reach and they can scale the climber really fast when they need to. They also like to play on it.


And now, a few final pictures:

Snuggles 2

Feet


Thank you for reading,
Julie

I'm linking this post up at the following link parties:


Related Posts Plugin for WordPress, Blogger...