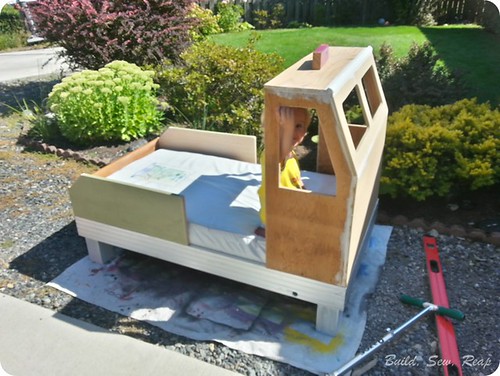
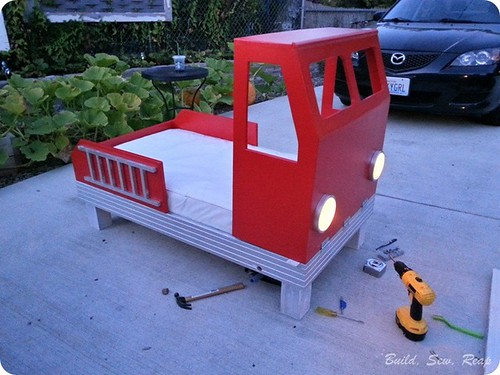
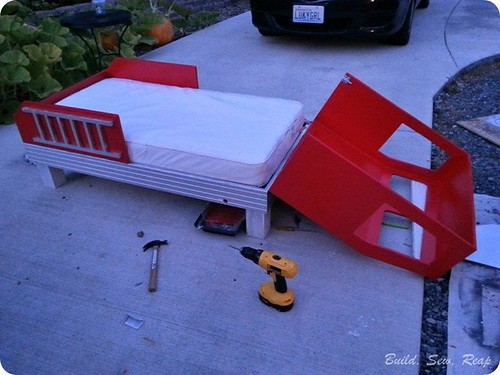
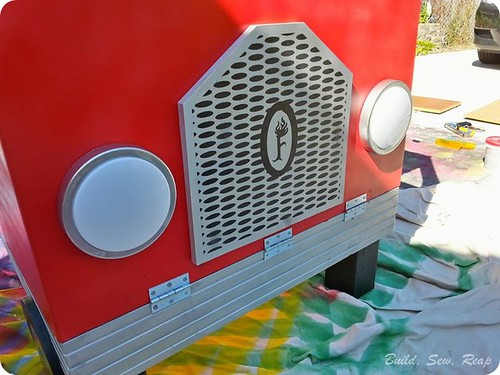
The little dude outgrew his mini crib even though I took one side off to make it more of a toddler bed. I realized this problem when he was already sleeping with his toes through the slats and one arm hanging off the side of the bed. I jumped into action and being me, I couldn't just build him a normal bed, it had to be COOL!
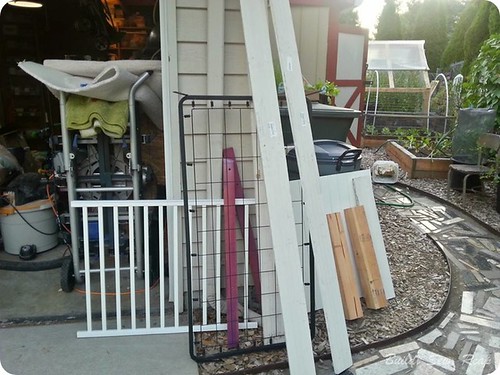
Thanks to my many garden projects revolving around old cribs, I had a spare regular sized crib springs on hand. I also found a free crib mattress listed on my community Buy Nothing site. The next step was to dig into my wood shed and start pulling stuff out. Here's where the pile started but I'll admit that I pulled out lots more scraps of plywood and MDF before the project was over.
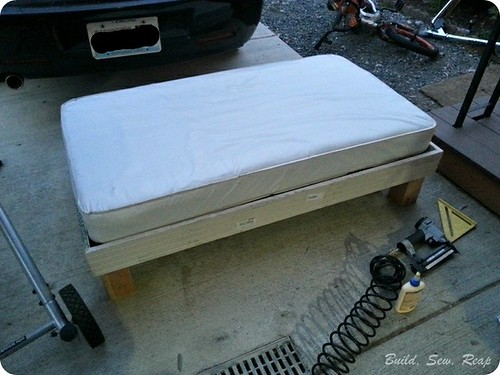
I started by building a base using pieces of door jamb that came with the pantry doors.
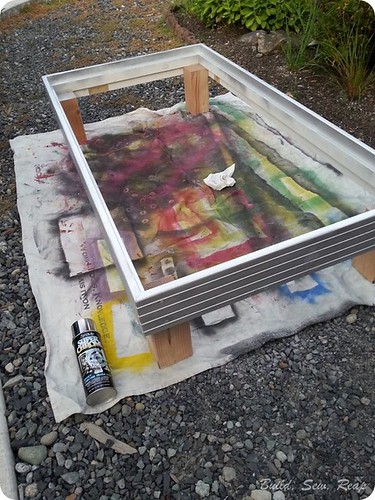
I also spray painted it with chrome spray paint.
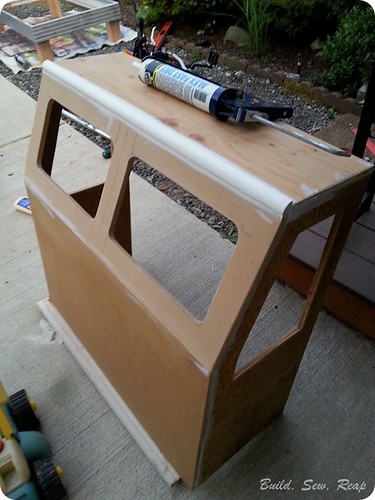
Then I got to building the top part of it. Each piece size and shape depended quite a bit on the wood I had. I just stared at the pile, figured out what would work and jumped in with both feet.
This:
became this:
Then I started adding details and painting.
And I added hinges to the front so we could open it up for easier sheet changes.
Then the details got really really intricate.
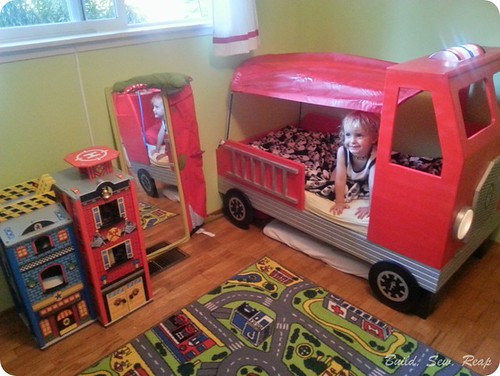
And finally, I moved it into his room and he was totally thrilled!!
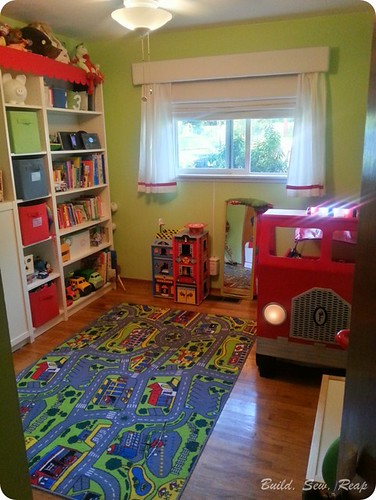
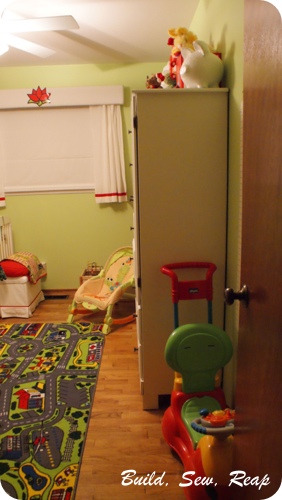
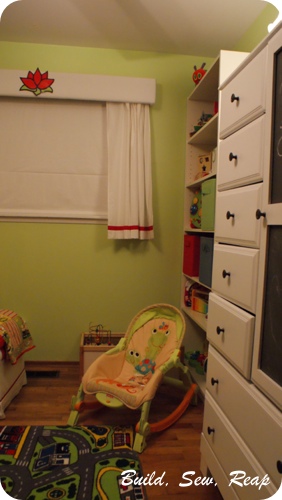
I also rearranged his room to better suit his new big-boy motif. I moved furniture, cleaned out toys and even sold off the biggest piece of furniture that was in his room. Here is the final look:
For this project, I purchased 2 tap lights, 1 light for the top, and some paint. I accomplished my goal of not buying any wood.
I love looking in his bright and playful room. I'm also thrilled that the colors I picked for his nursery have worked so well as he has grown up a bit. He loves his room too. Every night he tells me he wants to go to sleep in his fire truck bed.
Thank you for reading,
Julie
Showing posts with label Nursery. Show all posts
Updated Nursery - 1 Year Old Edition
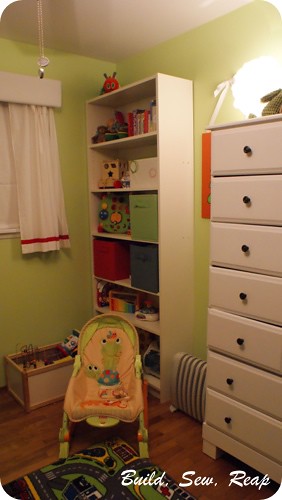
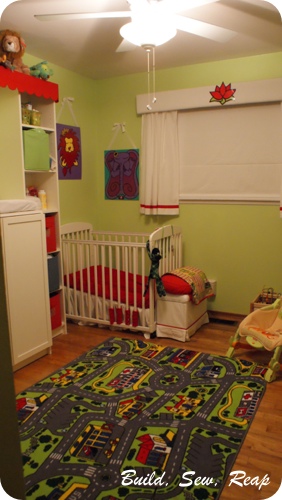
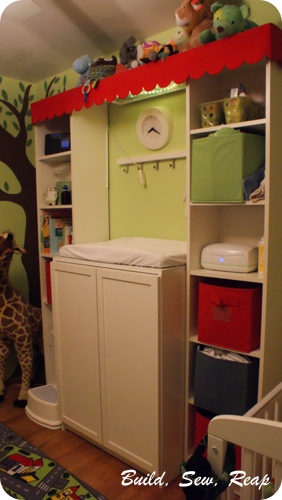
As you may recall, I completed the nursery design during my second trimester of pregnancy over a year ago. Now that the baby is 1, our needs have changed a little bit. He's bigger, walking a little bit, and he has lots of toys after celebrating his birthday and Christmas. When I redid the Snickerdoodle's room, I took a bookshelf out but knew we would someday want to use it again so we tucked it in my sewing area in the garage. Last night I retrieved it, loaded it into the baby's room and loaded it up with toys. Here's a tour of his room:
In an attempt to draw both boys into the room to play together, I found a fantastic play rug they really enjoy. We moved the serene white rug to our bedroom where it mostly just attracts cat barf (sigh).
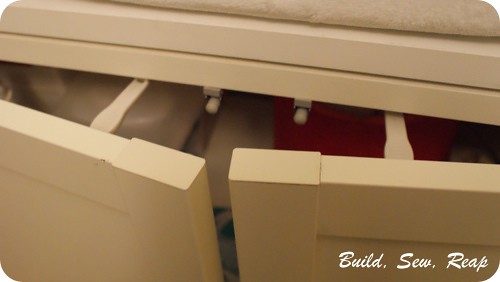
I also added some child locks on his cabinet since it contains the trash can as well as a can to hold his dirty cloth diapers until laundry day(s).
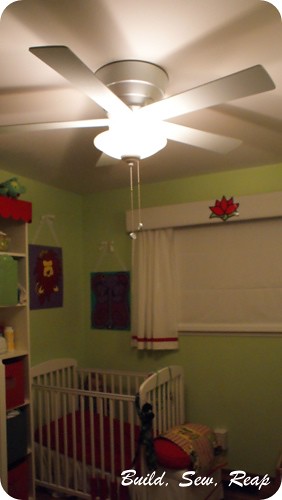
I also installed a ceiling fan. We really wished we had fans this past summer on the handful of hot days we have here in the Seattle area but we stuck it out then bought them at clearance prices at the end of the season. We don't have air conditioning so this will be a wonderful addition come summer. We put one in our bedroom too and I already love having it on at night.
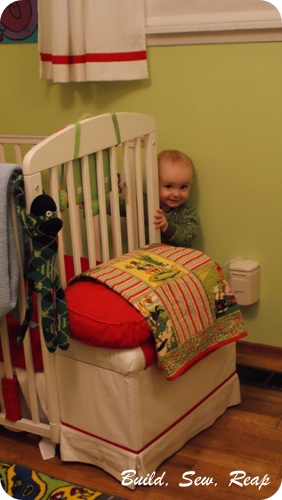
And finally one last picture of Mr. Mischief exploring the room while I took pictures
Thank you for reading,
Julie
In an attempt to draw both boys into the room to play together, I found a fantastic play rug they really enjoy. We moved the serene white rug to our bedroom where it mostly just attracts cat barf (sigh).
I also added some child locks on his cabinet since it contains the trash can as well as a can to hold his dirty cloth diapers until laundry day(s).
I also installed a ceiling fan. We really wished we had fans this past summer on the handful of hot days we have here in the Seattle area but we stuck it out then bought them at clearance prices at the end of the season. We don't have air conditioning so this will be a wonderful addition come summer. We put one in our bedroom too and I already love having it on at night.
(bonus points if you can find the hidden "object" in the picture)
And finally one last picture of Mr. Mischief exploring the room while I took pictures
Thank you for reading,
Julie
Oh No Piggy!
Since the Snickerdoodle had a piggy bank before he was even born, I figured it was high time Sugar Pop had a piggy bank for his room as well. After checking several stores, I found a really cute pig at a craft store. It was one of those white shiny ceramic pigs just begging to be painted. I wasn't going to paint it just yet until . . .
I got home from the store and he tumbled out of the bag and snapped an ear off. As you can see, I did my best to glue it back on but there was no disguising those cracks and missing pieces. After inadvertently teaching the Snickerdoodle some new vocabulary words, I decided to turn lemons into lemonade.
I now present to you . . .
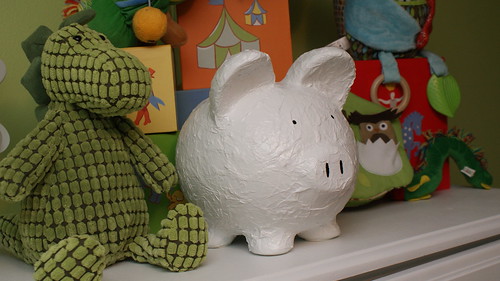
Torn up tissue paper mod podged piggy. He's still shiny white and he's still super cute, he just doesn't have a giant obvious crack in his ear.
It was a simple project really. I just ripped up a bunch of white tissue paper then section-by-section, I coated the piggy with mod podge and stuck the tissue paper in it. I allowed the tissue to wrinkle up quite a bit as I like that textured look. I worked on him off and on for days, allowing him to dry before adding more here and there. When I was content with his texture, I painted him using the same semi-gloss paint I had used on the furniture and trim in the nursery. I painted back on the eyes and nose and put him in his new special spot on Claudia.
Someday I'll give some paints to Sugar Pop and let him decorate it himself but not until he gains a little small motor control.
Thank you for reading,
Julie
I got home from the store and he tumbled out of the bag and snapped an ear off. As you can see, I did my best to glue it back on but there was no disguising those cracks and missing pieces. After inadvertently teaching the Snickerdoodle some new vocabulary words, I decided to turn lemons into lemonade.
I now present to you . . .
Torn up tissue paper mod podged piggy. He's still shiny white and he's still super cute, he just doesn't have a giant obvious crack in his ear.
It was a simple project really. I just ripped up a bunch of white tissue paper then section-by-section, I coated the piggy with mod podge and stuck the tissue paper in it. I allowed the tissue to wrinkle up quite a bit as I like that textured look. I worked on him off and on for days, allowing him to dry before adding more here and there. When I was content with his texture, I painted him using the same semi-gloss paint I had used on the furniture and trim in the nursery. I painted back on the eyes and nose and put him in his new special spot on Claudia.
Someday I'll give some paints to Sugar Pop and let him decorate it himself but not until he gains a little small motor control.
Thank you for reading,
Julie
I Love Chalkboard Paint
I really love chalkboard paint. I like to make sure I always have a can on hand. My latest chalkboard paint update landed on Claudia the Chifforobe.
If you'll recall, she started like this:
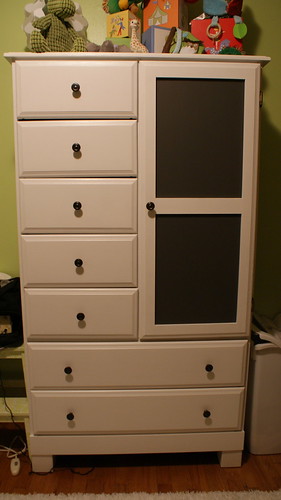
Was turned into this for the nursery:
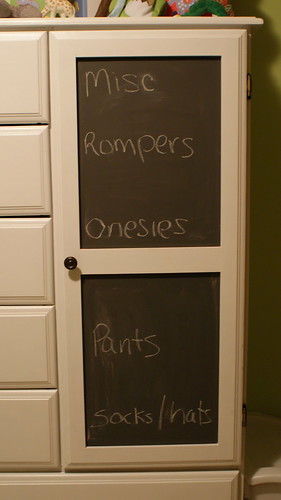
But then I kept moving stuff around in the drawers and my husband is going nuts trying to find clothing for the little guy so I thought I'd pop out the panels in Claudia's door, paint the back side with chalkboard paint then put the panels back in backwards. Now when you open the door you see the decorative panel which has no real value except I know that when we get tired of the chalkboard panels, we can just flip them back around. So here she is:
And with labels:
Someday we won't need to label the drawers and this can just be a fun area for doodles and notes or for little Tigger to practice writing.
Do you like chalkboard paint? What have you used it for? Feel free to leave a comment and even include a link if you've got pictures.
Thank you for reading,
Julie
If you'll recall, she started like this:
(I think she looks handsome)
And with labels:
Do you like chalkboard paint? What have you used it for? Feel free to leave a comment and even include a link if you've got pictures.
Thank you for reading,
Julie
Make Your Own Rocker
What was I thinking?!?! I designed a nursery with no rocking chair. I think I underestimated how much time I logged in the rocker-recliner we had in Snickerdoodle's original nursery. We sold that because it would have taken up half of this tiny little nursery but I really should have replaced it with something that would fit. I guess my oversight gave me a chance to get creative though.
Do you remember this chair:
I did a bunch of research, looking for just the right small chair and decided on this chair from Ikea. Then I found someone selling a used one on Craigslist for dirt cheap but without the cover. I bought that then purchased the cover new. Unfortunately the cover wasn't white enough so I took a chance and bleached it and it came out perfect.
Perfect except it is just a chair and it doesn't rock and we don't have a single indoor chair that rocks in our entire house and the baby sure likes movement.
I started pondering this issue and even went so far as to put a request on the local Freecycle board for a rocking chair thinking I could take the runners off one and attach them to this chair. No such luck, I got one response and it turned out to be a glider. I managed to attach the glider gear to the bottom of this chair but the results were so absurd I didn't even try to make it work.
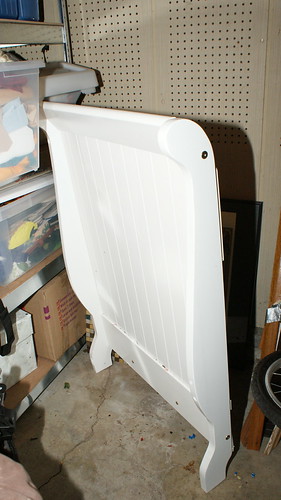
After much more pondering, I remembered I had the parts to an old drop-side crib in our garage and it had curved sides.
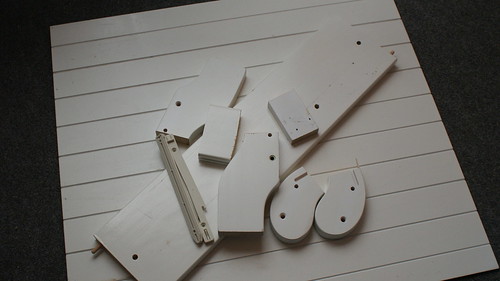
I got to work taking it apart and cutting it up a bit (here's what I didn't use):
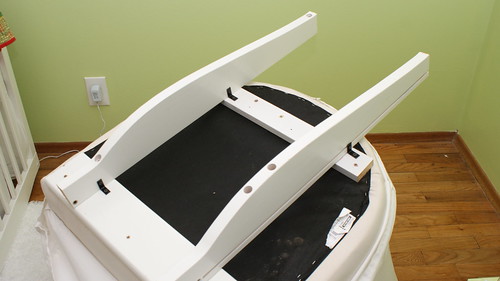
Then I attached my new homemade runners to the bottom of the chair:
I flipped the chair over to confirm it still looked good:
But the best part is . . . IT WORKS!!! I'm giddy with this no cost project.
Now what should I do with the scrap pieces? I'll think of something.
Thank you for reading,
Julie
Update - Ikea Hackers published my hack!! Check it out here.
Do you remember this chair:
I did a bunch of research, looking for just the right small chair and decided on this chair from Ikea. Then I found someone selling a used one on Craigslist for dirt cheap but without the cover. I bought that then purchased the cover new. Unfortunately the cover wasn't white enough so I took a chance and bleached it and it came out perfect.
Perfect except it is just a chair and it doesn't rock and we don't have a single indoor chair that rocks in our entire house and the baby sure likes movement.
I started pondering this issue and even went so far as to put a request on the local Freecycle board for a rocking chair thinking I could take the runners off one and attach them to this chair. No such luck, I got one response and it turned out to be a glider. I managed to attach the glider gear to the bottom of this chair but the results were so absurd I didn't even try to make it work.
After much more pondering, I remembered I had the parts to an old drop-side crib in our garage and it had curved sides.
I got to work taking it apart and cutting it up a bit (here's what I didn't use):
Then I attached my new homemade runners to the bottom of the chair:
I flipped the chair over to confirm it still looked good:
But the best part is . . . IT WORKS!!! I'm giddy with this no cost project.
Now what should I do with the scrap pieces? I'll think of something.
Thank you for reading,
Julie
Update - Ikea Hackers published my hack!! Check it out here.
How to Make a Roman Shade
I was recently asked to do a tutorial on how to make a blackout Roman shade. I didn't take a whole lot of pictures when I made the one for the nursery but I do believe the ones I have will be enough. Please don't hesitate to ask if you have questions.
Materials:
Add 1.5 inches to the side-to-side measurement, this is the width you'll be cutting the fabric and the blackout lining. Add 6 inches plus 2.5 inches for each horizontal support you'll want in your shade. I find that a support every 10-12 inches looks nice and works well.
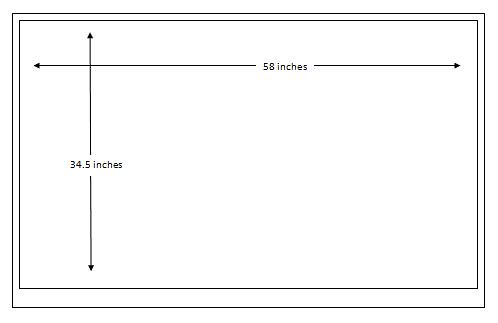
Side-to-side measurement: 59.5 inches
Top-to-bottom measurement: 34.5 + 6 + 2.5 + 2.5 = *45.5 inches
*I actually tend not to cut for height, I just leave it as long as I can but I now know that I will need at least 45.5 inches of height out of my fabric.
Cut one piece of your decorative fabric and one of your blackout lining using the measurements above. Lay out your fabric and blackout lining with right sides facing one another. Pin the two sides and the bottom edge leaving the top edge open. Be careful to pin within the 5/8 inch seam allowance or you might be able to see pin holes through your completed shade. Stitch those three sides together using a straight stitch.
Turn the whole thing right side out and press using the lowest heat setting allowed by either your decorative fabric or the blackout lining fabric. You don't want to melt either layer.
Optional: Top stitch the three sides for an extra polished look. I like to use a thread color to match my decorative fabric and white bobbin thread to match the blackout fabric so that it looks good from both sides.
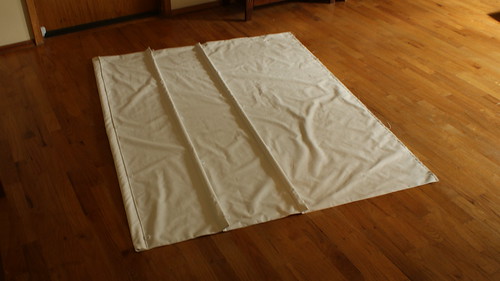
Now comes lots of measuring and pinning to create the horizontal casings to hold your dowels. Here's a look at the final result of this next step:
Fold up the bottom edge around one dowel (not too tight, you don't want to make it too hard to feed the dowel in after you sew) to get the correct casing size. Remove the dowel and carefully measure to ensure your casing is consistent from one side to the next. Pin in place and stitch down.
Measure to determine where you'll place your next horizontal dowel. I used 11.5 inches. Using your casing measurement from the last step, fold your fabric over and create your next casing. Remember, you want your distance (the 11.5 in my case) to be where the stitching lies so pin accordingly. Stitch.
Repeat for each casing until you have as many as you need for your shade. As you can see, in my case, I had one at the bottom then just two additional ones. Insert all your dowels.
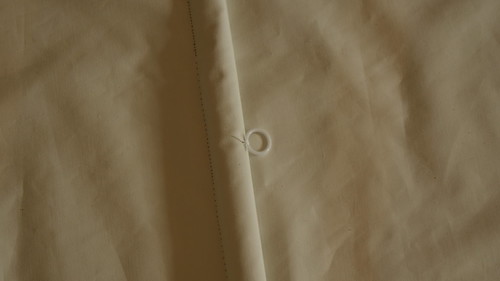
Next you'll need to hand stitch the plastic rings to the back. I used 5 per casing. The most important thing here is that they all line up with one another for each row. Stitch them securely with strong thread.
Once those are all in place, lay the shade out face-down and measure from the bottom edge marking your original window height plus 1/4 of an inch on the blackout fabric. Make several marks all along. Place the 1 inch side of the 1x4 wood against these marks and wrap the excess fabric around it and staple it in place. Trim excess fabric.
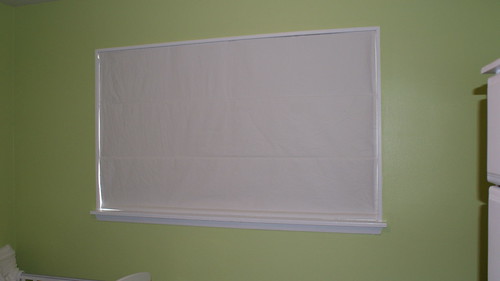
Now you're ready to screw the whole shade up into your window casing. Position the covered wood up against the top inside of your window casing and screw up through the fabric. Make sure the shade is facing out towards the room and that the front edge is where you want it.
Screw the eye bolts into the wood above each line of rings.
Now you're ready to add in the cording. Starting on the side where you'll want the cords to hang for opening and closing, thread the cord through all the eye bolts to the far side then down through the rings and tie the end securely to the bottom ring. Cut the other end of the cord (back where you started) 12-18 inches below the first eye bolt.
Repeat for the next row of rings. Starting at the same point again, thread the cord through all EXCEPT the last eye bolt then through the 2nd to last rings and tie off to the bottom ring. Cut the other end of the cord the same length as your first piece.
Repeat for each line, stopping one eye bolt short of the last. In my case, I had 5 cords when I was finished. Tie all the cords together in a knot at the end where you clipped them 12-18 inches long.
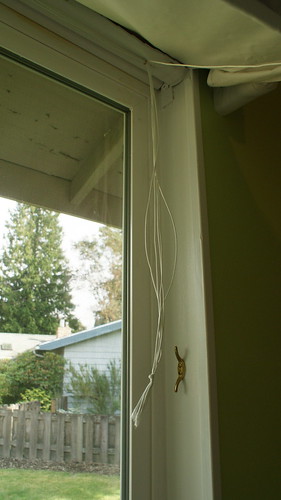
Attach your cleat with the provided hardware and you're ready to open your shade!! Pull that clump of cords gently and you should see the whole thing slide up nice and easy. When you've pulled it to the height you want it, wrap it around the cleat a few times to hold it open. You can also buy fancy hardware to make this work like blinds but I haven't found that the extra expense is worth it - the cleat works great.
Remember, if you have small children, PLEASE PLEASE PLEASE wrap any excess cording up so they can't get to it and hurt themselves (not like in this picture where you see it dangling).
Thank you for reading,
Julie
Materials:
- Blackout lining
- Decorative fabric (I often use sheets since they're available in larger sizes than by-the-yard fabric)
- Dowels for horizontal stabilization - I've used all sorts of stuff, lightweight is key but anything that's straight and that can be slipped into a casing will work.
- 1x2 scrap lumber for the top
- Plastic rings (I use these)
- Drapery cord (something like this)
- Screw in eye bolts (from the hardware store most likely)
- 1 small cleat
- Thread
- Staple gun and staples
Add 1.5 inches to the side-to-side measurement, this is the width you'll be cutting the fabric and the blackout lining. Add 6 inches plus 2.5 inches for each horizontal support you'll want in your shade. I find that a support every 10-12 inches looks nice and works well.
Side-to-side measurement: 59.5 inches
Top-to-bottom measurement: 34.5 + 6 + 2.5 + 2.5 = *45.5 inches
*I actually tend not to cut for height, I just leave it as long as I can but I now know that I will need at least 45.5 inches of height out of my fabric.
Cut one piece of your decorative fabric and one of your blackout lining using the measurements above. Lay out your fabric and blackout lining with right sides facing one another. Pin the two sides and the bottom edge leaving the top edge open. Be careful to pin within the 5/8 inch seam allowance or you might be able to see pin holes through your completed shade. Stitch those three sides together using a straight stitch.
Turn the whole thing right side out and press using the lowest heat setting allowed by either your decorative fabric or the blackout lining fabric. You don't want to melt either layer.
Optional: Top stitch the three sides for an extra polished look. I like to use a thread color to match my decorative fabric and white bobbin thread to match the blackout fabric so that it looks good from both sides.
Now comes lots of measuring and pinning to create the horizontal casings to hold your dowels. Here's a look at the final result of this next step:
Fold up the bottom edge around one dowel (not too tight, you don't want to make it too hard to feed the dowel in after you sew) to get the correct casing size. Remove the dowel and carefully measure to ensure your casing is consistent from one side to the next. Pin in place and stitch down.
Measure to determine where you'll place your next horizontal dowel. I used 11.5 inches. Using your casing measurement from the last step, fold your fabric over and create your next casing. Remember, you want your distance (the 11.5 in my case) to be where the stitching lies so pin accordingly. Stitch.
Repeat for each casing until you have as many as you need for your shade. As you can see, in my case, I had one at the bottom then just two additional ones. Insert all your dowels.
Next you'll need to hand stitch the plastic rings to the back. I used 5 per casing. The most important thing here is that they all line up with one another for each row. Stitch them securely with strong thread.
Once those are all in place, lay the shade out face-down and measure from the bottom edge marking your original window height plus 1/4 of an inch on the blackout fabric. Make several marks all along. Place the 1 inch side of the 1x4 wood against these marks and wrap the excess fabric around it and staple it in place. Trim excess fabric.
(This is where pictures along the way would have been ideal, I'm not sure if this is clear or not.)
Now you're ready to screw the whole shade up into your window casing. Position the covered wood up against the top inside of your window casing and screw up through the fabric. Make sure the shade is facing out towards the room and that the front edge is where you want it.
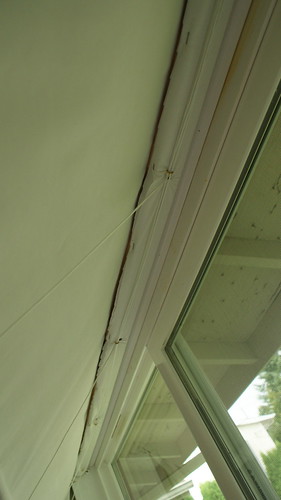
(Peeking up under the fully installed shade)
Screw the eye bolts into the wood above each line of rings.
Now you're ready to add in the cording. Starting on the side where you'll want the cords to hang for opening and closing, thread the cord through all the eye bolts to the far side then down through the rings and tie the end securely to the bottom ring. Cut the other end of the cord (back where you started) 12-18 inches below the first eye bolt.
Repeat for the next row of rings. Starting at the same point again, thread the cord through all EXCEPT the last eye bolt then through the 2nd to last rings and tie off to the bottom ring. Cut the other end of the cord the same length as your first piece.
Repeat for each line, stopping one eye bolt short of the last. In my case, I had 5 cords when I was finished. Tie all the cords together in a knot at the end where you clipped them 12-18 inches long.
Attach your cleat with the provided hardware and you're ready to open your shade!! Pull that clump of cords gently and you should see the whole thing slide up nice and easy. When you've pulled it to the height you want it, wrap it around the cleat a few times to hold it open. You can also buy fancy hardware to make this work like blinds but I haven't found that the extra expense is worth it - the cleat works great.
Remember, if you have small children, PLEASE PLEASE PLEASE wrap any excess cording up so they can't get to it and hurt themselves (not like in this picture where you see it dangling).
Thank you for reading,
Julie
Nursery Reveal
I've been showing you bits and pieces of the nursery for weeks now but it is finally totally finished!! After I got the last project completed, I just stood there in the middle of the room feeling strangely unburdened. I LOVED working on the nursery but sometimes having an ever expanding to do list in my head is overwhelming. I'm sure I'll add things to it here and there over the next few months but I'm thrilled to say that I completed all the main work during my 2nd trimester which was my overall goal.
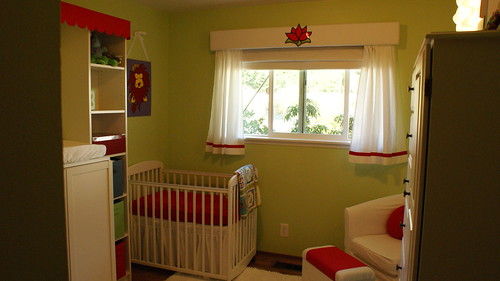
So, without further ado, here it is:
The wall need an extraordinary amount of prep work but once that was finished, I rolled on 3+ coats of Olympic Paint's "Lettuce Alone" in their no VOC / low odor paint.
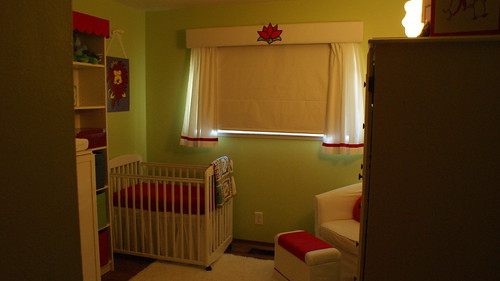
The crib is the DaVinci Alpha Mini Rocking Crib that I purchased off of Craigslist. I had to touch up the paint a little in places but Olympic Paint's "Delicate White" in semi-gloss matched perfectly. I made the fitted sheet out of "ultra cuddle" fabric and is a deep red to match the other reds in the room.
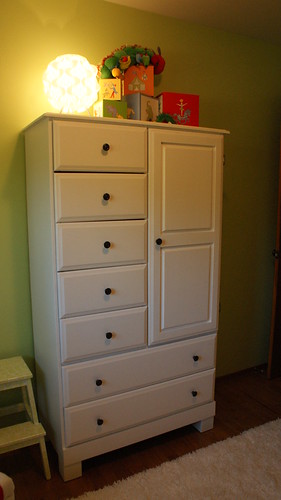
Here we have Claudia Chifforobe which was originally stained wood and in Snickerdoodle's nursery when he was an infant. It had a rough life though and needed to be restained or painted so I chose to paint it.
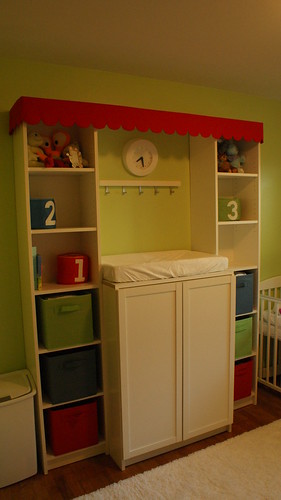
This is another piece I used the Delicate White paint on. The light on top is the Fillsta lamp from Ikea attached to a Dimma switch also from Ikea so it can be set really low and used as a nightlight.
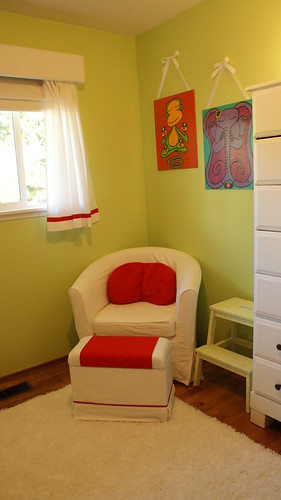
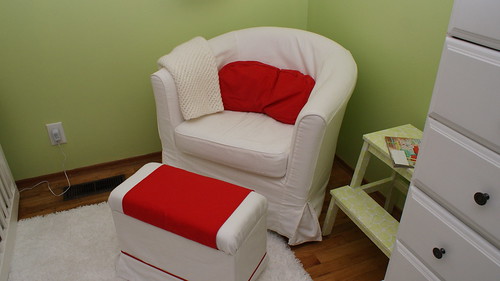
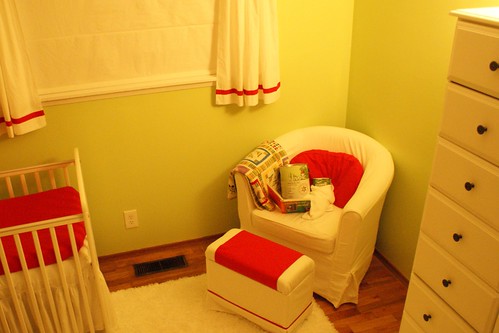
Just next to Claudia is the reading/feeding corner.
The chair is the Ikea Tullsta but I purchased ours off of Craigslist and then got a new Ektorp cover in Blekinge white which I bleached to get it the stark white you see here. The foot stool was something I built one weekend using scrap wood and fabric from other projects. The top lifts off to reveal storage beneath.
The step stool you see next to it was an Ikea Bekvam we had on hand that I painted. To me, step stools are infinitely more useful to have around than small tables (that can be pulled down on crawling babies' heads) so that's going to be the table for my drink and book for those late night feedings.
We also didn't want to purchase a new changing table but the one for Snickerdoodle's nursery was too big so we sold it and I put together a changing station using Ikea's Billy bookcases.
For more on how I set this whole thing up, you can check out my Ikea Hack 1 and Ikea Hack 2 posts.
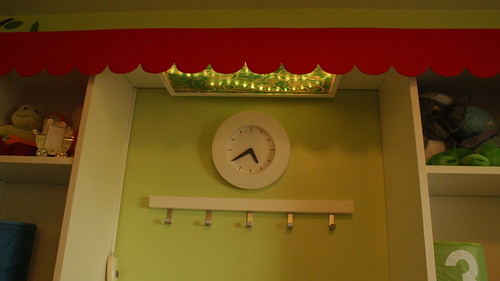
Up above the changing table is a cool light I created using a rope light, stuff from around the house and Snickerdoodle's mad finger painting skills.
I wanted something to provide just a little bit of light but that would also be interesting for the baby to look at during changes. This is also attached to a Dimma switch from Ikea so it can be turned down nice and low for sleepy nighttime changes.
Now, on to the window treatments:
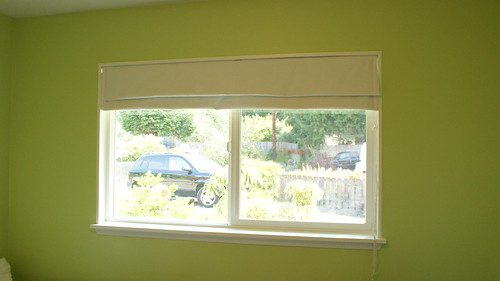
Somehow I managed to miss blogging about the window treatments but here they are closed. The blackout Roman shade is something I made out of an old sheet, blackout fabric from JoAnn (on sale no less, hooray) and some random materials found in our garage to hold each section straight. The curtains are also parts of the sheet with some red bias tape stitched down to the bottom edge. Having curtains AND a shade give us options on how much light and fresh air to let in. Finally, the cornice across the top is one I made out of scrap wood, foam and more sheet remnants. The lotus flower is just printed on photo paper and is significant because the artwork my awesome cousin did also contains lotus flowers.
And now, the artwork:
This stunning artwork was created by my cousin Camille of Mille.me (also on Facebook). She posted pictures of these paintings several months ago and I knew right away they would set the stage for the entire nursery (which I was still only dreaming about). I can't express enough how much I truly truly love these wonderful paintings she calls Buddhamals. Thank you Camille!!
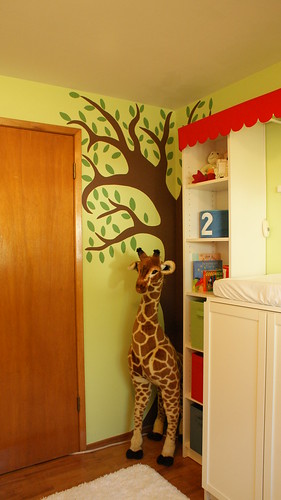
The last few touches I added to the room included Daisy the giraffe (free through a friend, yippee) and a hand painted wall mural:
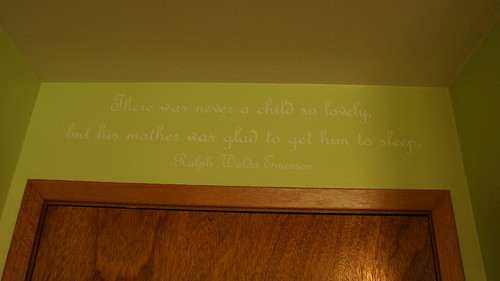
And finally, the last thing you see as you leave the room - a quote by Ralph Waldo Emerson above the door:
Now I just need one more thing for the nursery but he won't be here until around December 22. I'm glad the room is finished though, one less thing to worry about as my belly grows and grows and grows!
UPDATE: I entered the Olympic Paint and Stain's Simply Done contest and wanted to include my entry photo on this blog post. The criteria was that a can of Olympic paint had to be in the photo (oh, and of course, that I used Olympic paint which was already done) so I set up "Mama paint" reading Goodnight Moon to "baby paint" on the reading chair.
Thank you for reading,
Julie
Ikea Hackers shared my build! Check it out here.
I'm sharing on:
HGTV's Rate My Space - come on by and put in your vote!
So, without further ado, here it is:
The wall need an extraordinary amount of prep work but once that was finished, I rolled on 3+ coats of Olympic Paint's "Lettuce Alone" in their no VOC / low odor paint.
The crib is the DaVinci Alpha Mini Rocking Crib that I purchased off of Craigslist. I had to touch up the paint a little in places but Olympic Paint's "Delicate White" in semi-gloss matched perfectly. I made the fitted sheet out of "ultra cuddle" fabric and is a deep red to match the other reds in the room.
Here we have Claudia Chifforobe which was originally stained wood and in Snickerdoodle's nursery when he was an infant. It had a rough life though and needed to be restained or painted so I chose to paint it.
This is another piece I used the Delicate White paint on. The light on top is the Fillsta lamp from Ikea attached to a Dimma switch also from Ikea so it can be set really low and used as a nightlight.
Just next to Claudia is the reading/feeding corner.
The chair is the Ikea Tullsta but I purchased ours off of Craigslist and then got a new Ektorp cover in Blekinge white which I bleached to get it the stark white you see here. The foot stool was something I built one weekend using scrap wood and fabric from other projects. The top lifts off to reveal storage beneath.
The step stool you see next to it was an Ikea Bekvam we had on hand that I painted. To me, step stools are infinitely more useful to have around than small tables (that can be pulled down on crawling babies' heads) so that's going to be the table for my drink and book for those late night feedings.
We also didn't want to purchase a new changing table but the one for Snickerdoodle's nursery was too big so we sold it and I put together a changing station using Ikea's Billy bookcases.
For more on how I set this whole thing up, you can check out my Ikea Hack 1 and Ikea Hack 2 posts.
Up above the changing table is a cool light I created using a rope light, stuff from around the house and Snickerdoodle's mad finger painting skills.
Now, on to the window treatments:
Somehow I managed to miss blogging about the window treatments but here they are closed. The blackout Roman shade is something I made out of an old sheet, blackout fabric from JoAnn (on sale no less, hooray) and some random materials found in our garage to hold each section straight. The curtains are also parts of the sheet with some red bias tape stitched down to the bottom edge. Having curtains AND a shade give us options on how much light and fresh air to let in. Finally, the cornice across the top is one I made out of scrap wood, foam and more sheet remnants. The lotus flower is just printed on photo paper and is significant because the artwork my awesome cousin did also contains lotus flowers.
And now, the artwork:
This stunning artwork was created by my cousin Camille of Mille.me (also on Facebook). She posted pictures of these paintings several months ago and I knew right away they would set the stage for the entire nursery (which I was still only dreaming about). I can't express enough how much I truly truly love these wonderful paintings she calls Buddhamals. Thank you Camille!!
The last few touches I added to the room included Daisy the giraffe (free through a friend, yippee) and a hand painted wall mural:
And finally, the last thing you see as you leave the room - a quote by Ralph Waldo Emerson above the door:
"There was never a child so lovely,
but his mother was glad to get him to sleep."
Now I just need one more thing for the nursery but he won't be here until around December 22. I'm glad the room is finished though, one less thing to worry about as my belly grows and grows and grows!
UPDATE: I entered the Olympic Paint and Stain's Simply Done contest and wanted to include my entry photo on this blog post. The criteria was that a can of Olympic paint had to be in the photo (oh, and of course, that I used Olympic paint which was already done) so I set up "Mama paint" reading Goodnight Moon to "baby paint" on the reading chair.
Thank you for reading,
Julie
Ikea Hackers shared my build! Check it out here.
I'm sharing on:
HGTV's Rate My Space - come on by and put in your vote!

Labels:
Bedroom,
build,
crafting,
Decorating,
home,
Kids,
motherhood,
Nursery,
Organization,
Sewing,
Silhouette,
tutorials
Subscribe to:
Posts (Atom)