Showing posts with label Superhero. Show all posts

How to make costume gloves

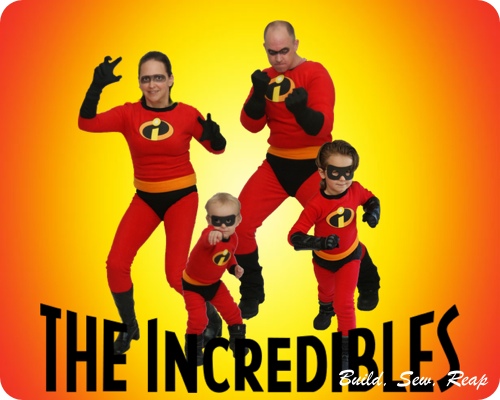
For Halloween, the hubs and I both needed gloves to go with our Incredibles costumes.

Incredibles

Fabric isn't a problem but finding elbow-high gloves for each of us was a daunting task so I set out to make us each a pair.

For mine, I used some black swimsuit fabric. It has LOTS of stretch so I wasn't worried much about the fit. For Mr. Incredible's gloves, I used a t-shirt knit. That worked out great as well. Whatever you decide to use, make sure it has lots of stretch and if one direction stretches more than another, make sure the stretch is side-to-side on your hand, not from fingertip to wrist.

The following tutorial includes pictures from my first glove which I added fabric to in order for it to reach to my elbows. For my husband's gloves, I included the arm part by just

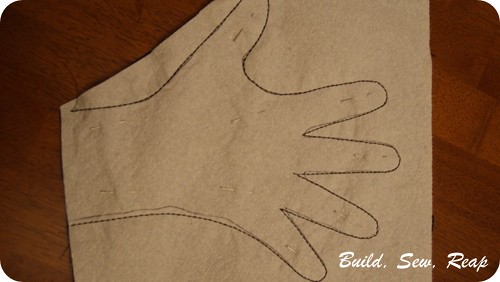
Start by tracing around your hand on a paper towel or piece of tissue paper. Pin the paper towel to two layers of fabric, right sides together.
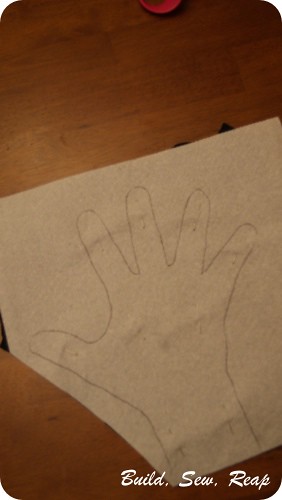
DSC07807

Using a stretch stitch on your sewing machine,
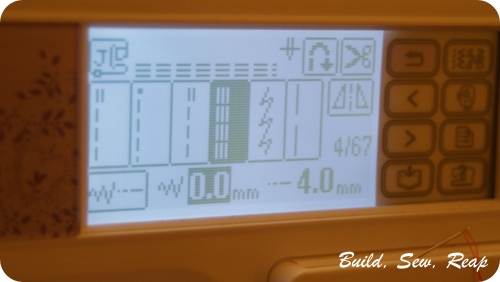
Costume gloves by Julie at Build, Sew, Reap

carefully stitch around the hand tracing.
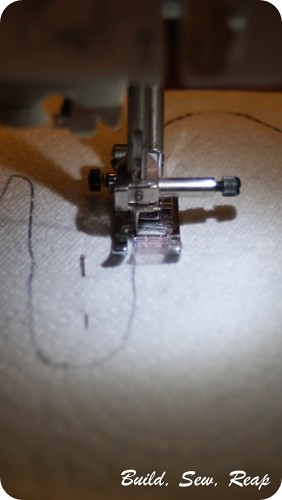
DSC07809

Costume gloves by Julie at Build, Sew, Reap

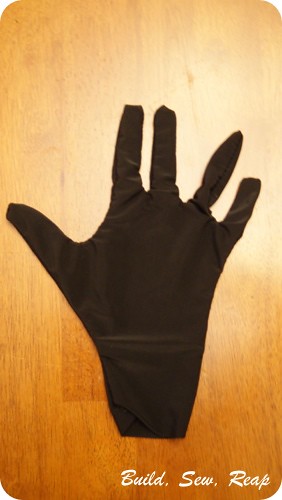
Now cut out the hand, trimming close to the stitching.
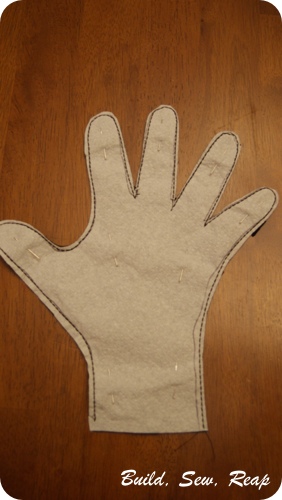
Costume gloves by Julie at Build, Sew, Reap


Remove the pins and rip off the paper towel. Don't worry if it doesn't all come off, you won't notice it. If you're worried that you will, you should be able to soak off whatever remains.
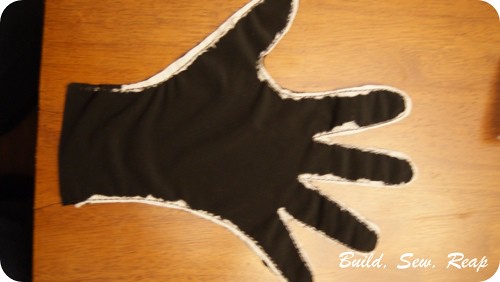
Costume gloves by Julie at Build, Sew, Reap

Turn the glove right side out.

Costume gloves by Julie at Build, Sew, Reap

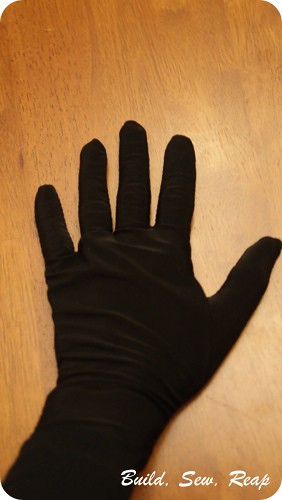
And try it on!

Costume gloves by Julie at Build, Sew, Reap

This only works with really stretchy fabric but I have to say, it was a super quick way to crank out some super hero gloves. They were comfortable too. I'll probably think twice before throwing out another paint-splattered, hole growing t-shirt ... perhaps some fun gloves can be created out of it instead.

Thank you for reading,
Julie



Superhero Party Cake

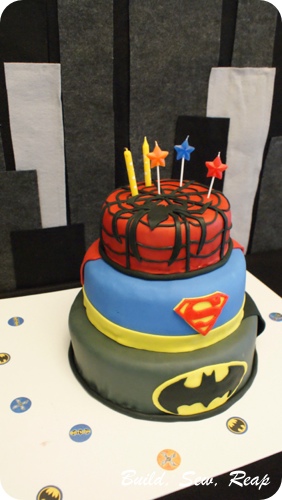
After pinning and dreaming and giving myself lots of pep talks, I attempted what seemed like the impossible (to me). My biggest problem with cakes is that I can't start them a couple of weeks in advance and have plenty of time to redo stuff I don't like. With cake - it's all or nothing. I wait until two nights before the party to bake the cakes so they're cooled the day before which makes decorating infinitely easier.

DSC04658

The bottom cake was a 2-layer yellow cake as was requested by the birthday boy. The middle cake was a 2-layer homemade vegan chocolate cake (for me mostly but hey, I made it, I needed to be able to enjoy some of it right?). The top cake was a 2-layer Bob's Red Mill gluten free yellow cake mix. The Snickerdoodle had no idea what I had up my sleeve so after staying up late into the night the night before his party, I was eager to show it to him first thing the next morning. When he saw it, he said just what I needed to hear, "Wow Mommy! That's exactly the cake I wanted you to make me!"

He loved it, as did all his little superhero friends.

DSC04720

Thank you for reading,
Julie
Curious about the rest of the superhero themed party? Check out
Superhero Party Invitations
Superhero Party Decorations
Superhero Party Capes


Superhero Party Capes

I thought the next post would be about the cake but I wanted to sneak this one in first. The cake post should go up on Saturday.

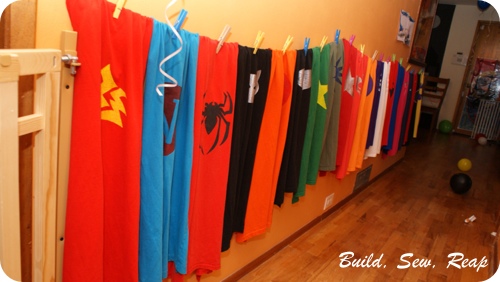
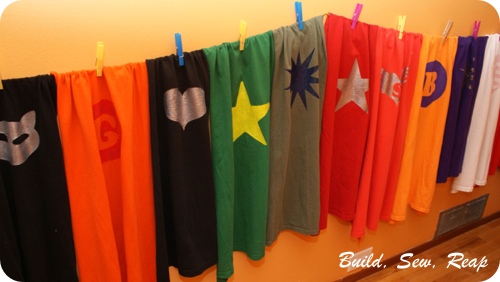
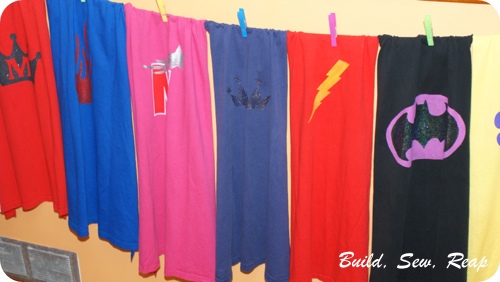
I made a t-shirt cape for each kiddo who attended the Snickerdoodle's superhero party. I tried to figure out what each one would like best and make something personalized. I'll include a tutorial below but here are the 21 capes hanging on a clothesline down our hallway inside the house:

DSC04641

I hit the $1 rack of t-shirts at Goodwill and picked the brightest t-shirts they had in size adult medium. I even bought some of the ones with the ugliest possible front graphics figuring nobody else would ever buy them. The only criteria I had was that the backs be completely plain and that there were no side seams. Once I cut them all out (over several evenings), I began using my Silhouette to cut out freezer paper to fun designs and painted each cape with a different design. For the party, I printed out address label stickers with each child's first name to stick to the capes so we'd know who should get which cape.

DSC04640

DSC04635

So now on to the tutorial. There are lots of tutorials out there but after reading several, here's the process I found was quickest, easiest and produced the best results.

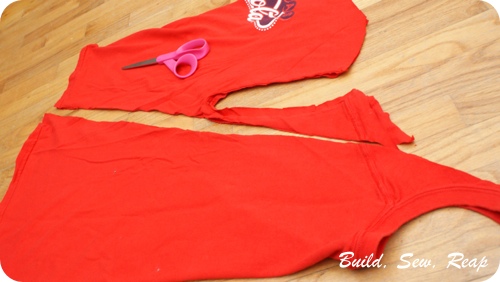
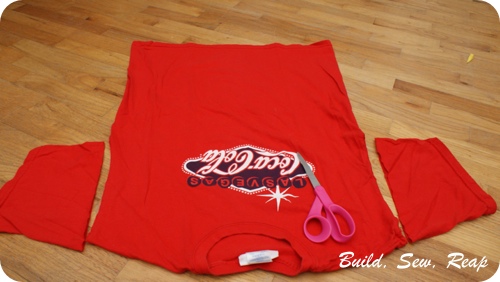
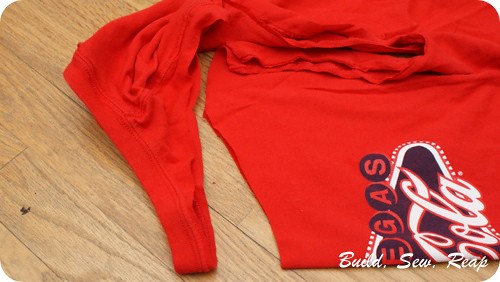
First, lay the t-shirt out flat with the front side up. Cut off the arms. It doesn't really matter which side of the seam you cut on but I found I was able to match up the sides better in the next step if I cut on the sleeve side of the seam.

DSC04390

Next, fold the shirt so that the front of the neck line is folded in half together. Don't fold the whole t-shirt in half, you more need to just grab the very center of the front neckline and fold so then the very center of the back neckline is not folded within it but folded out away from the front.

Start your cut at the front center and snip just below the neck ribbing for a couple of inches then angle out so that you cut to the shoulder seam about 2 1/2 inches from the neck hole. At that point, snip to the arm hole next to the shoulder seam.

DSC04391

It should now be easier to flatten out your whole project so that the front is folded in half on one side and the back is folded in half towards you. Clip from your last cut all the way to the bottom edge of the shirt while angling out towards the front.

DSC04392

The back of the shirt now serves as a fantastic cape with the original neck binding of the t-shirt being the neck of the cape. Decorate and give to your favorite superhero!

Thank you for reading,
Julie


Superhero Party Decorations

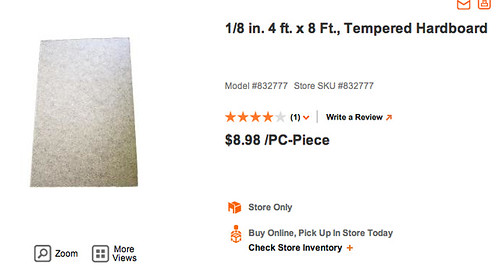
I set out to find a material I could cut easily and that came in sheets bigger than readily available foam core board (which is actually available at Dollar Tree in case you don't need something bigger - $1 is a great price!!). I ended up at Home Depot because I'm pretty sure they have everything I could ever need when I don't know what it is. While pricing out plywood, I came across hardboard which ended up being exactly what I needed.

Screen Shot 2013-04-09 at 8.20.15 AM

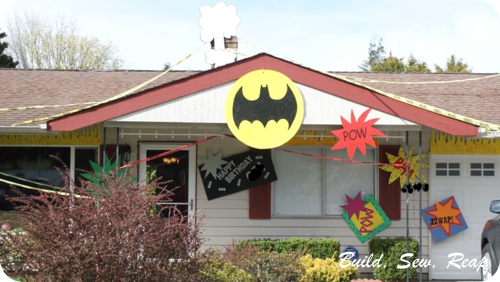
It is easy to cut with a jigsaw, holds paint well and is just sturdy enough to make all sorts of stuff out of it. I made a bunch of signs, flames and an explosion. The hubs mounted them to the house using special nails made for panelboard. I recommend these because they hold on to the thin wood really well. I tried using the nail gun for part of the project but they all pulled through the hardboard.

DSC04663

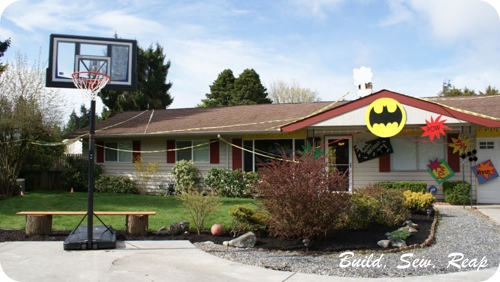
The bat signal had to be front and center since the Snicerdoodle was dressed up as Batman for the party. I cut out flame shapes for above the garage and two of the front windows, there's an explosion on the chimney and then you can see the various comic bubbles throughout.

And stepping back, here are some pictures of the rest of the house.

DSC04665


DSC04619

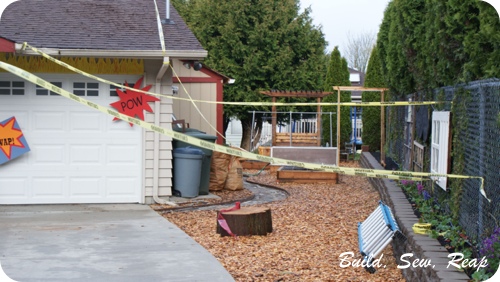
The hubs picked up some caution tape that he strung throughout the property. Originally we were just going to use a little along the back of our property so the kiddos wouldn't wander into the neighbor's yard but the roll was so big, he just kept going with it. It definitely gave the house a look of chaos, as if the villains really had attacked. It was so fun!

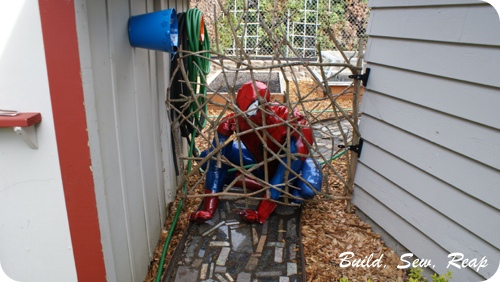
We also picked up a gigantic inflatable Spiderman on Amazon and inflated it ourselves using the air compressor. We didn't want him to be helium. He looked great on the garden side of the gate I just made (going to have to post about that too). It mostly kept the kiddos out of our garden which was what we were aiming for.

DSC04667

I think he even scared a few people (insert evil laugh).

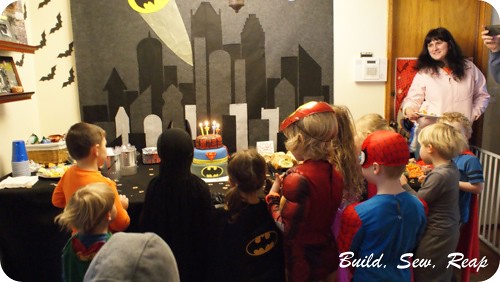
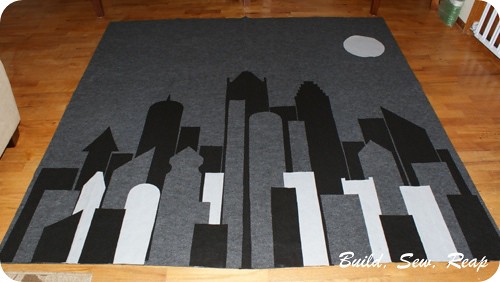
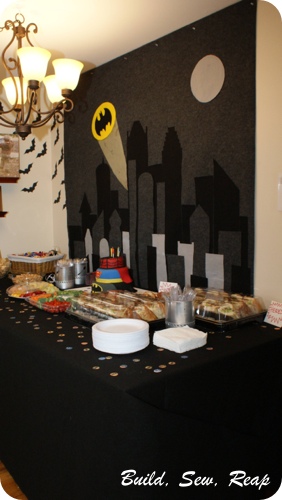
Moving inside. I bought about 800 yards of black and grey felts and made a cool backdrop to hang on the wall behind the food table. Here it is partially assembled:

DSC04497

This was pretty easy to put together. I figured out how big to cut the background then just started with black buildings, moved on to dark grey, then light grey then did a mix at the front. I was really happy with the end product.

I also added a bat signal before it went up on the wall. The signal is also felt but the light beam is organza that I painted with Mod Podge before cutting it out. I just laid it on some freezer paper and coated it well, let it dry then cut the triangle to serve as the light beam.

DSC04674

At the Snickerdoodle's suggestion, we used our Halloween bats throughout the living and dining rooms to decorate the walls. We also had some helium balloons and streamers.

I thought the place looked great and the kiddos really seemed to enjoy the superhero theme. Up next - the cake!!

Thank you for reading,
Julie


Superhero Party Invitations

We just celebrated the Snickerdoodle's 5th birthday this past Saturday. We love going up and over the top with the themes he picks and this year he wanted to do a superhero party. We knew that would be loads of fun so we approved his request and ran with it.

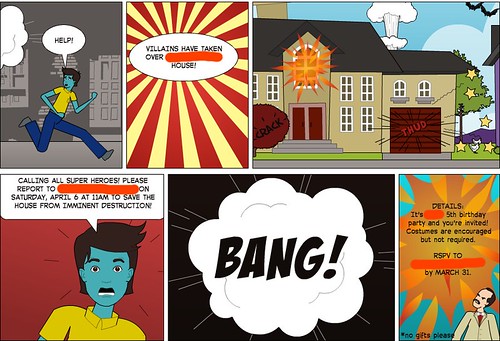
I looked around online for a website that would allow me to create my own comic for the invitations. I ended up using Pixton. I found their site was easy to use and had enough flexibility for me to make what I wanted to. Here's the final product:

Pixton_Comic_Obi_by_rain25girl-3

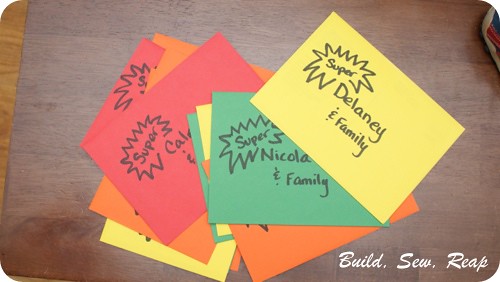
I uploaded the file to cardstore.com (my favorite place to order cards) and set some to be sent straight to our friends and a stack of others for us to hand out to those we see regularly in person. The ones that were sent out by cardstore were sent as postcards which I thought was fun. For the ones we handed out ourselves, I put each one in a brightly colored envelope:

DSC04409

The invitations were a huge hit and they set the stage for the super fun party on Saturday. Next post - Superhero party decorations!

Thank you for reading,
Julie


Related Posts Plugin for WordPress, Blogger...