
Materials:
- Blackout lining
- Decorative fabric (I often use sheets since they're available in larger sizes than by-the-yard fabric)
- Dowels for horizontal stabilization - I've used all sorts of stuff, lightweight is key but anything that's straight and that can be slipped into a casing will work.
- 1x2 scrap lumber for the top
- Plastic rings (I use these)
- Drapery cord (something like this)
- Screw in eye bolts (from the hardware store most likely)
- 1 small cleat
- Thread
- Staple gun and staples
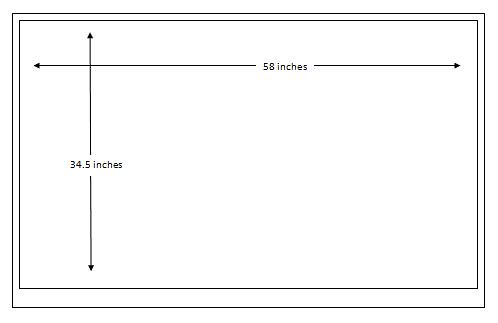
Side-to-side measurement: 59.5 inches
Top-to-bottom measurement: 34.5 + 6 + 2.5 + 2.5 = *45.5 inches
*I actually tend not to cut for height, I just leave it as long as I can but I now know that I will need at least 45.5 inches of height out of my fabric.
Cut one piece of your decorative fabric and one of your blackout lining using the measurements above. Lay out your fabric and blackout lining with right sides facing one another. Pin the two sides and the bottom edge leaving the top edge open. Be careful to pin within the 5/8 inch seam allowance or you might be able to see pin holes through your completed shade. Stitch those three sides together using a straight stitch.
Turn the whole thing right side out and press using the lowest heat setting allowed by either your decorative fabric or the blackout lining fabric. You don't want to melt either layer.
Optional: Top stitch the three sides for an extra polished look. I like to use a thread color to match my decorative fabric and white bobbin thread to match the blackout fabric so that it looks good from both sides.
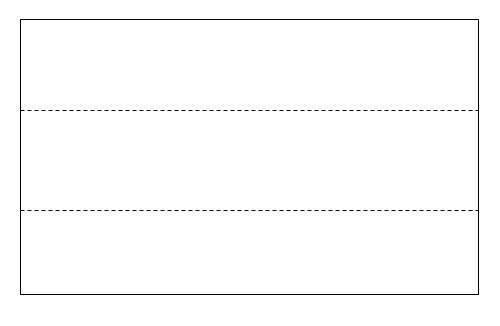
Now comes lots of measuring and pinning to create the horizontal casings to hold your dowels. Here's a look at the final result of this next step:
Fold up the bottom edge around one dowel (not too tight, you don't want to make it too hard to feed the dowel in after you sew) to get the correct casing size. Remove the dowel and carefully measure to ensure your casing is consistent from one side to the next. Pin in place and stitch down.
Measure to determine where you'll place your next horizontal dowel. I used 11.5 inches. Using your casing measurement from the last step, fold your fabric over and create your next casing. Remember, you want your distance (the 11.5 in my case) to be where the stitching lies so pin accordingly. Stitch.
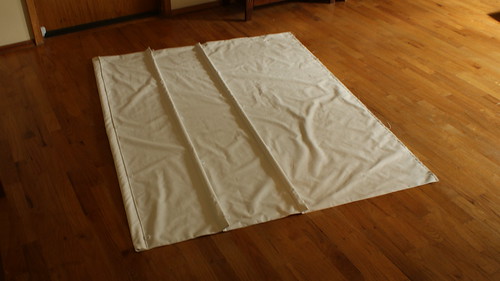
Repeat for each casing until you have as many as you need for your shade. As you can see, in my case, I had one at the bottom then just two additional ones. Insert all your dowels.
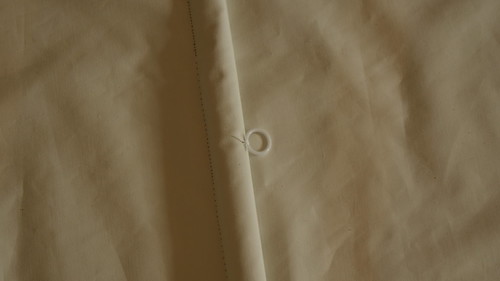
Next you'll need to hand stitch the plastic rings to the back. I used 5 per casing. The most important thing here is that they all line up with one another for each row. Stitch them securely with strong thread.
Once those are all in place, lay the shade out face-down and measure from the bottom edge marking your original window height plus 1/4 of an inch on the blackout fabric. Make several marks all along. Place the 1 inch side of the 1x4 wood against these marks and wrap the excess fabric around it and staple it in place. Trim excess fabric.
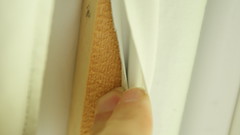

(This is where pictures along the way would have been ideal, I'm not sure if this is clear or not.)
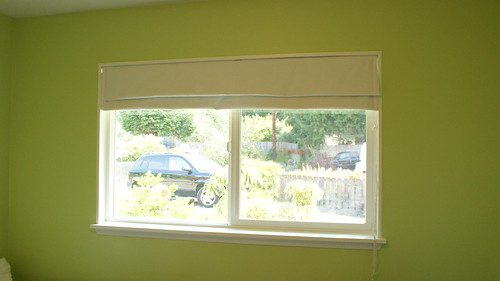
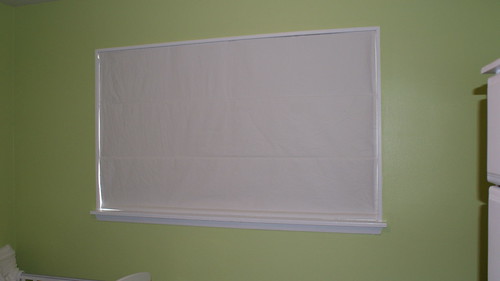
Now you're ready to screw the whole shade up into your window casing. Position the covered wood up against the top inside of your window casing and screw up through the fabric. Make sure the shade is facing out towards the room and that the front edge is where you want it.
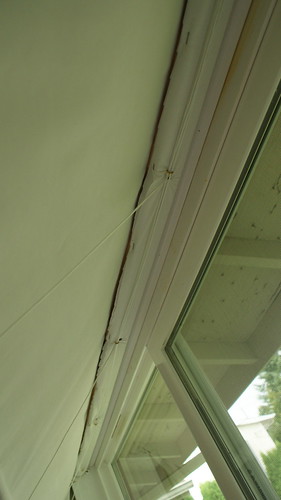
(Peeking up under the fully installed shade)
Screw the eye bolts into the wood above each line of rings.
Now you're ready to add in the cording. Starting on the side where you'll want the cords to hang for opening and closing, thread the cord through all the eye bolts to the far side then down through the rings and tie the end securely to the bottom ring. Cut the other end of the cord (back where you started) 12-18 inches below the first eye bolt.
Repeat for the next row of rings. Starting at the same point again, thread the cord through all EXCEPT the last eye bolt then through the 2nd to last rings and tie off to the bottom ring. Cut the other end of the cord the same length as your first piece.
Repeat for each line, stopping one eye bolt short of the last. In my case, I had 5 cords when I was finished. Tie all the cords together in a knot at the end where you clipped them 12-18 inches long.
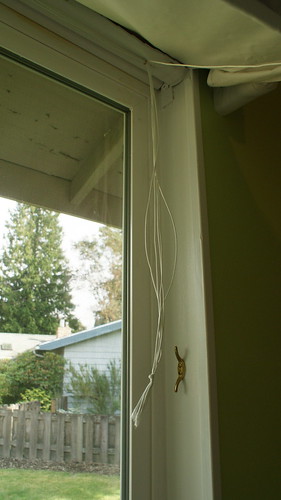
Attach your cleat with the provided hardware and you're ready to open your shade!! Pull that clump of cords gently and you should see the whole thing slide up nice and easy. When you've pulled it to the height you want it, wrap it around the cleat a few times to hold it open. You can also buy fancy hardware to make this work like blinds but I haven't found that the extra expense is worth it - the cleat works great.
Remember, if you have small children, PLEASE PLEASE PLEASE wrap any excess cording up so they can't get to it and hurt themselves (not like in this picture where you see it dangling).
Thank you for reading,
Julie


I have always been looking for a way to distract myself from the daily hustle and bustle, work, problems, and the constant flow of news. For some, it's sports, for others, it's travel, but for me, it's casinos. Playing at casinos has become my personal solace, a place where I can reset my mind and feel the thrill of life. I love that special moment when my heart beats a little faster and every spin or deal adds excitement that is so lacking in everyday life. I don't see casinos as just a way to win money — for me, it's all about the emotions, the atmosphere, and the feeling of the game. In the evening, when I want to escape the routine, I launch my favorite slots, pour a cup of coffee, and allow myself this little break. Over time, I realized that it is important to choose trusted resources where everything is fair and clear. That's why I recommend checking out https://bezdepy.com.ua it has useful information, reviews, and a selection of no deposit bonuses. It's convenient, especially for those who want to play smart and without unnecessary risks. For me, casinos are a balance between excitement and control, and that's how they bring real pleasure.
ReplyDelete