
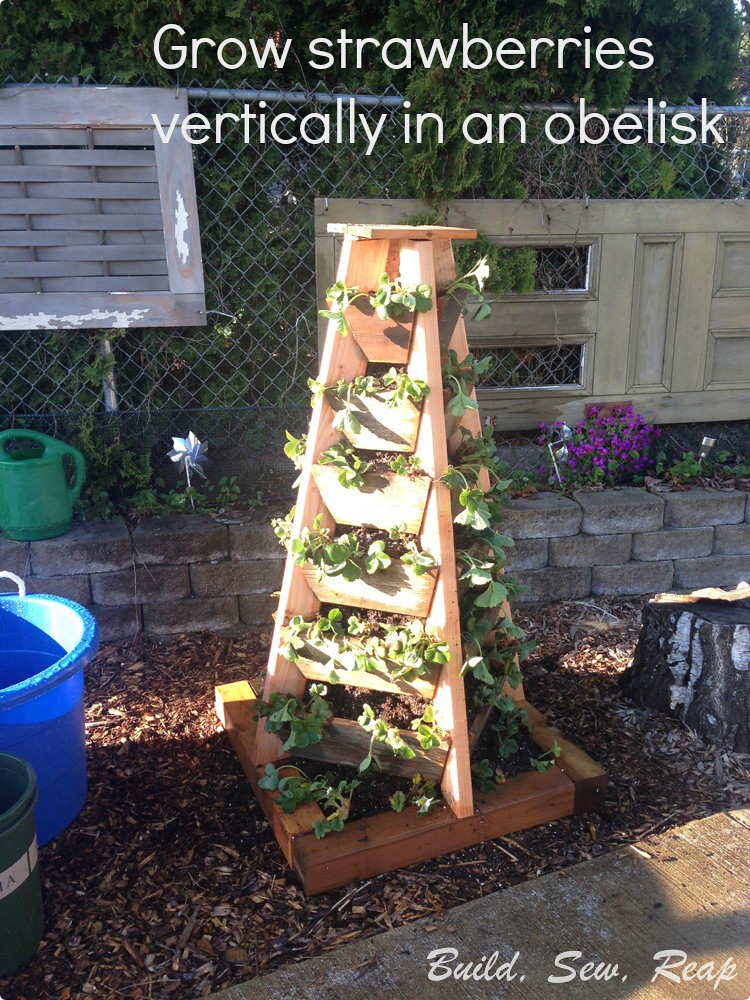
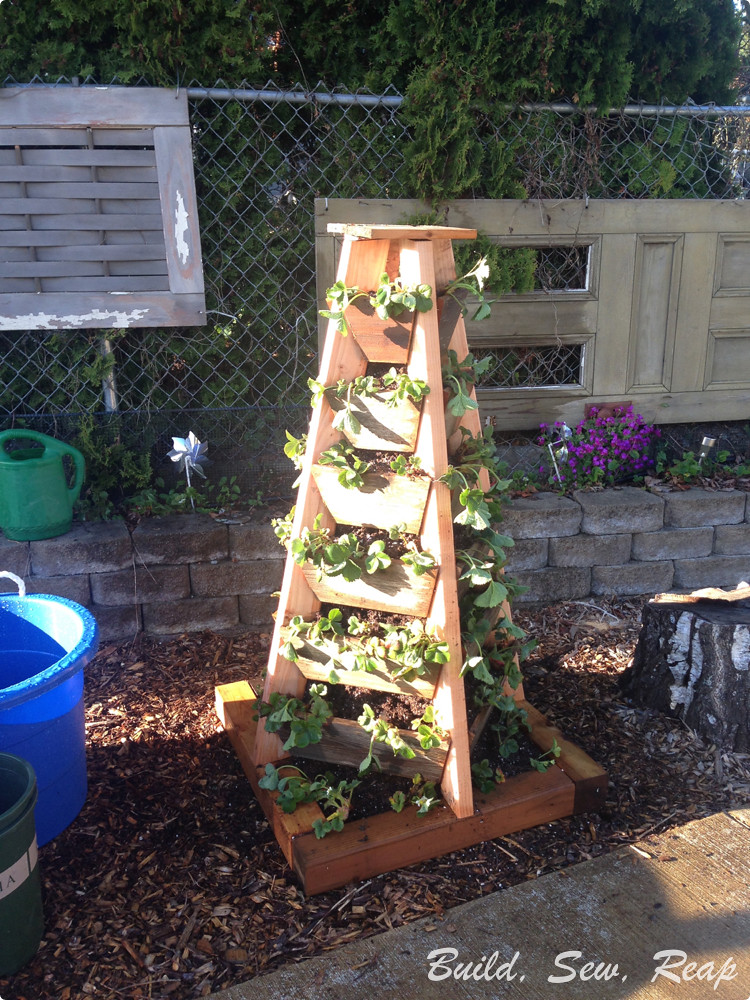
You may have seen my last blog entry about the Strawberry Post. Well, I have been trying to move my strawberries out of the retaining wall and I thought building something that would hold 60 strawberries would help me clear out most of the wall but I wasn't even close. It was time to find a way to build something to hold even more plants. I headed back to Pinterest for inspiration and found several pictures of obelisks that I really liked. I knew it would look nice to have something tall at the start of the garden so as soon as the sick 5 year old's ibuprofen kicked in and he wanted to head out for some sunshine and gardening on Friday morning, we busted out the power tools and got to work.
Now, here's the embarrassing part. This was a MAJOR blogger fail. Between the rush to finish the project while there was still sunshine (at least a week of rain is predicted after this one sunny day) and the sick kiddo, I just hit the ground running and failed to take a lot of pictures along the way. I knew the base needed to be square so I dragged out some scrap cedar 4x4s and cut them all to the length of the shortest one which was 22". I then arranged them in a square and screwed them together with 3 1/2 inch screws. Those things aren't coming apart any time soon.
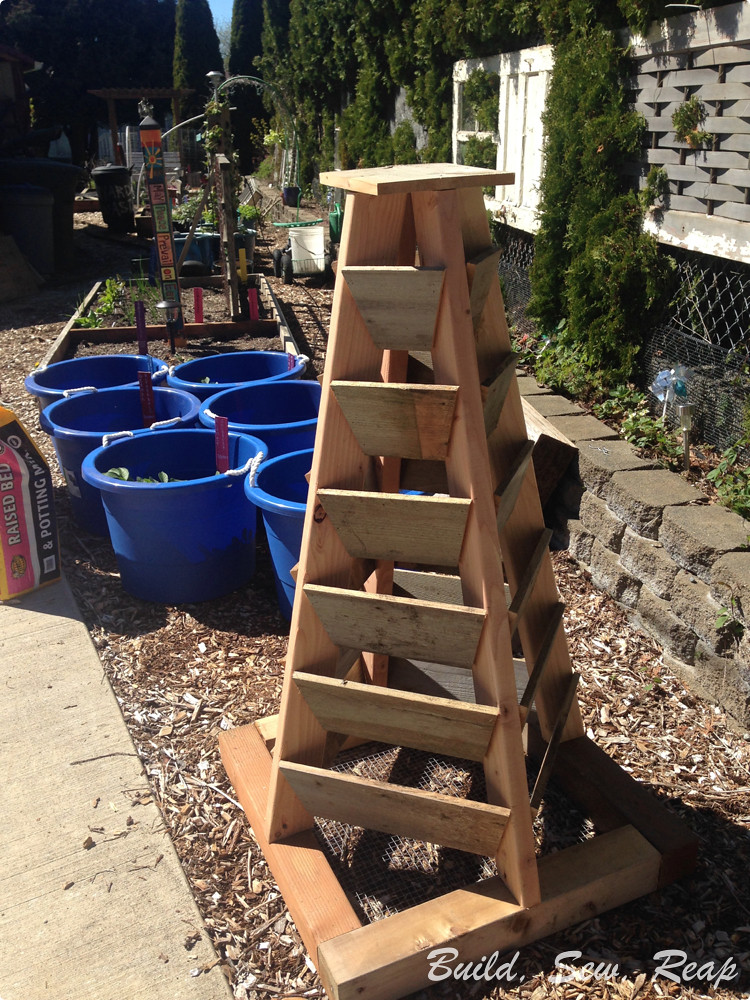
Then I started monkeying around with the height. I opted to use some 2x4s in my stash. While pine isn't ideal for an outdoor structure, I think it'll outlast the strawberry plants so in the interest of saving money, I stuck with basic stud 2x4s. I cut them in half, 48" long then I angled the ends. I forget what angle I used but the scrap triangle was about 1" by 3.5" by 3.64". The ends are parallel with one another so that I could put a flat top on it. I hope to put something interesting up top eventually.
BUILD BREAK ALERT: The sick little dude was losing interest in my build but I wanted him to stay outside with me to get some sunshine and fresh air so I took a break from the obelisk and he and I busted out a work bench.
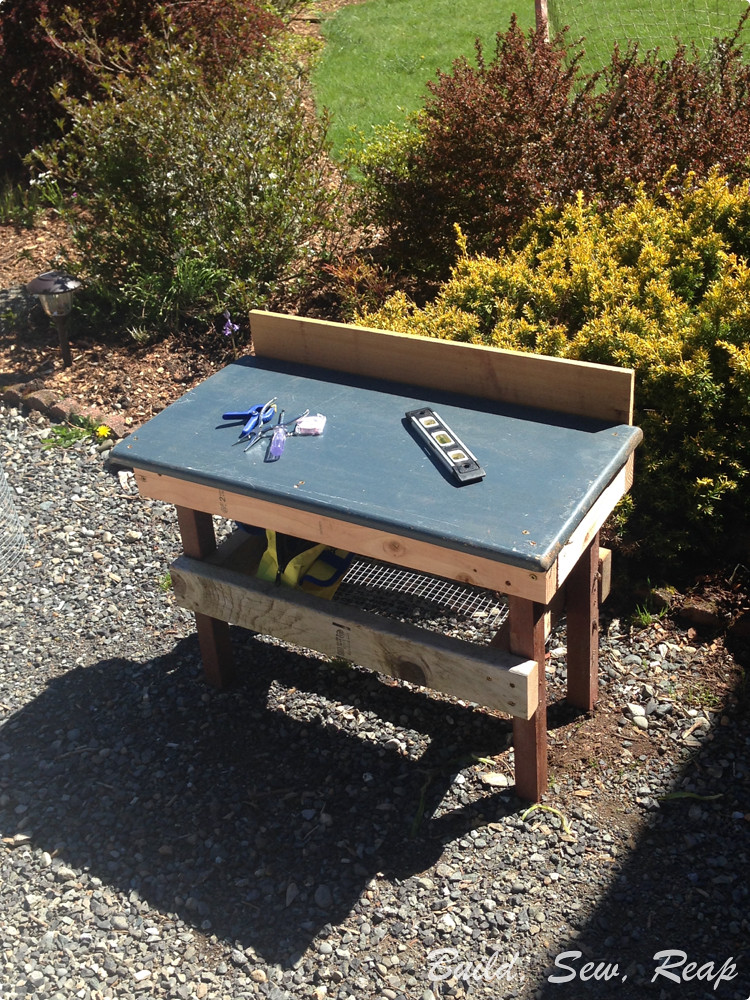
Sadly, he didn't stick around long enough to use it as he got tired and wanted to snuggle with the dog and ended up falling asleep on the couch.
So, back to the obelisk (work fast Julie, he won't sleep all day).
I then marked out where I'd want the "shelves" (for lack of a better word) and measured the front edge. The first one had a front edge of 6" and the back edge was around 3". I determined that a 15 degree cut would get the piece in properly. I cut 4 of these at a time then used my nailer to shoot brads through the edges of the shelves into the 2x4s. I put three in each side.
I realized I might someday want to move this beast but I didn't want a piece of wood to rot underneath so I tipped it over and stapled some hardware cloth to the bottom.
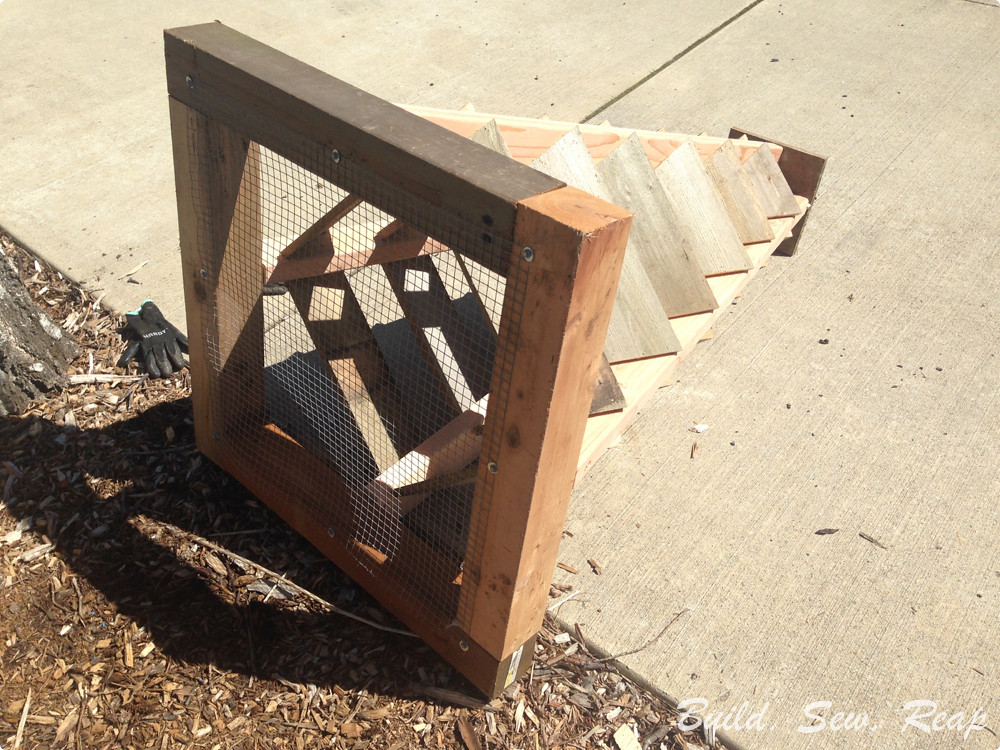
This will also keep moles or other burrowing rodents from making a home in my strawberry plants.
Then I started the tedious process of filling this thing with dirt.
Note to you: If you build one of these, go ahead and do the base, hardware cloth, and maybe 2 levels at the bottom and then start filling with soil. Fill it up, add another layer or two of 'shelves' then fill some more.
I had to try to squeeze about 4 cubic feet of soil in between the shelves. That was just silly and annoying but I got through it then I soaked it with water to prep it for planting.
Finally, I plucked out a ton of strawberry plants from the wall and stuffed them in the pockets. I think I got more than 100 strawberry plants into this planter. Sadly, the wall still isn't emptied.
So, that's strawberry grower number 2. There may be a number 3, we'll just have to see what I can think up.
Thank you for reading,
Julie


Awesome, Julie! Love your posts. This one is very informative! Thank you for sharing your wonderful talent!
ReplyDeleteSuper duper cute, and functional! Lub it!
ReplyDelete