
The first thing I did was finalize the wall paint color. Periodically throughout the earlier stages of the project I had been peeling off the wallpaper and scrubbing the residual glue from the walls. Then I patched and primed over all the holes and generally prepped the space to get a bold update on the walls. I realized that the Navajo White color I was using on the cabinets looked a lot more yellow that expected so I had to be very careful in picking the right wall color to give it an updated look rather than a country look which wouldn't go well with the rest of our decor. I landed on a lovely deep teal blue similar to the background of this blog. I didn't take any pictures of the wall color specifically but you can see it in some of the photos later in this same entry. It goes GREAT with the orange walls down the adjoining hall and in the living room. I love the vibrant contrast.
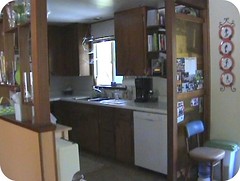
Now let's talk about "the amber wall." Our kitchen is tiny as it is but the builder (or someone early on) felt it would be a good idea to put a strange sort of see-through partial wall up at the end of the counter. This did absolutely nothing to help the kitchen except hide the mess that accumulated under the old microwave shelf. It was ugly and blocked all the light that should have been streaming in from the sliding glass door just outside the kitchen. Here are two pictures, one from each side. You can see in the second one how the light could be coming into the kitchen from the sliding glass door but it is being blocked by the amber plexiglass.

I realized that thing just had to go only the decision wasn't that quick. First I thought about just cutting it down to half size then finishing it off with drywall because the side of the dishwasher would be completely exposed without at least a half wall. Plus I couldn't decide if I wanted to look at the end of a cabinet even if I did finish it off. I started hacking away at the wall with the help of the hubs and ultimately, I decided to just tear the whole thing down. What a FANTASTIC decision that was.
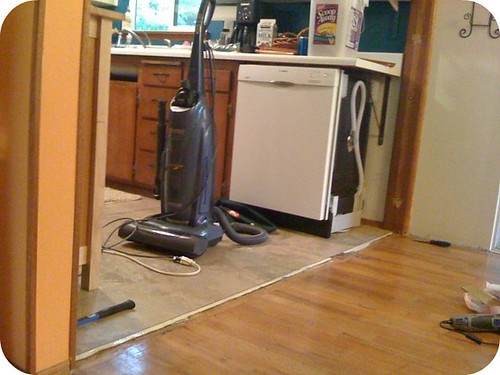
I'm sure you can now see the next problem I've created. I knew it going into the final decision to demo the wall completely but now it is even more obvious - that dishwasher just can't stay there.
Yes, you guessed it, I moved the dishwasher next only I'm not sure the term "moving" accurately depicts what I went through to get that thing where I wanted it.
It took most of a Saturday, many of my power tools including my savior, the Dremel Multi Max which I had to use to not only cut wood but to cut nails and screws I couldn't pull out for various reasons. My dad had bought me the tool when they visited back before the last Christmas and boy was I singing his praises as I would never have accomplished this task without it. I had to actually cut the front of the lower cabinets apart between the drawers and the under-sink cabinet then detatch the unit from the counter above as well as the wall and the floor. It was very well attached. I still joke that there were times I wondered if our cabinets had been carved out of one giant log as I had a hard time finding seams and ways to pull them apart.
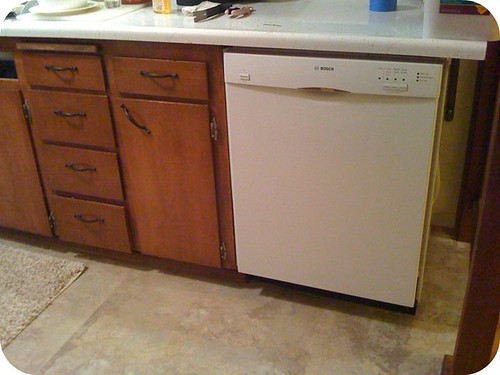
In the end, I won the battle and it was totally worth it. I had to build out a new wall between the new dishwasher location and the drawers and do a bunch of piecework around the drawers but they're holding up well.
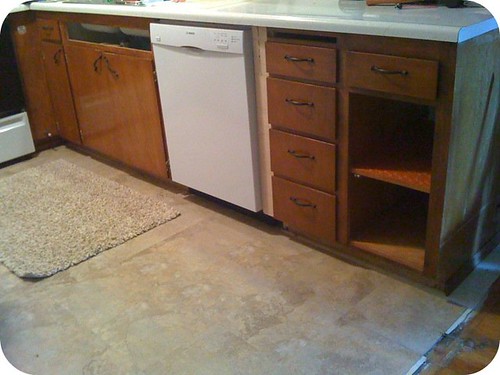
After I took that last picture, I also opted to nix the pull out cutting board as it was stained and gross and nothing I ever wanted to touch. I'm so glad I did all the necessary work to get that in the right place and to make it look nice which leads us to tomorrow's post - finishing the lower cabinets (hooray!).
Thank you for reading
The New Kitchen, Part 1
The New Kitchen, Part 2
The New Kitchen, Part 3
The New Kitchen, Part 4


Thank you so much for the wonderful information .This is really important for me .I am searching this kind of information from a long time and finally got it.Jody
ReplyDeleteOn www.schriftle.com/blog/bachelorarbeit-in-deutschland, students can learn how to structure their thesis effectively in Germany. From topic selection to final editing, all essential steps are explained clearly.
ReplyDelete