
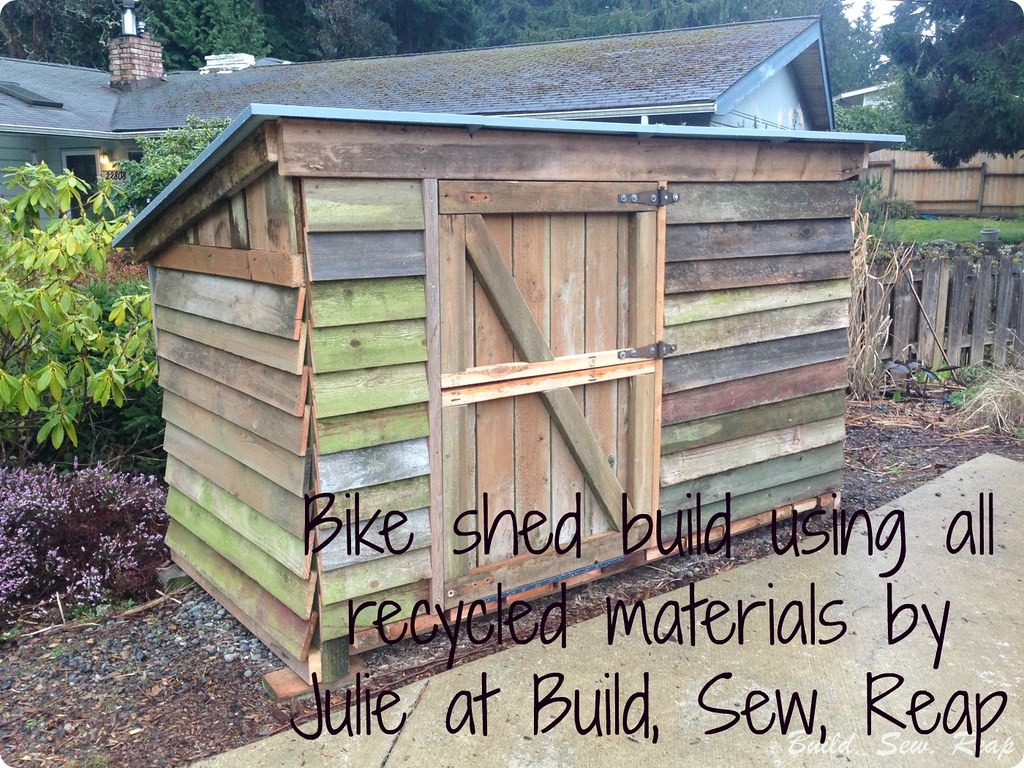
I'm so excited about this build but I can't really give you any sort of blueprint or plans for how I did it. I followed the same steps I usually do with a scrap/recycled materials build:
1) I use pinterest to gather ideas and inspiration on a board.
2) I stare at the piles of materials I have to chose from.
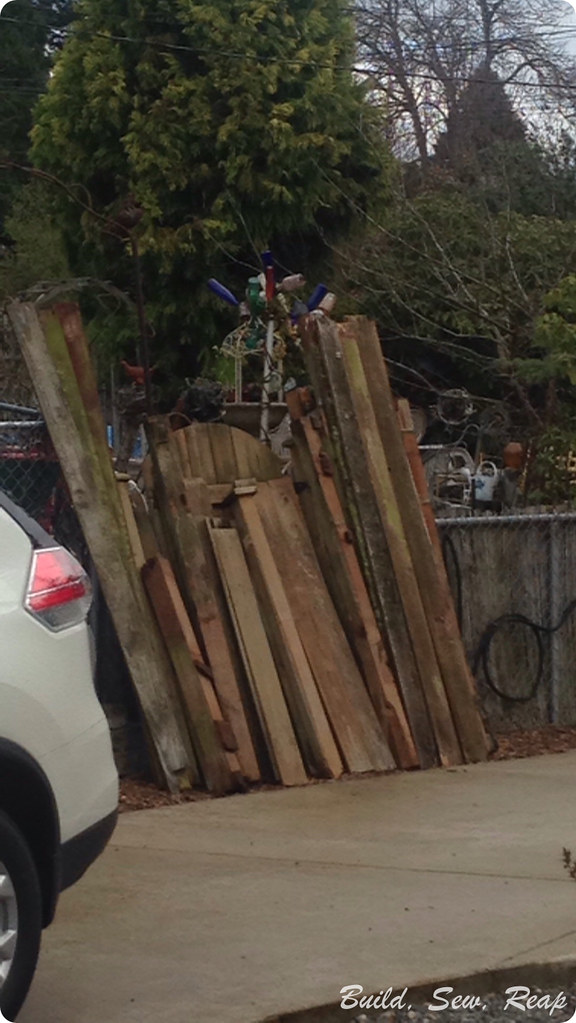
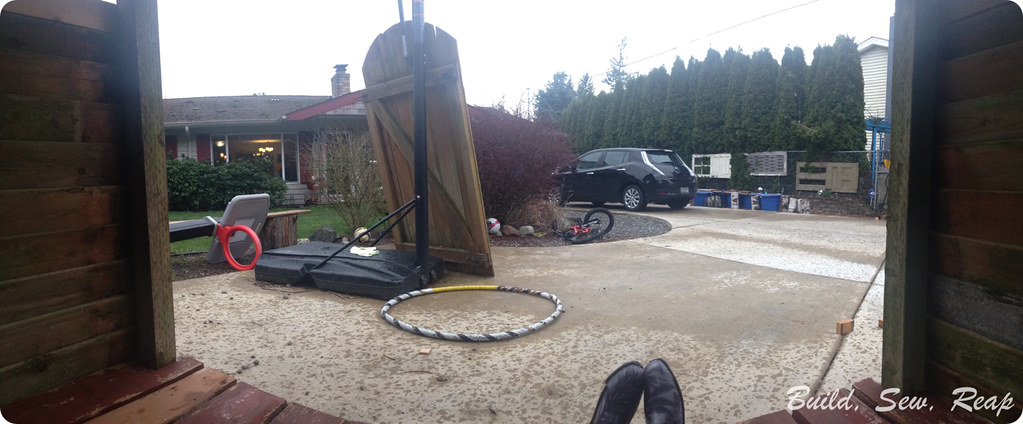
This is just one of several wood piles
3) I jump into the project with both feet.
4) I start cutting stuff up and attaching it to other cut up stuff.
5) I change my mind a lot. With each new decision comes the process of deciding if my new idea is good enough to bother undoing what work I've done to that point.
6) I take a break and let the progress to that point sink in and I consciously and subconsciously think through the next stages of the project.
7) I cut more stuff and attach more stuff to other stuff.
8) At some point I declare the project complete.
9) I enjoy the feeling of creating something out of recycled materials.
So, let's get started with the pictures I took along the way.
The size of the structure was based on the 8' garage door window panel I had found on the side of the road last summer as well and the shortest length of fence board I had to use.
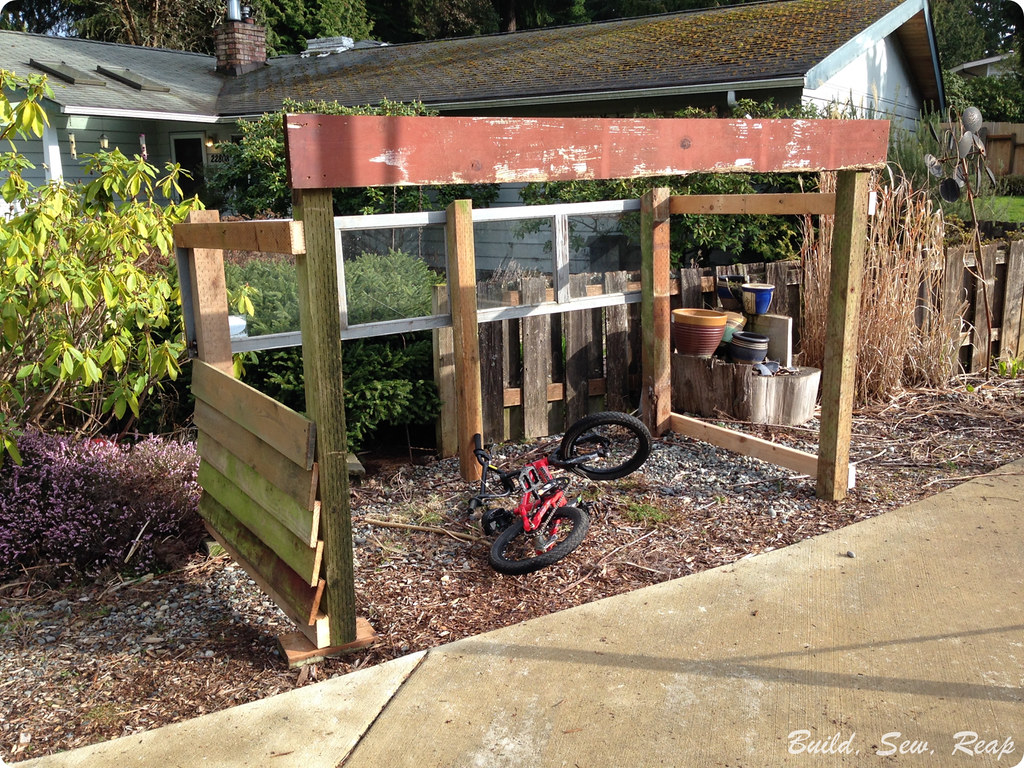
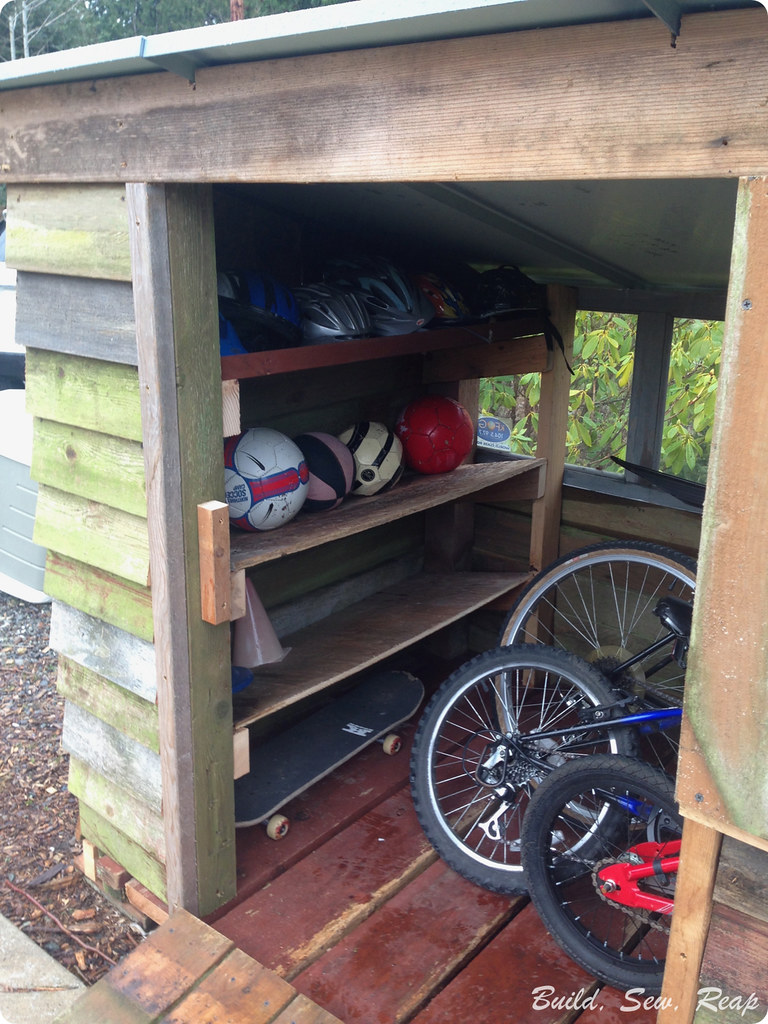
My 5 year old decided to test out how well the bike garage would contain his wheels.
Once I realized I could use the red cedar decking for the floor, I replaced the header beam with an unpainted 2x6 from my scrap pile. If I remember correctly, that was part of our old carport that we removed to put in the garden.

I knew I was getting to the point where I'd be needing a roof before too long but I was struggling with the materials I had on hand. I didn't have enough plywood to make a proper base for a shingled roof, nor did I even have tar paper and shingles. I messaged a friend who tends to have some pretty great building materials in her garage and asked if they had anything I could use to make a roof. Boy did they ever come through for me!!
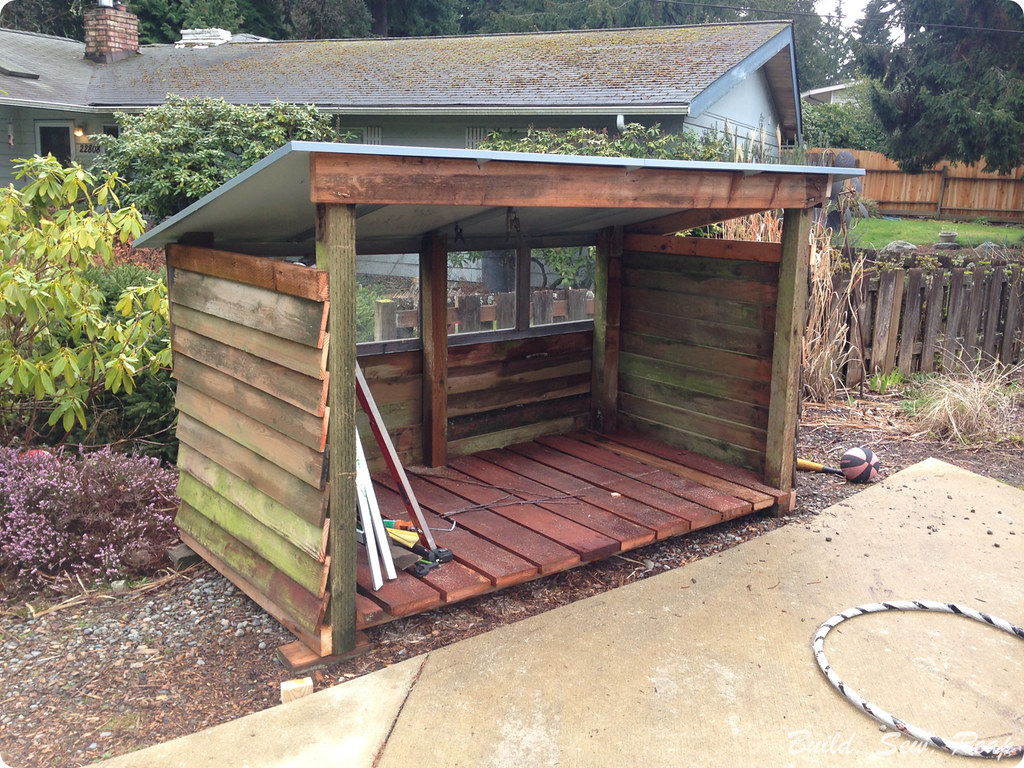
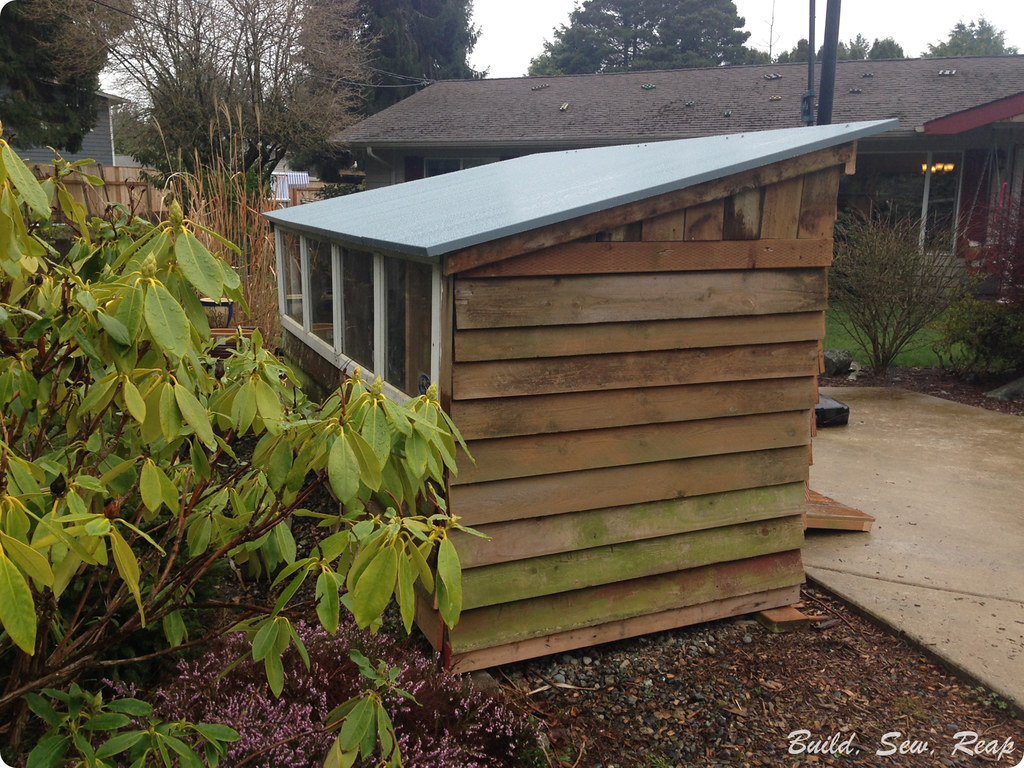
They gave me 4 aluminum panels for the roof. The best part is since the panels have a 1 inch edge all around, they are super sturdy so I didn't have to build a frame for them to sit on. I merely notched out the horizontal supports of the existing structure and slid them into place.

I did reinforce with a few screws across the top but they were really easy to install and look great. I also caulked along the seams to keep rain from pouring down between the 4 panels.
I took some time to test out the waterproofing job I had done. It was nice to sit in the shed while it rained on the aluminum panels above me.
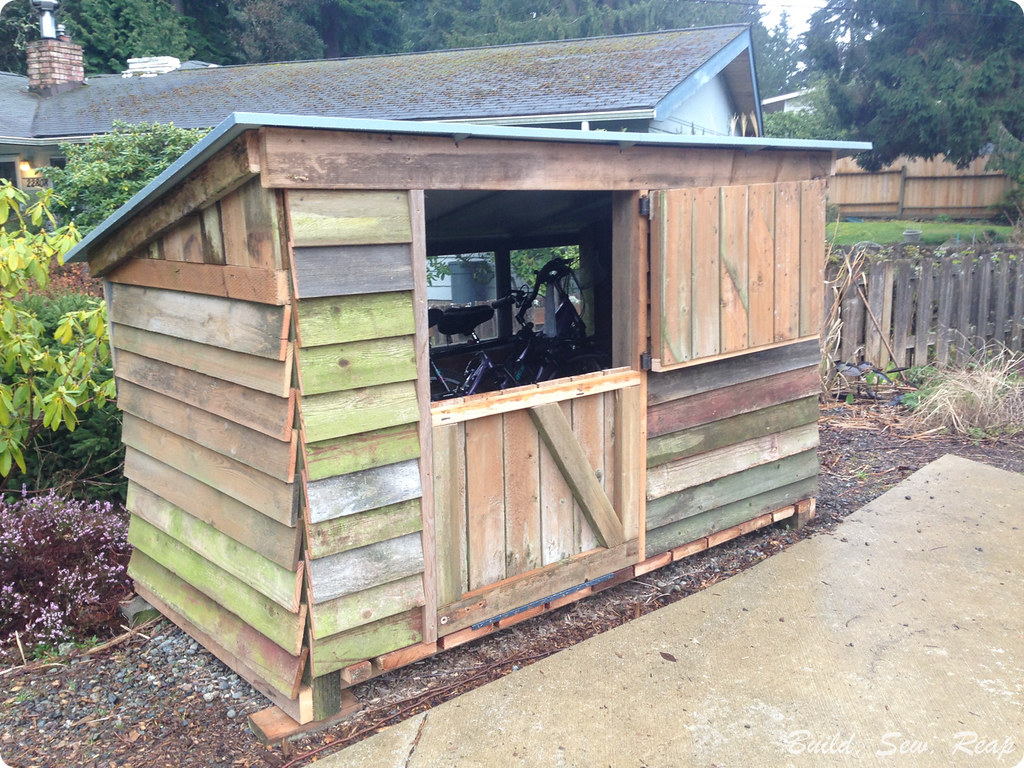
I wasn't sure what kind of a door I wanted to put on the structure but after the 5 year old struggled to get his bike from the driveway, across the gravel space, and up into the shed, I knew it needed a ramp. Mr. BSR and I talked over lots of different ideas and in the end, I opted for one of my favorite looks - the dutch door but instead of both sections opening to the side, I attached the bottom section to the floor with a piano hinge and it became a fold out ramp.
I had an old fence gate in my pile of scraps (pictured above) so I opted to disassemble that and use it for the door. Knowing this, I put the front walls on leaving enough space on the left for shelves and then made the door opening as wide as the gate I had.
Taking apart the gate wasn't easy but I took it one galvanized nail at a time and pulled them all out.
First I built the bottom part of the door and got it installed. Then I built the top part. Working with reclaimed wood isn't easy because it's often warped, missing chunks, or presents other challenges along the way. Despite lots of measuring twice, checking plumb and level, and trying to remain consistent with measurements, the doorway was not actually perfectly rectangular. Apparently the original gate wasn't either. I adapted though, and created just the right door for the job.
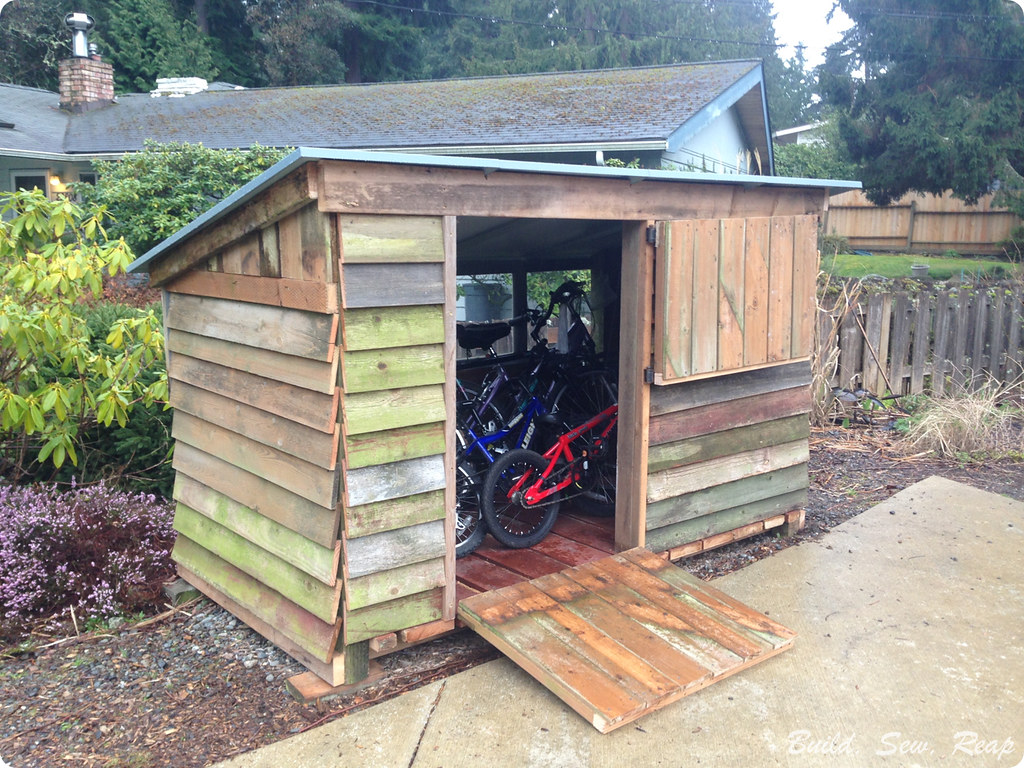
The ramp portion is lightweight enough that the 5 year old can open it himself. The top portion holds the bottom portion in place too so when it's all closed up, even a hefty wind won't blow it back open. I need to find a latch to put on the top part so we can also lock the shed when we aren't around. Late last night, long after I'd taken all the pictures, I remembered where I might find just the lock I need (hint: it's stuck to a post in my remaining scrap pile).
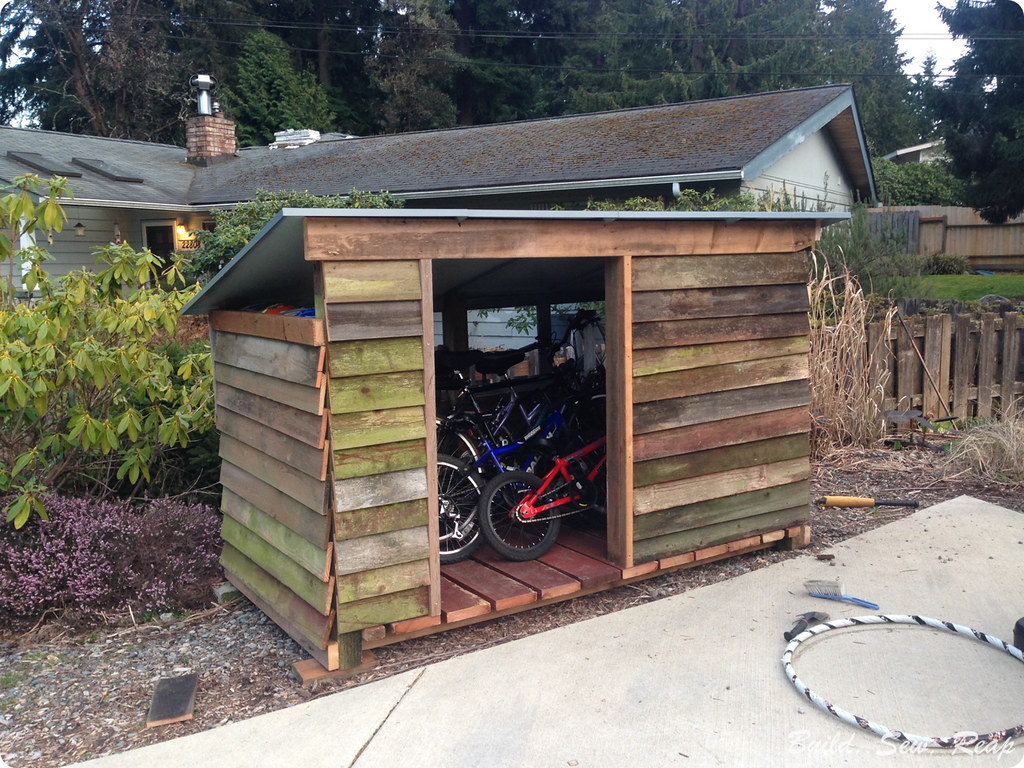
This is what the shed looks like as you round the corner of our private road and approach our driveway. I think it's nice enough looking to be a front yard shed. The neighbors' bushes should continue to grow up behind it too which will provide a nice backdrop. I'm also considering mulching around it to give it a homier look. The other neighbor has a pile of mulch she wants off her driveway so I think I can procure the materials for free yet again. Woo hoo!
It features shelves for helmets, balls, and other small equipment (boy oh boy I'm so excited to dig stuff out of the back of the garage and load it in).
And it looks like it's been there for years despite being a fully custom build that just happened over the past week.
Now the kids can easily get to their equipment and I can reclaim the garage for my tools. I think I'll make a cool sign for the build. At the suggestion of one of my most favorite friends, this will be called "The Wheelhouse." I think a pyrography project is in order!

Thank you for reading,
Julie


Awesome blog. I enjoyed reading your articles. This is truly a great read for me. I have bookmarked it and I am looking forward to reading new articles. Keep up the good work! garage door replacement Studio City
ReplyDeleteWhile these helmets have a better coverage then no coverage at all, they do not have the maximum coverage. http://www.motorcyclesafer.com/
ReplyDeleteFurthermore, as it's a genuine occupation I would prefer not to abridge it here into visual cues. Garage Door Installation Burbank
ReplyDeleteI'll most likely keep it quick and painless and connection to this rather if that is cool. Much obliged.
ReplyDeleterw doors
Great information. Thanks for providing us such a useful information. Keep up the good work and continue providing us more quality information from time to time. Visit Now
ReplyDeleteI continuously continue coming to your website once more simply in case you have posted new contents.garage door repair
ReplyDeleteSan Francisco Garage Doors
444 22nd Avenue
San Francisco, CA 94121
(415) 223-7600
Congratulations for posting such a useful blog. Your blog isn?t only informative but also extremely artistic too. There usually are extremely couple of individuals who can write not so easy articles that creatively. Keep up the good writing !! vega helmets price
ReplyDeleteThis is such a great resource that you are providing and you give it away for free. I love seeing blog that understand the value of providing a quality resource for free. www.chatsworthcagaragedoorrepair.com
ReplyDeleteLearn more Google Instant is off due to connection speed studds Helmets Prices & Dealers in India
ReplyDeleteThis offers you as I found out after using them for a short time a great deal of options on where to hold them and change your position on a continuous basis, this slight adjustment of your hands seems to save your forearms and wrists from starting to ache. https://storify.com/ampleom/bike-and-roll-dc#publicize
ReplyDeleteIf your springs have come to their end, indicating these have exceeded the number of times that they could lift and close the door, and it would probably cause less efficiency when it comes to operating. garage doors Burbank
ReplyDeleteIn other cases, check the hinges and replace damaged ones. In case the openers show indications of sagging on one aspect then correct it by servicing the hinges. Make sure that the solid wood on which the hinge is positioned is not cracked or chipped. garage door repair services in culver city, ca
ReplyDelete
ReplyDeleteFriend, this web site might be fabolous, i just like it.
bed liner spray
This is such a great resource that you are providing and you give it away for free. I love seeing blog that understand the value of providing a quality resource for free. Garage Pros Calgary
ReplyDeleteWow...!! This Post is so intriguing that now i want to know more about this topic. Waiting for your next Post..!!, you can read more: HJC Motorcycle Helmets
ReplyDeleteIt is the intent to provide valuable information and best practices, including an understanding of the regulatory process. Seattle locksmith
ReplyDeleteNorth Shore Plumber
ReplyDeleteThank you for this blog. That's all I can say. You most definitely have made this blog into something thats eye opening and important. You clearly know so much about the subject, youve covered so many bases. Great stuff from this part of the internet. Again, thank you for this blog. Best Garage Doors
ReplyDelete