
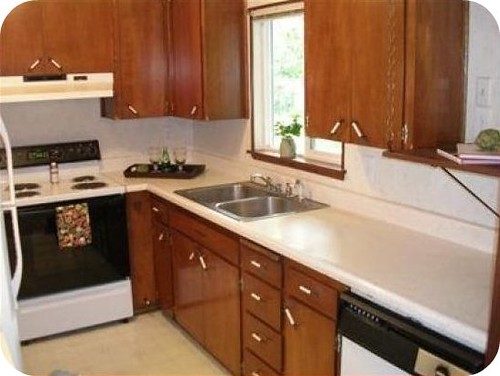
Before (you've seen this one before if you've been following along):
And after:
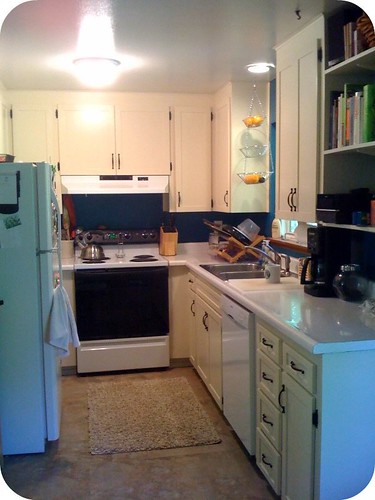
At first we were blinded by how the light reflected around in there. It was shocking how bright it was and how clean and usable everything ended up. I picked up some spice racks and a few super susans (my mom's name is Susan, we don't call those spinny things lazy susans in our family) to help organize my cabinets. My favorite change within the cabinets though was that I reinstalled an old pull out wire drawer the previous owner kept cleaning supplies in but I put it on the opposite side under the sink and it now holds our trash and recycling containers. Before the overhaul, the trash and recycling were near the entrance to the kitchen which wasn't very convenient but it was the only place they would fit. I also lined all the shelves with clear shelf paper so they'd be easy to clean and the dishes wouldn't stick to the painted surface.
By the time fall rolled around and it started getting dark earlier, we realized the light fixture in there also needed an upgrade so I picked up something I'd been eyeing up at Ikea. I also made some changes to the kitchen cart to inprove on our limited counter space. I still dream of updating the counter tops but with the rest of the kitchen looking so good, I hardly notice them anymore.
Our kitchen today (picture taken after midnight one night recently):
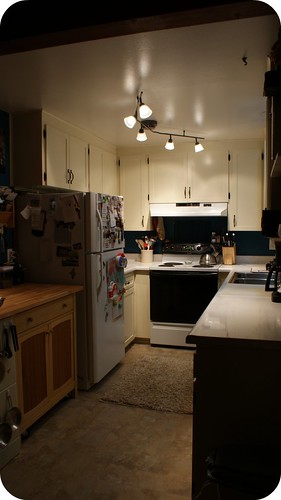
To recap, I started with a new low budget peel & stick tile floor then moved on to the cabinet hardware. When that didn't leave me content, I added trim to the doors and drawers and painted them, painted the cabinets inside and out, stripped the wallpaper then patched and painted the walls, ripped out an ugly partial wall, moved the dishwasher in next to the sink (and the cabinet over where the dishwasher was) and updated the lighting. In the end, not a day goes by that I don't think to myself, "I love my kitchen."
Thank you for reading
The New Kitchen, Part 1
The New Kitchen, Part 2
The New Kitchen, Part 3
The New Kitchen, Part 4
The New Kitchen, Part 5
The New Kitchen, Part 6


Oh Julie, it's beautiful!!
ReplyDeleteThank you Sarah! I don't think I'd be any happier with it if I had dropped thousands of dollars to start from scratch. OK, maybe if those thousands had included all new appliances but that's not such a big deal to me right now.
ReplyDeleteTHIS IS FAB!! It is amazing what $400 will do!! Thanks for auditioning for OMTWI!!
ReplyDeleteWhat a difference - your kitchen looks wonderful!!!
ReplyDeleteTine
Julie...what a happy space you have created. You counter tops are so shiny!!! what did you do to them?
ReplyDeleteBlessings and health, Deborah
Thank you all, I appreciate the comments
ReplyDeleteDeborah - I think that's just the way they are. I wish I had a trick but when they're clean and the lighting is good, they're just shiny.
Thank you all, I appreciate the comments
ReplyDeleteDeborah - I think that's just the way they are. I wish I had a trick but when they're clean and the lighting is good, they're just shiny.
Thank you Sarah! I don't think I'd be any happier with it if I had dropped thousands of dollars to start from scratch. OK, maybe if those thousands had included all new appliances but that's not such a big deal to me right now.
ReplyDeleteVery efficiently written information. It will be beneficial to anybody who utilizes it, including me. Keep up the good work. For sure i will check out more posts.
ReplyDeleteLove to read your blog! so much creative tips
ReplyDeleteThe content was really very interesting.
ReplyDeleteMspy is a software that can be installed on a cell phone or other device to track its location, as well as various activities that are performed on it. It is often used by parents to track their children's whereabouts, or by employers to keep tabs on their employees. how to use mspy - by tracking the cell phone's GPS location and then transmitting that information to a server, which can be accessed by the person who installed the software. The software can also track various activities that are performed on the phone, such as calls and text messages.
ReplyDeleteMy experience with ghostwriter-erfahrung.com was entirely positive. The ghostwriters are professional, efficient, and deliver results that impress. Anyone seeking information should definitely check this site.
ReplyDelete