Sliding Barn Door How-to

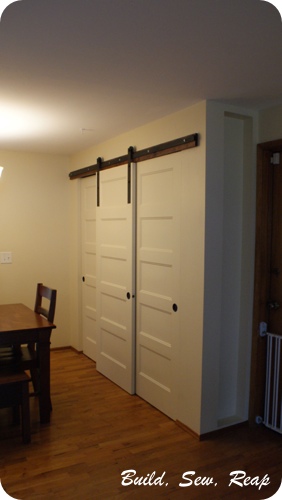
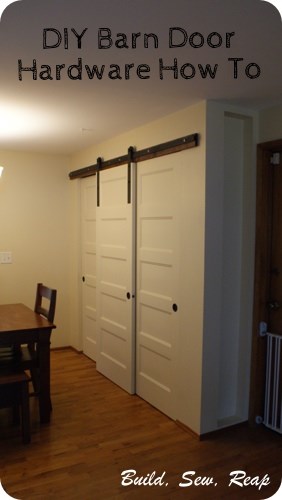
As you'll recall, I recently added a pantry to our dining area (the closest area to the kitchen) and I wanted it to look better than your average boring pantry or closet. The opening is 81 inches wide so instead of doing 2 huge closet doors, I opted for three smaller standard doors that I picked up from a local building materials recycling company.

Pantry with DIY Barn Door Hardware by Julie @ Buildsewreap.com 

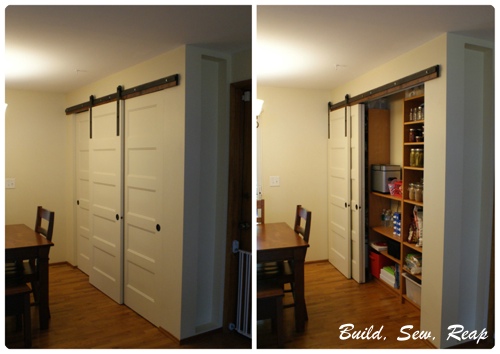
I also wanted all three doors to roll to one side or the other so I could get to the maximum sized opening possible when I need to access the food inside.
DSC07131

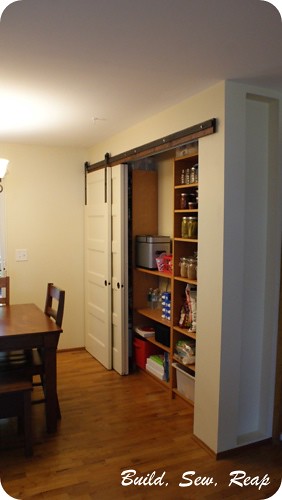
The easy part of the project was attaching the two back doors which are each 28 inches wide. I used a standard closet track system and followed the instructions in the box. I did buy a nice one knowing it would be used many times daily but it was available at my local Home Depot so this should be easy for you to acquire.

DSC07141

Let's start with just the track setup.
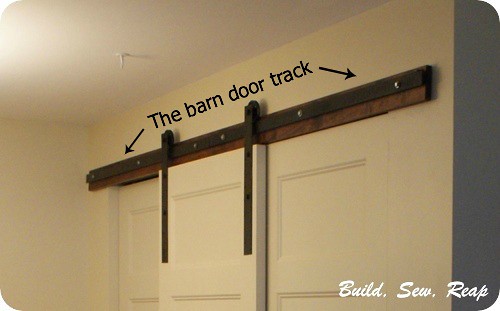
Track

My track is 96 inches long, I wanted it to run wider than the actual opening of the pantry.

Materials:
  • 1 - 8 foot long 1x4 stain-grade lumber
  • Stain of choice
  • 6 - 4 inch long screws that match the stain on your wood
  • 2 pieces of 4 feet by 1 1/2 inch by 1/4 inch steel (Lowe's or Home Depot). NOTE, this must be 1/4 inch if you're going to use the same garage door pulley I'm recommending. Of course, if you can get an 8 foot long piece that's 1 1/2 inch by 1/4 inch thick, go for that instead.
  • 6 hex lag screw - 4 inch long, 1/4 inch diameter
  • 30 standard washers - fits over 1/4 inch bolt/screw
  • 6 fender washers - fits over 1/4 inch bolt/screw but larger outside diameter
  • 2 strong nails, at least 2 inches long
  • Black spray paint (if you want the look I used)
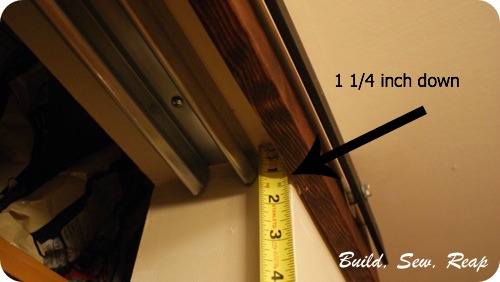
First, I stained an 8 foot long piece of 1x4 hemlock to match other wood in our house. I hung that up using matching screws secured into the studs. I positioned those screws so that they would be hidden by the steel track later but was mindful to avoid where the bolts would need to go. The front edge hangs 1 1/4 inches down from the finished opening to the pantry. This was low enough to hide the metal track but high enough so I could still remove the back doors for repairs if necessary.

DSC07399

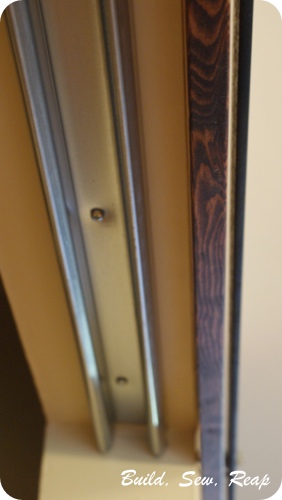
Next came the actual steel track. It consists of two pieces of steel that I purchased at Lowe's that I spray painted flat black. Each piece is 48 inches long, 1 1/2 wide and 1/4 inch deep. I used my regular cordless drill and a good bit to drill three holes in each piece; 4 inches from either end and in the center.
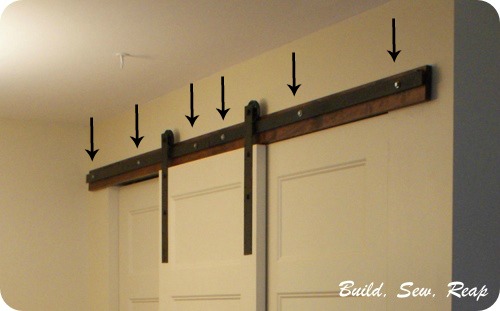
Bolt Positions

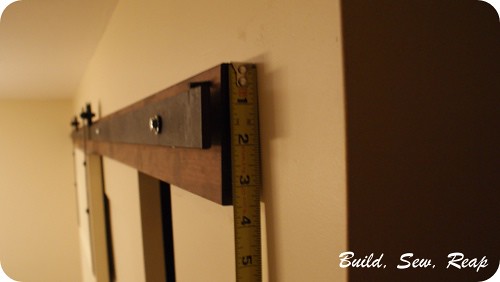
Using lots of clamps, I positioned the steel bars one at a time, end-to-end and marked where I would need to pre-drill through the wood. I positioned the bar 1/2 inch down from the top. I liked the way this looked and it allowed ample clearance for the bolt that will go through the center of the wheel.
DSC07404

I took the steel back down and drilled 1/4 inch holes through the wood and into the studs (where I hit them). Since I screwed the wood into the studs in an earlier step, it isn't as necessary that the steel be attached to the studs, as long as it is securely attached to the stained wood piece.

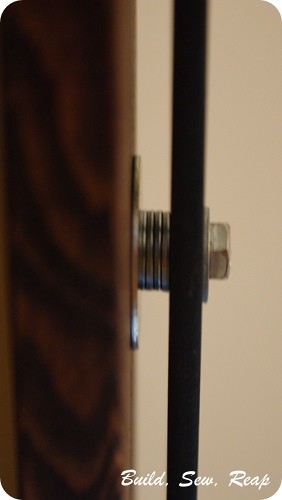
Next, I stacked my materials as follows for each screw:
  1. One four inch long, 1/4 inch hex lag screw
  2. Standard washer
  3. Steel bar
  4. FOUR standard washers
  5. One fender washer
  6. Wood
The goal here is to have the center of the track as close to 3/8 from the wood as possible. This was what I determined would make my 1 3/8 inch thick hollow-core door hang straight and glide easily without hitting the other doors. I did a little bit of experimenting with this so if you're using the same materials I'm using, save yourself the balancing act. 
DSC07138

I found that I needed to get each one started just a little bit before I could tighten them all down. Remember also that you will have a little bit of wiggle room as you're tightening so take care to ensure your two tracks are perfectly aligned and butted up tightly against one another. I tapped mine with a hammer before fully tightening down all the screws and my doors glide easily over the intersection.

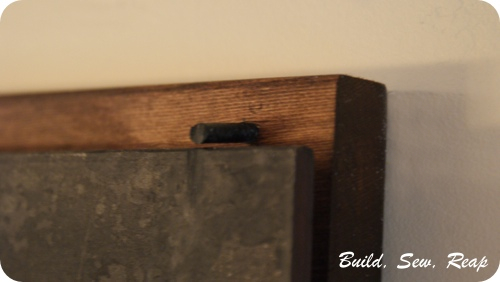
The last step is to create door stops. I wanted something really subtle so I used a nail that I tapped in until I felt like it was really secure and then I used a hack saw to cut the nail off and I painted it black to blend.
DSC07145

If anyone gets up a bunch of speed with the door, it will fly off the end most likely but I felt like it was secure enough in our household. If you don't feel like this would work in your home, perhaps try using an L bracket to stop the wheel.

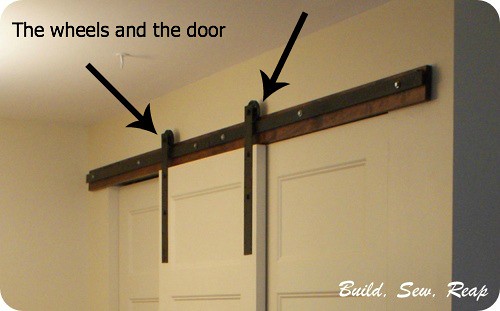
Now let's move on to the wheels and the door

wheels and door

Materials:
  • 2 - 3 inch garage door pulley kits - This idea came from ShabbyLisaW
  • 6 standard washers to fit over the bolt included in the pulley kit
  • 2 - 18 inch long by 2 inch wide steel flat bars (or 1 - 36 inch long one and a good hack saw)
  • 4 - 1 inch long by 1/4 inch hex lag screws
  • 4 standard washers to fit over the 1/4 inch hex lag screws
  • Flat black spray paint (optional)
  • Brown spray paint (optional)
  • Glue that can adhere metal to wood 
I purchased one 36 inch long by 2 inch wide steel flat bar because I liked where the existing holes were positioned. If you can't find that, you can drill your own holes. The top hole should be an inch from the top of the bar to achieve the same look I have.

I spray painted all the bolts, washers, wheels and flat bars with a flat black spray paint then just lightly dusted over that with brown to soften the look a bit. Once the paint is dry, assemble the setup as follows:
  1. Bolt from pulley kit
  2. Standard washer
  3. Steel flat bar
  4. 2 standard washers
  5. Pulley wheel
  6. Nut included in pulley kit
The goal on this one was to set the center of the wheel 5/8 inch away from the flat bar. 


DSC07140

Next, I used clamps to position the bars on the door while in place. I checked to ensure it rolled smoothly from end-to-end, appropriate gap under the door (matched the other doors) and that it looked good from afar.

Once I liked where it was, I marked the placement very carefully, took the door off the track, and removed the clamps. Then I glued the bars to the door as marked and clamped them back down. Finally, I pre-drilled and screwed the 1 inch lag screws with washers into the door. The lower two didn't make a great connection but they went through glue so while they aren't highly functional, they are stuck in there for good.

I allowed the adhesive to dry per the instructions on the container then removed the clamps and hung the door.

HINT: If you find that you didn't get the bars glued into place exactly right and need to adjust how the door hangs, try loosening up the bolt through the pulley and adjust from up there. There is a little bit of wiggle room there.

Now stand back and enjoy how awesome your new barn door looks!
Awesome Barn Door In Action

Thank you for reading,
Julie

I'm sharing this post at the following link-up parties:


New Pantry

For awhile now, I've kept all our extra food out on some chrome shelving in the garage. This worked out ok because the kitchen isn't too far from the garage but we recently took on an unwanted boarder who helped his fury little self to some of our dry goods. I also noticed that certain items weren't staying fresh out there, even when they weren't opened. We are about to finally fix our garage for good (I hope) so I asked the dear hubs if he wouldn't mind if I threw in a little project before we started on the garage and he agreed it was a good one.

I'm now the proud new owner of an awesome custom pantry.

DSC07130

And here is is with the doors all open to one side:

DSC07131

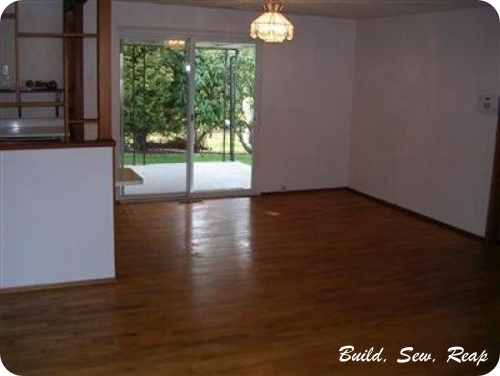
Here's a picture I took of this wall before we moved in (and replaced the light, redid the ceiling and got furniture):

2750_64918819441_5048573_n

This was my first big drywalling job so I'm not thrilled with how the cubby turned out on the end but I'm glad I did it, I'm sure once I figure out what to do with that space, it'll look really neat. For now, it'll sit empty until inspiration hits. I'm thinking of creating a command center but I'm afraid it'll get cluttery looking.

The finished outside dimensions of the closet are 102 inches long by 15 inches deep. I built the space just slightly deeper than an Ikea Billy bookcase because I was able to get the two tall ones off Craigslist for $30. I picked up the center one in the as-is section at Ikea for about the same price. The two tall ones had no backs on them so I took the backing off the short one. I prefer to see the wall through the shelves anyway.

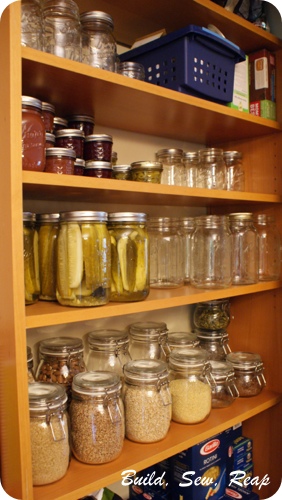
I stocked my pantry with fresh canned produce from the garden and the things I like to buy-up on when I shop sales:

DSC07133

Would you believe those awesome jars on that lower shelf there are also from Ikea? I'm sure you know what that means - the didn't cost an arm and a leg. They're part of the new Korken line (I think it's new anyway) and they start at $2.99 each. There were three different sizes available at my store in Renton, WA.

As you can see, the cucumbers I grew in my garden have been turned into pickle. Yum!

If you've been following this blog for any length of time, you've probably picked up on the fact that I don't pay full price for anything so I promise to do a post dedicated solely to the barn door track hardware really soon. All the parts were from either Home Depot or Lowe's so the setup most definitely did not cost me an arm and a leg.

DSC07140

Here's a quick breakdown on where the materials for this project came from:

Doors - Second Use
Barn Door Hardware - Home Depot and Lowe's
Sliding Closet Door Hardware - Home Depot
Lumber and drywall - Dunn Lumber
Tall Bookcases - Craigslist
Short Bookcase - Ikea as-is section

As I said, I'll dedicate a separate post to the hardware and will be sure to include lots of detail pictures. I'm absolutely loving how this turned out.

UPDATE: Here's that how-to post!

Thank you for reading,
Julie


I'm linking this post up at the following link parties:


Porch Swing

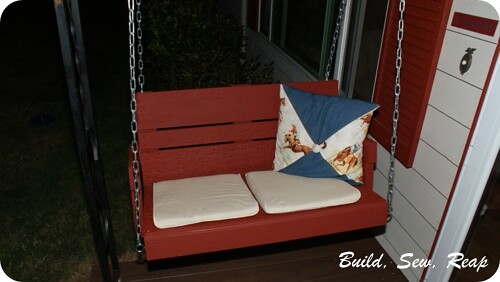
I alluded to the addition of a porch swing to our brand new front porch in my last post so I wanted to follow up with close up shots of it. I took inspiration from a post on Ana White's blog.

I knew as soon as I finished the porch that it needed a swing but didn't want to spend much money on it so I ended up using scrap wood to make it. I also dug up some cushions I had from a seat we threw away awhile back and the throw pillow is from the Snickerdoodle's original nursery back in our apartment.

(Please excuse the strange picture, I really wanted to get this post written up but it was already dark out when I realized I never took proper pictures of it)

DSC07025

The Snickerdoodle has logged countless hours swinging on this swing. He fits on it perfectly, even lying down. He loves to just go out there and take some time to himself swinging gently in the shade. It makes me so happy that he enjoys it so much.

Speaking of being happy, I'll leave you with this:

DSC06218

Thank you for reading,
Julie


Curb Appeal

I always want to do some huge surprise project before my parents visit from St. Louis. Sometimes one gets done, sometimes not. Sometimes one gets done and I can't keep my mouth shut so they know about it but this time, I managed to keep it a secret.

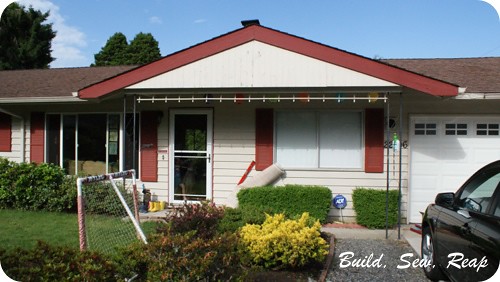
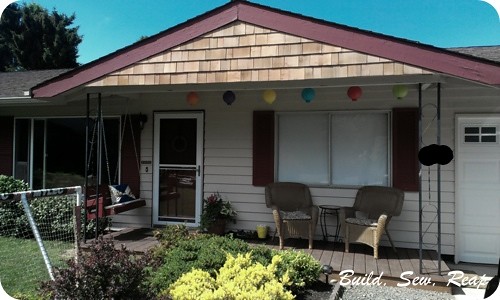
We've wanted a porch on the front of our house ever since we moved in. I decided 2 weeks before their visit that it was time to make it happen. There's nothing like slapping a front porch on quickly! I did it with time to spare and LOVE how it turned out.

Here's the picture I took right before I started the work, complete with rug from our room waiting to get hosed off (I love Ikea rugs).

Before Transformation

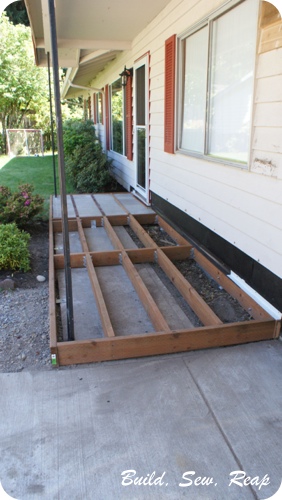
I opted to frame out the joists using pressure treated ground contact rated lumber but the actual porch boards are a composite product we purchases from Dunn Lumber. I'm so thrilled with our decision to use the composite, it's really a beautiful, high quality product. It was easy to work with and while it was much more expensive than natural wood would have been, we won't have to refinish it and don't have to worry about splinters at all.

When I started the project, I thought I'd just slap down some joists then screw in the decking and be done. Then I started talking to my neighbor who does things right and he mentioned I should take the bottom strip of siding off and add a ledger board bolted in to the foundation and then a piece of flashing (might not be the right term) to correctly route water away from the house and the project grew. I'm proud to say I did things right, not just fast. I had to do a lot of calculations to route water away from the house because the existing concrete had dropped quite a bit and not in a favorable way.

Here's the framing underneath:

DSC06185

I had to pull out several layers of siding but that gave me the opportunity to refresh the tar paper underneath the new pieces.

I need to mention here that  if you're going to take this as inspiration to do your own porch, this does not meet the clearance requirements set forth by the manufacturer of our composite decking. I don't claim to be a professional but this is sturdy and attractive which were my two primary goals.

So, carrying on ...

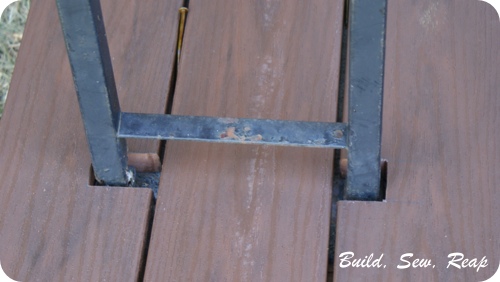
We're not sure what we're going to do with the posts in the long run but since they might be supporting the front of the house, I didn't want to mess with them. I suspect we'll eventually encase them in wood trim and paint them. For now, I just notched out the decking around them.

DSC06189

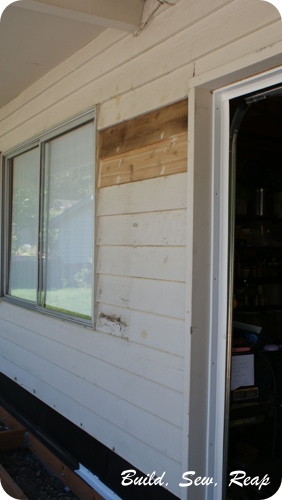
I also decided that while I was updating the front of the house and had to replace some siding, I would fix the huge gaping hole where we used to have our electrical meter. Here are the two boards I replaced but before I painted them and put the shutter back.

DSC06187

We've stared at that hole for over 4 years now so it is so fantastic to see a fresh, clean wall.

When the front porch project went so well, I realized I had a few days before my parents would arrive so I slapped up some cedar shake, you know, like people do right before they have out of town guests.

So here's how it all ended up:


IMAG0421


Oh, and I built a porch swing but you'll have to wait for another post to read all about that.

So, are you nuts like me? Do you try to accomplish major tasks before guests visit?

Thank you for reading,
Julie


Related Posts Plugin for WordPress, Blogger...