
I had seen these online but couldn't find a tutorial at the time so I just made it up as I went along.
UPDATE: Do NOT use fence boards like I did unless you know of a better way to make the screws through the hinges hold. Any of the screws that didn't go through to a 2x4 didn't hold and there are a couple of places where a 2x4 can't go without messing up how this folds. Get better wood.
Here's the lid:
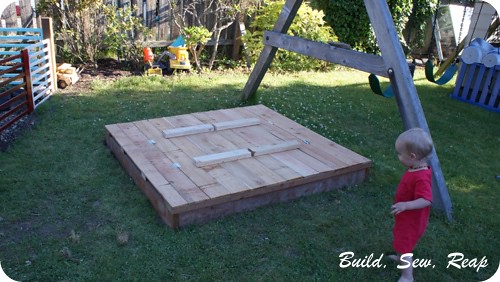
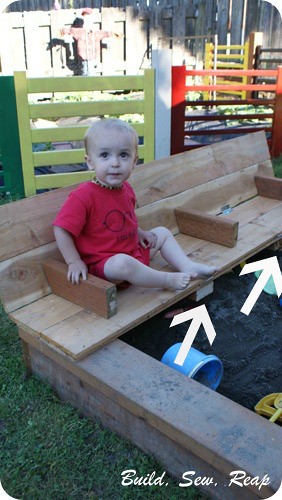
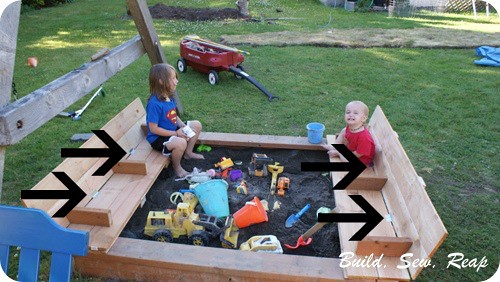
It isn't rain tight, it isn't supposed to be. The primary goal of a sandbox lid (for us anyway) is to keep animals from depositing little gifts in the sandbox. This sandbox is just a frame surrounding a hole we dug in our yard that we then filled with sand.
Here's the best part though:

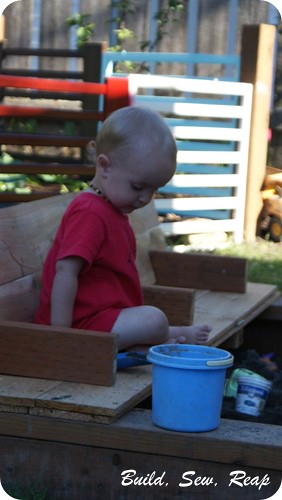
The boys absolutely love the benches. They're comfortable and sturdy and the Snickerdoodle can even open and close the sandbox on his own. I need to add some handles to make it easier but haven't gotten around to it yet (I keep forgetting to buy them).
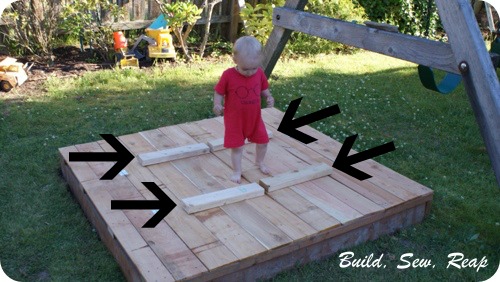
I didn't take step-by-step photos but I can break down the slat and hinge placement for you based on my sandbox design. First of all, I laid out all the slats to ensure 12 of them would fit side-by-side with a slight gap every 2nd board. I'm not sure if this is going to make much sense but I'll walk you through my steps.
The end boards are slightly narrower than all the rest.
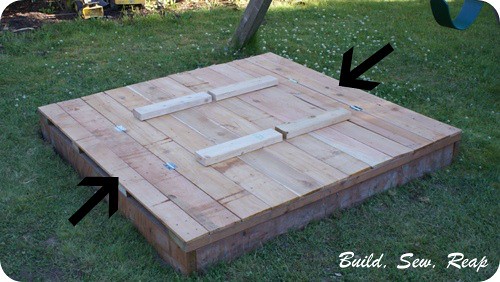
This was to ensure boards 3 and 4 (counting in from each side) would overlap 1 and 2 when the top is folded back to form the bench.
Boards 1 and 2 are also screwed into the top of the sandbox ...
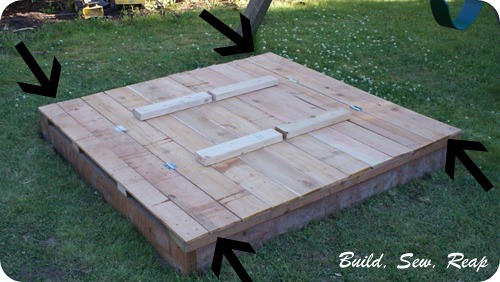
... and are attached to two scrap 2x4s each.
These 2x4s underneath keep them from bowing down towards the sand when a little tush sits on the bench. I positioned these 2x4s below where I wanted the hinges to go. This ensured the screws going through the hinge on board 2 would be tighter since they went into the 2x4 as well.
Between boards 2 and 3, I screwed in two hinges so that board 3 could fold back onto board 2.
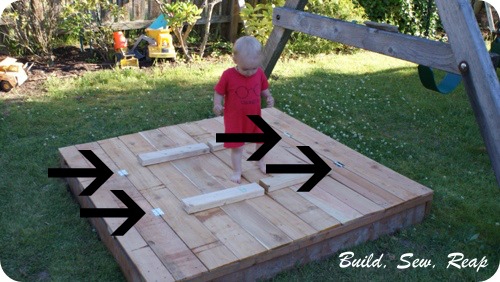
Before attaching boards 3 and 4 together, I attached hinges between boards 4 and 5. These hinges faced down so they would ultimately fold the opposite direction as the ones between 2 and 3.
I folded 3 back on 2 and then measured and cut the arm wrests and bench supports you see on top of the bench then attached those to boards 3 and 4 (which was already attached to 5).

Finally, I attached longer scrap 2x4s to both hold boards 5 and 6 together as well as to provide support for the back of the bench. When the sandbox is open, these boards rest firmly against the base of the sandbox to support the back rest of the bench.
I hope this helps you figure out how to make one of these for your kids. I used fence boards although I'm not sure I'd recommend that. They warped a bit in the sunshine but look surprisingly straight now that we're in the rainy season. Whatever you use, make sure it is something that will weather well (cedar is a great choice) and seal it with a deck sealer or something similar to extend its life.
Good luck!
Thank you for reading,
Julie


In business since 2010, Primlink is one of the largest quality control company providing product inspections, supplier quality assessments and factory audits services at Asia, America, Australia, Turkey, and other countries.
ReplyDelete