Here's another project I failed to blog about in a timely manner but I loved the project so much that I don't want it to get lost.
I had seen these online but couldn't find a tutorial at the time so I just made it up as I went along.
UPDATE: Do NOT use fence boards like I did unless you know of a better way to make the screws through the hinges hold. Any of the screws that didn't go through to a 2x4 didn't hold and there are a couple of places where a 2x4 can't go without messing up how this folds. Get better wood.
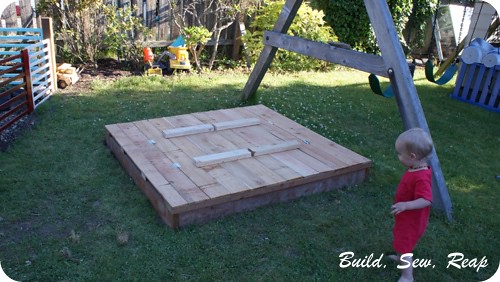
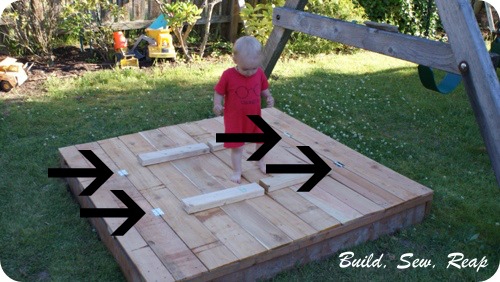
Here's the lid:
It isn't rain tight, it isn't supposed to be. The primary goal of a sandbox lid (for us anyway) is to keep animals from depositing little gifts in the sandbox. This sandbox is just a frame surrounding a hole we dug in our yard that we then filled with sand.
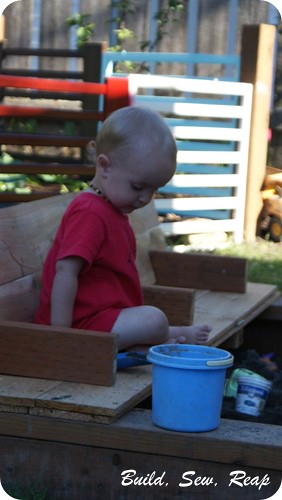
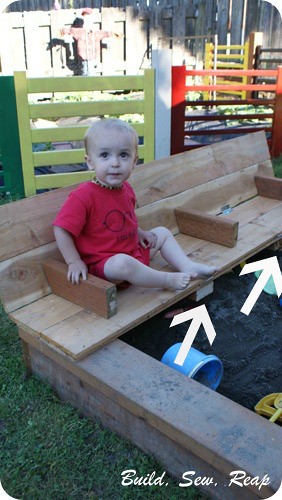
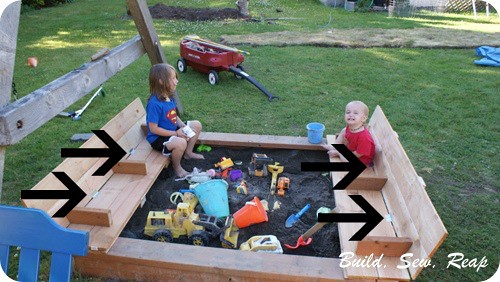
Here's the best part though:
The boys absolutely love the benches. They're comfortable and sturdy and the Snickerdoodle can even open and close the sandbox on his own. I need to add some handles to make it easier but haven't gotten around to it yet (I keep forgetting to buy them).
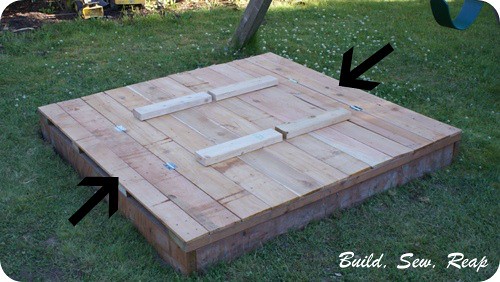
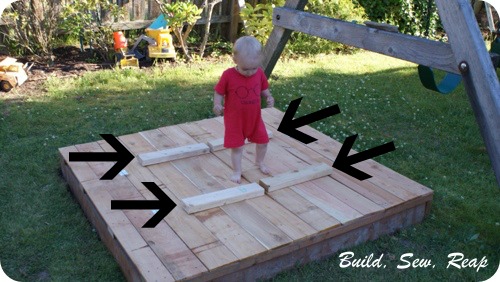
I didn't take step-by-step photos but I can break down the slat and hinge placement for you based on my sandbox design. First of all, I laid out all the slats to ensure 12 of them would fit side-by-side with a slight gap every 2nd board. I'm not sure if this is going to make much sense but I'll walk you through my steps.
The end boards are slightly narrower than all the rest.
This was to ensure boards 3 and 4 (counting in from each side) would overlap 1 and 2 when the top is folded back to form the bench.
Boards 1 and 2 are also screwed into the top of the sandbox ...
... and are attached to two scrap 2x4s each.
These 2x4s underneath keep them from bowing down towards the sand when a little tush sits on the bench. I positioned these 2x4s below where I wanted the hinges to go. This ensured the screws going through the hinge on board 2 would be tighter since they went into the 2x4 as well.
Between boards 2 and 3, I screwed in two hinges so that board 3 could fold back onto board 2.
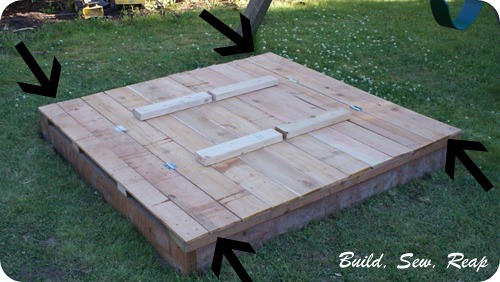
Before attaching boards 3 and 4 together, I attached hinges between boards 4 and 5. These hinges faced down so they would ultimately fold the opposite direction as the ones between 2 and 3.
I folded 3 back on 2 and then measured and cut the arm wrests and bench supports you see on top of the bench then attached those to boards 3 and 4 (which was already attached to 5).
Finally, I attached longer scrap 2x4s to both hold boards 5 and 6 together as well as to provide support for the back of the bench. When the sandbox is open, these boards rest firmly against the base of the sandbox to support the back rest of the bench.
I hope this helps you figure out how to make one of these for your kids. I used fence boards although I'm not sure I'd recommend that. They warped a bit in the sunshine but look surprisingly straight now that we're in the rainy season. Whatever you use, make sure it is something that will weather well (cedar is a great choice) and seal it with a deck sealer or something similar to extend its life.
Good luck!
Thank you for reading,
Julie
Storage Tip - Ziptie Shoes Together
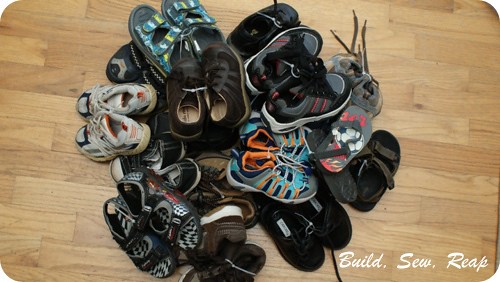
I recently realized that my method of tossing the Snickerdoodle's old (but hand-me-down eligible) shoes into a big storage bag was flawed. I was really struggling to find pairs of shoes when I went searching. That's when it hit me - zip ties!!!
Now when he outgrows a pair of barely-worn shoes, I carefully zip tie the pair together and toss them in the bag. No more searching for shoe mates.
How do you keep hand-me-downs organized?
Thank you for reading,
Julie
Now when he outgrows a pair of barely-worn shoes, I carefully zip tie the pair together and toss them in the bag. No more searching for shoe mates.
How do you keep hand-me-downs organized?
Thank you for reading,
Julie
How to make costume gloves
For Halloween, the hubs and I both needed gloves to go with our Incredibles costumes.
Fabric isn't a problem but finding elbow-high gloves for each of us was a daunting task so I set out to make us each a pair.
For mine, I used some black swimsuit fabric. It has LOTS of stretch so I wasn't worried much about the fit. For Mr. Incredible's gloves, I used a t-shirt knit. That worked out great as well. Whatever you decide to use, make sure it has lots of stretch and if one direction stretches more than another, make sure the stretch is side-to-side on your hand, not from fingertip to wrist.
The following tutorial includes pictures from my first glove which I added fabric to in order for it to reach to my elbows. For my husband's gloves, I included the arm part by just
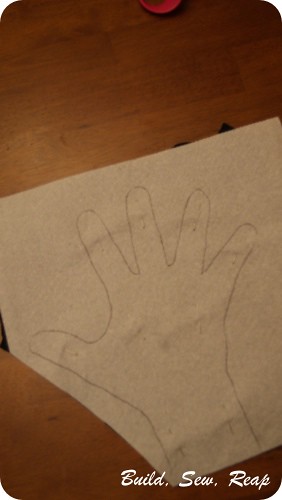
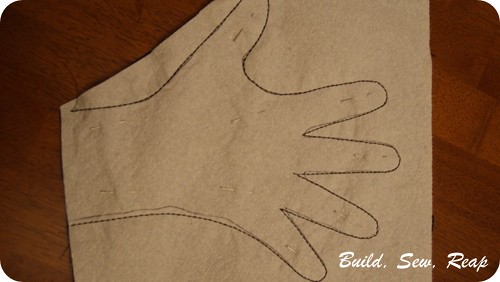
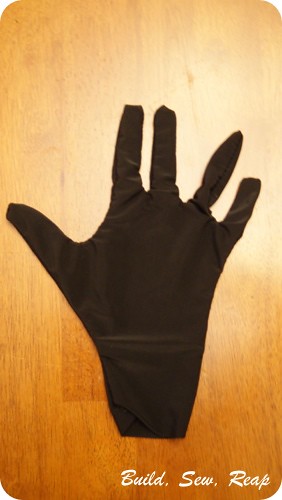
Start by tracing around your hand on a paper towel or piece of tissue paper. Pin the paper towel to two layers of fabric, right sides together.
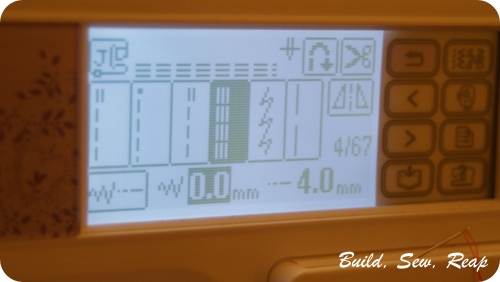
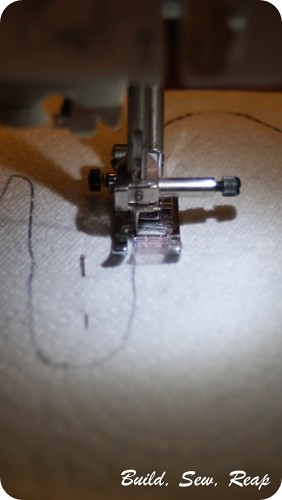
Using a stretch stitch on your sewing machine,
carefully stitch around the hand tracing.
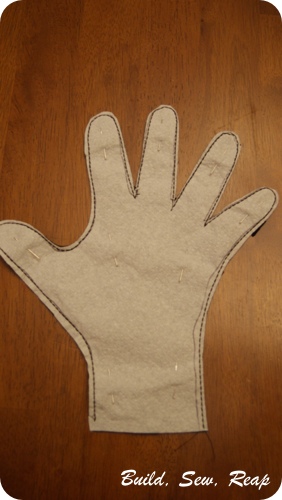
Now cut out the hand, trimming close to the stitching.
Remove the pins and rip off the paper towel. Don't worry if it doesn't all come off, you won't notice it. If you're worried that you will, you should be able to soak off whatever remains.
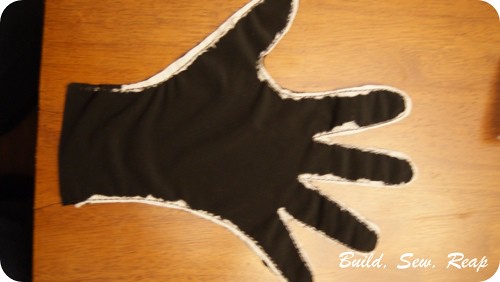
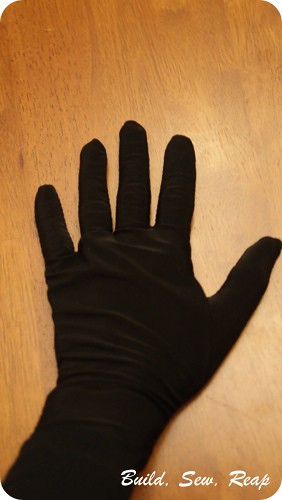
Turn the glove right side out.
And try it on!
This only works with really stretchy fabric but I have to say, it was a super quick way to crank out some super hero gloves. They were comfortable too. I'll probably think twice before throwing out another paint-splattered, hole growing t-shirt ... perhaps some fun gloves can be created out of it instead.
Thank you for reading,
Julie
Halloween 2013 - The Incredibles
I know I haven't posted in forever but I feel like projects are happening so fast that I've barely stopped to take pictures much less blog about them. The end of the summer brought with it many evenings processing mainly tomatoes and beans from our garden as well as other wonderful produce I picked up through farmers markets and suppliers looking to sell their organic harvests at a great price. I've filled the pantry with an impressive bounty of our favorite foods.
One project I snuck in while in the middle of about 12 others was our family Halloween costume. The Snickerdoodle originally wanted to be a cheetah and he wanted Mr. Mischief to be a deer so he could chase him and try to tackle and eat him. While this made me laugh, I couldn't do that to the little guy so I had to think fast and come up with a better costume idea. All at once, we introduced him to The Incredibles and convinced him the whole family could dress up.
He was all for it and immediately started calling himself Dash and running around at high speeds everywhere he want.
I created each of our costumes out of fleece to keep us all warm on what I expected to be a typical cool Halloween night. I rarely sew with patterns anymore so I just winged it to make each outfit fit nice and snug. My husband borrowed a muscle suit from a friend and we all sported our favorite boots. I'll try to write up a post on making costume gloves. It was quick and easy!
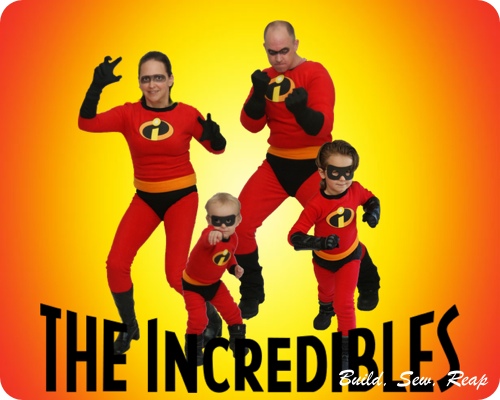
So, without further ado, here we are, The Incredibles:
Of course, I took about 30 photos of each member of the family in order to put that image together but everyone enjoyed trying out their costume for a bit and posing for the camera (my kids are hams).
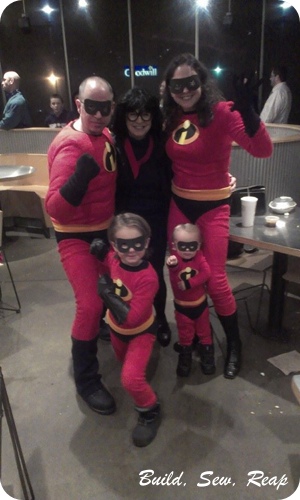
On Halloween, we were joined by my husband's mom who dressed up as Edna from the movie. We had such a blast trick-or-treating in our little downtown area but after loading up the kids with sugary treats, we headed to Chipotle to enjoy $3 meals (for wearing our costumes). Here we were at the very end of the night:
While everyone was surely tuckered out, even the little dude managed to muster up a cool super-guy pose.
I hope your Halloween as as enjoyable as ours. I know we sure made some great family memories with this one.
Thank you for reading,
Julie
One project I snuck in while in the middle of about 12 others was our family Halloween costume. The Snickerdoodle originally wanted to be a cheetah and he wanted Mr. Mischief to be a deer so he could chase him and try to tackle and eat him. While this made me laugh, I couldn't do that to the little guy so I had to think fast and come up with a better costume idea. All at once, we introduced him to The Incredibles and convinced him the whole family could dress up.
He was all for it and immediately started calling himself Dash and running around at high speeds everywhere he want.
I created each of our costumes out of fleece to keep us all warm on what I expected to be a typical cool Halloween night. I rarely sew with patterns anymore so I just winged it to make each outfit fit nice and snug. My husband borrowed a muscle suit from a friend and we all sported our favorite boots. I'll try to write up a post on making costume gloves. It was quick and easy!
So, without further ado, here we are, The Incredibles:
Of course, I took about 30 photos of each member of the family in order to put that image together but everyone enjoyed trying out their costume for a bit and posing for the camera (my kids are hams).
On Halloween, we were joined by my husband's mom who dressed up as Edna from the movie. We had such a blast trick-or-treating in our little downtown area but after loading up the kids with sugary treats, we headed to Chipotle to enjoy $3 meals (for wearing our costumes). Here we were at the very end of the night:
(I'm not really that tall, I was wearing boots and my husband was
crouching down a bit, normally I'm shorter than him)
While everyone was surely tuckered out, even the little dude managed to muster up a cool super-guy pose.
I hope your Halloween as as enjoyable as ours. I know we sure made some great family memories with this one.
Thank you for reading,
Julie
Subscribe to:
Posts (Atom)

