
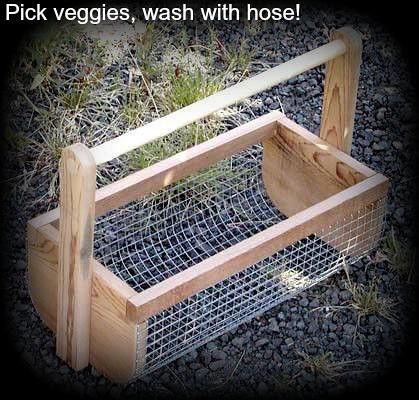
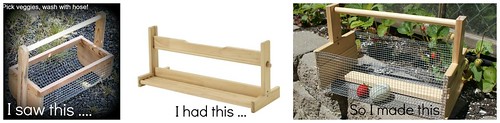
It wasn't her picture, it was just something she saw online that she liked and she shared it with her fans. I have no idea where it came from, if you know, please post a link to the original in the comments so I can give credit where credit is due. As soon as I saw it, I knew I had to have one but I didn't take the time to make it happen until today.
I had been kicking around the Ikea Mala Tabletop Paper Holder ever since we got our art easel several years ago. I tried to sell it at a garage sale for $1 but nobody wanted it I guess or maybe it was because it was pouring rain that day and we didn't get a lot of customers. Regardless, it was still in our garage. So, here's what happened:
Do you want to know how? Well, you've come to the right place. First, some basics.
Materials:
- Ikea Mala Tabletop Paper Holder
- Hardware Cloth
- 5/8 inch nails for a nail gun
- Staples for a staple gun
- Glue
Tools:
- Saw (I used my power miter saw but the cuts were very simple, you could use a hand saw)
- Nail gun
- Pliers
- Hammer
- Allen Wrench
- Metal snips or wire cutter to cut the hardware cloth
Instructions:
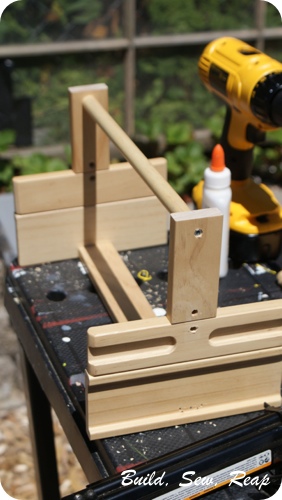
First you'll need to take apart the Mala. There were just 4 screws in mine and once I took those out, everything pretty much just fell apart. I think I was missing one piece so if you have one more than you see here, just know you won't need it to make the basket because I didn't have it.
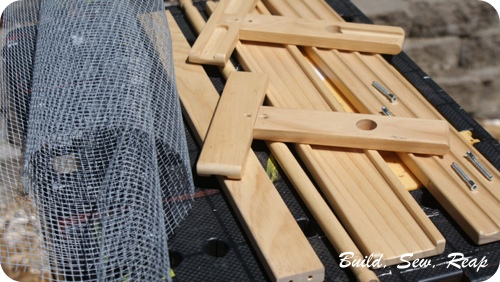
Of course, the hardware cloth you see there was not part of the Mala.
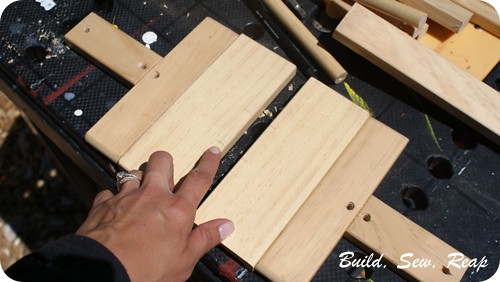
You'll see that you have [at least] two long pieces, one has grooves to hold crayons/markers/etc, the other doesn't. Take the one that doesn't and line it up with one of the end pieces. Mark how long that piece is and cut it. Now cut another one.
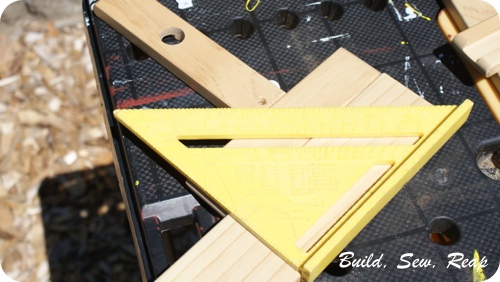
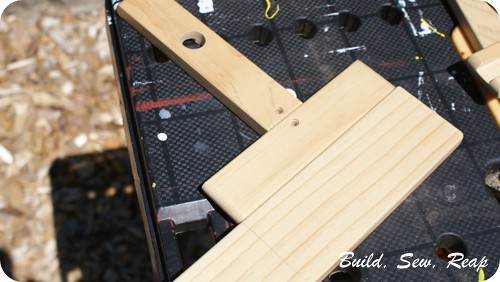
While you're sawing, cut straight across just below the holes where the rod used to be. It's hard to tell in the picture below, but I have both end pieces there, they are stacked up.

Glue the fresh cut pieces to the end pieces. Reinforce with short nails using your nail gun. I shot into the groove.
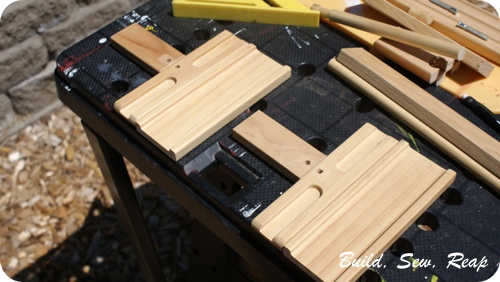
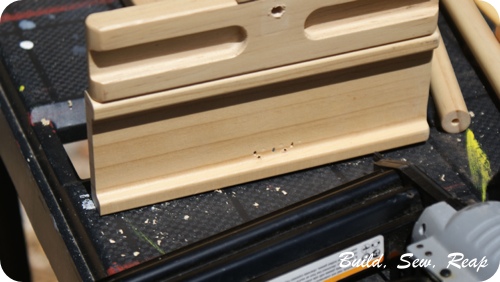
Now, take the long narrow rectangular piece that used to support the body of the roll holder and the rod. Cut one notched end off the rod then cut both pieces to 12 inches long.

You only need to keep the 12-inch pieces, set the rest aside.
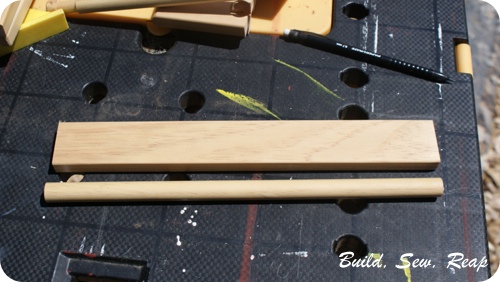
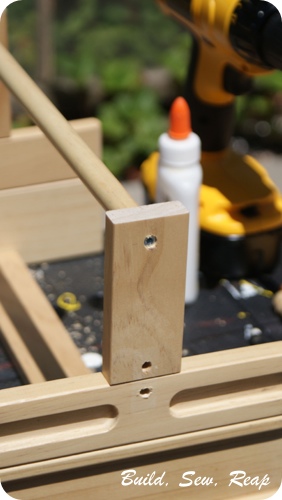
Using a 7/32 drill bit, drill a hole in each end piece near the top.
Using a 5/32 inch drill bit, drill a hole straight down the center of each end of the dowel. Somehow I missed taking a picture of this but it might help to envision it by knowing that eventually you'll line up these holes with the end pieces to make the handle.
Using a straight edge, mark the bottom edge of each end piece opposite the perpendicular piece you just drilled a hole in.
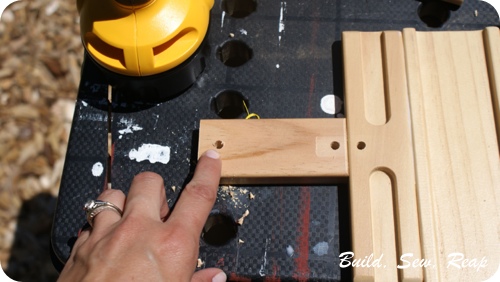
Now glue and nail gun the other (not the dowel) 12-inch piece you cut last to each end piece between the marks.
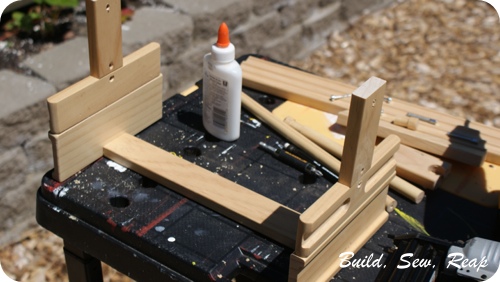
Align the dowel with the holes at the top and using two of the screws you removed from the Mala, attach the handle.
Now the structure of your basket is complete!
You still have to cut and attach the hardware cloth though so put on some gardening gloves (that metal is sharp sharp sharp) and grab some snips.
Cut a piece of hardware cloth that's 15 inches plus 4 rows (for me that was 16 inches long) by 12 1/2 inches wide. Using pliers, fold down two rows at either end making it 15 inches long.
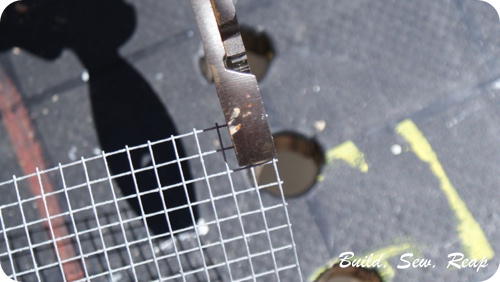
I find it's best to line the pliers up with where I want the fold to be then make the bend. After bending it a bit all the way across my line, I can fold it the rest of the way down by hand. Finally, I pinch the fold with my pliers to make it nice and flat.
Now wrap the hardware cloth from one side, around the bottom and back up the other side. Make sure your folded edges are at the top and the fold is towards the inside of the basket (although if you folded them opposite, it won't affect how well your basket holds produce, I just like mine folded in).
Staple the edges in place and tap the staples in with the hammer if necessary.
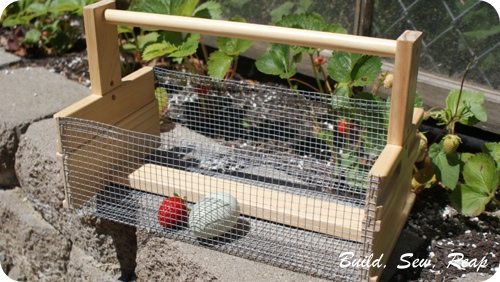
And there you have it. Now fill it with produce (and maybe an egg), have you kid hold it and hose off your haul outside so the dirt and critters stay where they belong.
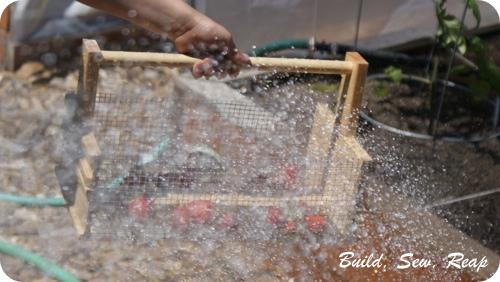
NOTE: You don't really have to make your kid hold it while you shoot it (and maybe him) with a hose. It's always a risk trying to hold a project, a hose and a camera all at once so I enlisted his help for this last picture. Also, you don't have to do long distance hosing, it's just more fun that way.
Thank you for reading,
Julie


I am in the market for new tools for my garden. Looks like this one would be super comfortable for long hours of work a Garden Produce Basket .I like and understand fully your topic and bookmark it for create new one for me post of you.Donald
ReplyDeleteI have always wanted one of these! Thanks for writing about it! Thanks for the article! It was a lot of good info. I am researching Garden Produce Basket.Lots of things for me to check out, how to create is it.
ReplyDelete