
Here's a refresher on what the kitchen looked like before I began this journey:
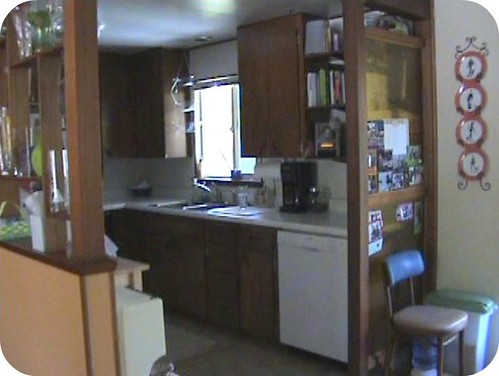
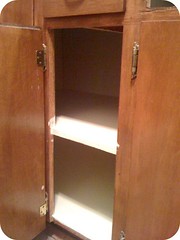
Not good, not good at all. It's awfully dark in there. Well, just as with the top cabinets, I took off all the cabinet doors and removed all the drawers and moved them to the back patio to get their facing trim and paint jobs. Then I started painting the cabinets. These proved to be a bit of a task as a couple of those cabinets (the ones on either side of the stove) go waaaay back and I was determined to do a very thorough job painting them. So in I went . . .
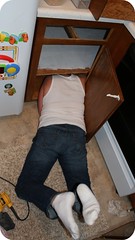
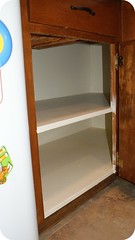
And I painted until they were all good and done.
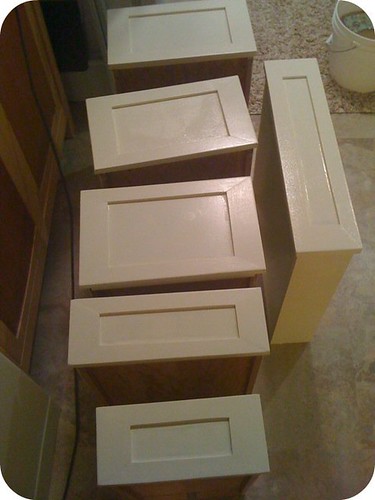
I also added the trim to the doors and drawers and painted them. The trim on the drawers was tricky as the vertical pieces of trim were 2 inches but the horizontal pieces were 1 1/4 making the angles on the cuts very strange. I'm glad I went to the trouble of getting it right though, the proportion is as it should be.
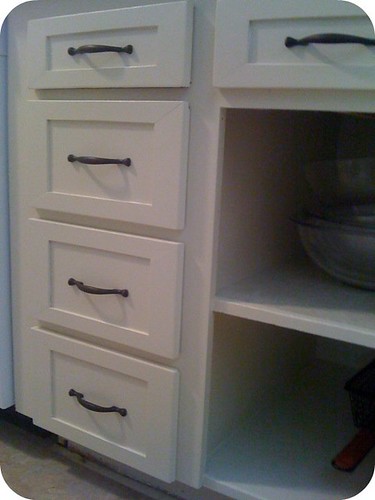
I added the hardware and put everything back.
I completed my mission but you're going to have to come back tomorrow for the wrap up to see the final product!
Thank you for reading
The New Kitchen, Part 1
The New Kitchen, Part 2
The New Kitchen, Part 3
The New Kitchen, Part 4
The New Kitchen, Part 5


I stumbled across your blog on pinterest and could not be happier that I found your before & after pictures with tutorials! We have the exact same cabinets in our kitchen, right down to the icky pull-out cutting board. I LOVE the way you have done the shaker style cabinets & can't wait to get started on our kitchen, you have given me some great ideas. Our kitchen remodel has started with minor projects- adding a pass-through/breakfast bar, removing faux brick wallpaper (who even knew there was such a thing) & replacing laminate floor tiles (which turned out to have hardwood underneath them, so instead we are refinishing the floor). New cabinets are out of our budget, but this looks like the perfect solution for updating our kitchen!
ReplyDeleteBeen going through your kitchen change post and I am loving it. Wanting to make a change on my once painted cabinets. It's been probably been 20 yrs or more since I painted mine. They held up great, I just want a change and I think this might be it. Love the way you did the drawers to match the cabinets. Awesome job. Thanks for sharing.
ReplyDeleteI'd love to see pictures when you're done. I still totally love the change in here (computer is in the kitchen for easier recipe searches). I can't believe how dark and dated it once was. I've definitely been more content with my tiny kitchen since it is now bright and current looking at least.
DeleteThanks for stopping by the blog and leaving comments!
I really like your kitchen, it puts me in the mine of mine. The cabinetry is just like yours (same color and everything!) I have done some remodels in my kitchen, paint, floors, pantry. Now I am about to tackle the cabinets. Where did you find your wood?
ReplyDeleteThis is exactly the cabinet look I was going for last year when we 'spruced up' our kitchen. We have beautiful hardwood floors and new cabinets were not in the budget plus I didn't want the flooring messed up. I got the cabinets (we have nearly twice as many as you appear to) sanded and painted but I couldn't get our very shallow drawers to look right with the trim pieces on them. I opted to leave the drawers out of the process except for repainting and doing just the cabinet doors. We used liquid nails to attache our trim with a few screws on the interior of the doors, and didn't miter the corners as I want a 'farmhouse' feel to the kitchen (and I'm a quilter so adding lapped borders is a piece of cake) We have black counter tops so I chose wrought iron 'button' pulls for the doors and cup handles for the drawers. I just love the look, fresh and clean.One caviat: be sure to put a top poly on the doors and drawer to avoid paint chipping. I didn't and now a few doors need touchups.
ReplyDeleteIf you want reliable academic support, ghostwriter-erfahrung.com offers everything you need. Ghostwriting experiences are professional, transparent, and trustworthy. My was extremely satisfactory.
ReplyDelete