
I know what you're saying, "Holy moly, that must be SOME job to make enough for a whole new kitchen in just a couple of months in your spare time." Wellllll, ok, it's not a whole new kitchen but it'll look like one when I'm finished.
The first thing I did was head off to Home Depot to wander the aisles kid-free. Yes, I left O with the hubs and headed out on a fact finding mission. I priced plywood, trim, beadboard and everything else I passed along the way as my mind spun out of control with ideas. Finally I wandered into the kitchen showroom area and really examined all the different styles. I asked one of the guys sitting at the desk what he thought about my design options based on the size of our kitchen and style of our home. He pointed out some great pros and cons of the different options I was looking at and ultimately I settled on just adding a frame around each door to give it some architectural interest. I returned to the show kitchen with this same detail and studied up.
I headed back home to ponder as I often do with larger projects and over the next few days I realized that I couldn't purchase pre-cut trim because the trim on my drawers would have to be narrower than the trim on the cabinet doors or the proportion would be all wrong. In the end, I opted to purchase a sheet of 1/8 inch thick plywood and cut the strips for the trim on my own. I cut 2 inch as well as 1 1/4 inch strips.
I started with one double-door freestanding upper cabinet to give myself a good inspiration piece. I took off the cabinet door, glued down custom trim to the face of it, routered it, sanded it, primed it, painted it and voila! the first door was done.
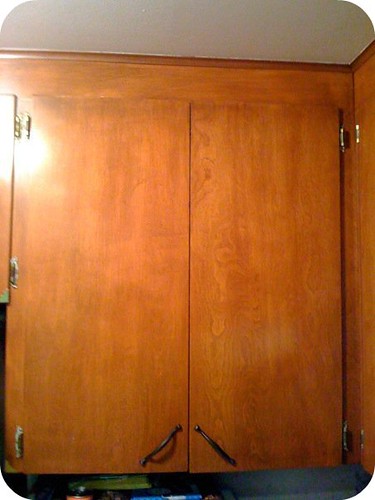
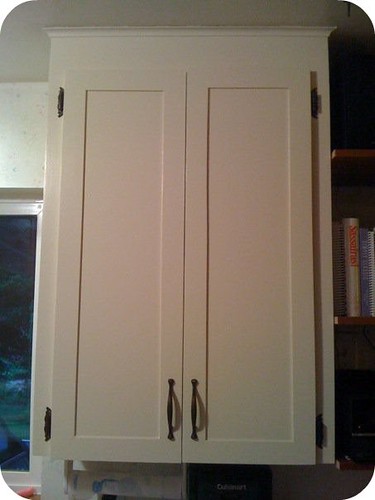
I'm going to back up a bit though. Here's the before picture (note: this is technically a different cabinet than the first one I completed but they all look the same):
As I said, I took down the first cabinet door and started working on it (rough workspace eh?).

Then I painted it with a coat of primer, sanded it, a coat of Navajo White (Behr brand) semigloss, sanded it, then finally a top coat of the Navajo White semigloss. I used a foam roller for the top coats to avoid brush marks:

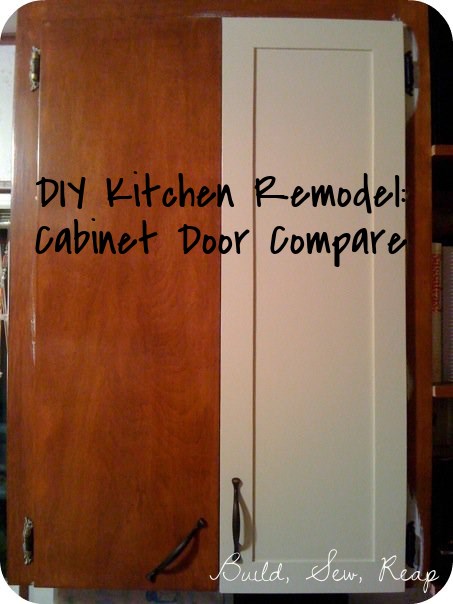
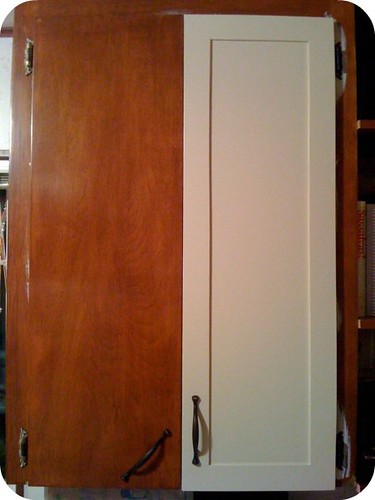
Then I hung it back up next to the old one to get a good look at where I was coming from and where I was going:
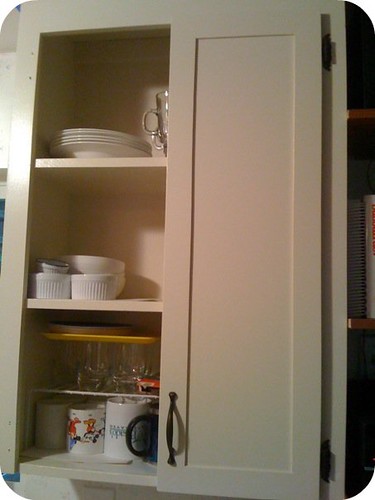
So excited to finish up this first full cabinet, I primed and painted the unit inside and out and completed the transformation of the second door:
I'm not going to lie, even I was shocked at how amazing the transformation was. I'll never forget that feeling when I realized that they actually looked good enough that this might not be a temporary fix until we can pay someone else thousands of dollars to redo it in a few years. We might actually be content with this kitchen indefinitely. I had a hard time getting to sleep that night as I dreamed of what the kitchen might look like at the end of the project. I also learned a few lessons along the way and knew I had my hands full on this one.
Tomorrow: The rest of the top cabinets (remember, this isn't real-time . . . in reality this took several weeks of evening and weekend work)
Thank you for reading
The New Kitchen, Part 1
The New Kitchen, Part 2


WOW! That is quite the transformation. They look awesome! I came over from MMS. I am working on a kitchen remodel and this insired me!
ReplyDeleteWOW! That is quite the transformation. They look awesome! I came over from MMS. I am working on a kitchen remodel and this insired me!
ReplyDeleteI have super similar kitchen cabinets that I plan on doing the same thing to. These look great but I only have one concern and question. After adding the bulk via addition pieces to make them shaker did you have any trouble with opening or closing?
ReplyDeleteI didn't but it may have to do with the type of hinges that were on our cabinets. Our hinges attach to the back/inside of the doors and then also to the frame of the cabinet itself so nothing changed about how they attached. Adding only to the face of the cabinets meant that I put the hinges back on exactly where they were before I started the project. There's a picture of the inside of the cabinet on this post so you can see how the hinges attach to the door: http://www.buildsewreap.com/2012/02/measuring-cups-and-spoons-organization.html
DeleteDoes that help?
What adhesive did you use to add the trim?
ReplyDeleteIt was some sort of construction grade adhesive that I had to use a caulking gun to apply. I'm sorry I don't remember more, as I recall, it was something I happened to have on hand.
DeleteI just dug back through all the posts and I can just barely see a blue and red tube of something sitting on the table. I think I might have used this stuff: http://www.homedepot.com/p/Loctite-9-fl-oz-Clear-Power-Grab-Heavy-Duty-Construction-Adhesive-1589157/203009262
DeleteI did have to press and wiggle the pieces into place to smear the glue around and then I clamped although once I started using my nail gun in addition to the glue, I don't think I had to clamp anymore. Regardless, even with the humidity of a poorly ventilated kitchen (I hate that noisy old hood so I rarely use it), none of the cabinet doors are showing any signs of coming apart.
Where did you find 1/8" thick plywood? smallest I've seen is 1/4"
DeleteI's been awhile so I can't say for sure but maybe it was this which isn't quite as thin as 1/8 but thinner than 1/4: http://www.homedepot.com/p/Unbranded-Underlayment-Common-7-32-in-x-4-ft-x-8-ft-Actual-0-196-in-x-48-in-x-96-in-431178/203183010
DeleteSorry I can't be more certain.
This is beautiful! I am thinking strongly about updating my kitchen cabinets this way. How to the sides of these cabinets look? Did you have to fill any gaps where the plywood meets the cabinet?
ReplyDeleteDo it!! It definitely took a few weeks to get it all done but I was mostly working on the weekends with a few minutes of stolen time during the kiddo's naps here and there. The sides looked great. If I recall correctly, I did have to fill a bit but I think it was more filling where there were gaps in the plywood (you know, a middle ply had a hole/knot).
DeleteWhen I put the trim on, it wasn't always perfectly even because I'm not very good at cutting long pieces of plywood. I remember having to use my router to shore up the edges. My router has a bit with a guide that could run along the edge of the cabinet and shave off anything of the trim that hung over at all. It's a pretty common bit. I'm a huge fan of wood filler though, for better or worse (not sure if that makes me a bad carpenter) so if in doubt, use filler. I don't think I needed much though.
Were the edges of your original cabinets slightly rounded? I would love to do this to my doors, they have rounded edges - do you just put the new wood up to the edge and fill the gap?
ReplyDeleteThe corners of my cabinets were not slightly rounded. I'm not sure how you could fix that either. My first thought was that you could do the frames as I did and then use a router to make the frame edges match the original cabinet doors but I'm not positive that would look good. Rounded corners with the rectangular frames might not jive. You could try making a template and cutting out corners that you could glue on maybe? or cut new cabinet doors out of something like MDF which is what I did when I built a new cabinet and added it in next to the fridge. I wish I had better/easier ideas for you. Don't give up and if you come up with a good solution, please come tell me what you did here on this post. I'm sure others have the same challenge.
DeleteThis post shows a similar project with rounded-edge doors. http://cherishedbliss.com/kitchen-hack-diy-shaker-style-cabinets/
DeleteWhere did you use the 2 inch and 1 1/14 inch strips? Horizontal, vertical, or on drawers? Kitchen looks great!
ReplyDeleteThe 2 inch strips were used for all the door parts as well as the vertical parts of the drawers. The smaller strips were for the horizontal parts on the drawers. I can't remember what the angle was but please keep in mind the drawer cuts weren't 45 degrees due to the different width strips.
DeleteLove it ! This is exactly what I have been planning to do to my cabinets as they are exactly like yours only white already ! So you said that you router them? How, and why? are my questions to you?
ReplyDeleteThanks in advance !
Hi Jeannee - I routed the edges after adding the trim to make sure they were exactly flush with the original cabinet doors. That's probably not necessary if you cut perfectly straight trim pieces (or buy them) but apparently at the time, my cutting skills were lacking and despite all my clamping and marking and guide setting, my edges weren't perfect. I ended up just letting them hang over a bit then used my router with the bit that has a roller that rolls along one edge and then a cutter that cuts the other edge to exactly match the first edge. Does that make sense? It may not be necessary if you're more precise from the start.
Deletelooking great! We have those type of cabinets also - after you used the router to make the edges match - did you apply a 'filler' along the edges, between the new trip piece and original door, and then sand smooth to make them look like all one piece? Thanks! Your are an inspiration! Karen
ReplyDeleteMy cabinets are formica type facings. Do you think the nail gun will cause a crack in the formica when attaching the trim? Also, what else do I need to take into account when painting over the formica?
ReplyDeleteI love this, this is exactly what I want to do to update my cupboards, glad t know it is possible and it looks so good. Thanks for sharing, how wide are your trim pieces?
ReplyDeleteThanks for this great idea...i'd had a similar idea with a strangely matching original cabinet set up to yours! Must have been a big run on this type of cabinet back in the day...love the look you've created and thanks for the inspiration to just do it! Looks like you did angle the corners of your door front trim if I am seeing it correctly, right?
ReplyDeletehttp://pin.it/Zvl2qj1
ReplyDeleteDo you think we could do that with our kitchen ? Picture above. Ours is so flat. I think it would add more demention.
Hi Nicole - I totally think you could update yours like this. Be mindful of how the new trim might interfere with the hinges but I think it would look great.
Deletehttp://pin.it/UdRrQq7
ReplyDeleteHere's another one that shows how flat it is.
Very creative and effective. However, there is only 1 photo of the process and its from a distance. All the other photos were before starting or after it's done. Thanks!
ReplyDeleteThis is so awesome! My cabinet doors are almost identical to yours! I'm so excited to get started...thanks so much for the post! ��
ReplyDeleteHi Julie,
ReplyDeleteThanks so much for this post, which is really great. I'm just about to start doing this in my kitchen, but have inset doors so need to use thin ply. Most bloggers seem to use 1/4", but you say you've used 1/8", which is what I need to use. Are you sure it 1/8"?? It looks even better than the doors I've seen with 1/4"! I hope this is right. So excited!!
Thanks so much - your kitchen looks fantastic and very inspiring!
Do you have a picture of your drawers? I'm just trying to get an idea of different widths on drawers and would like to see the 1 1/4". Your kitchen looks great. I have an 80's Melamime kitchen presently and going to basically do this same technique to my flat doors to add dimension.
ReplyDeleteReally a amazing post....excellent works. Thanks for sharing..
ReplyDeleteOur stone countertops and custom cabinetry make your kitchens the most beautiful heart of every home. We also sell and install the countertops all around Manitoba.
Stone Countertops Winnipeg
This comment has been removed by the author.
ReplyDeleteThanks for sharing your views with us. I think now I have a solid hold over the subject after going through the post. I will unquestionably come back for more data. Quality dolly
ReplyDeleteHi, I just ran across your weblog via Bing. Your viewpoint is truly pertinent to my life right now, and I’m really pleased I discovered your website. kitchen countertops in baltimore
ReplyDeleteWow! Such an amazing and helpful post this is. I really really love it. It's so good and so awesome. I am just amazed. I hope that you continue to do your work like this in the future also ES Builder
ReplyDeleteWhat did you use a router on?
ReplyDeleteI would love to see a picture of the finished kitchen.
ReplyDeleteThank you for always posting content that helps people learn better. Read this article for more. Clic Par Seconde is a simple online tool to check clicking performance.
ReplyDeleteI was very impressed by this post, this site has always been pleasant news Thank you very much for such an interesting post, and I meet them more often then I visited this site. jesse pinkman yellow hoodie
ReplyDelete