
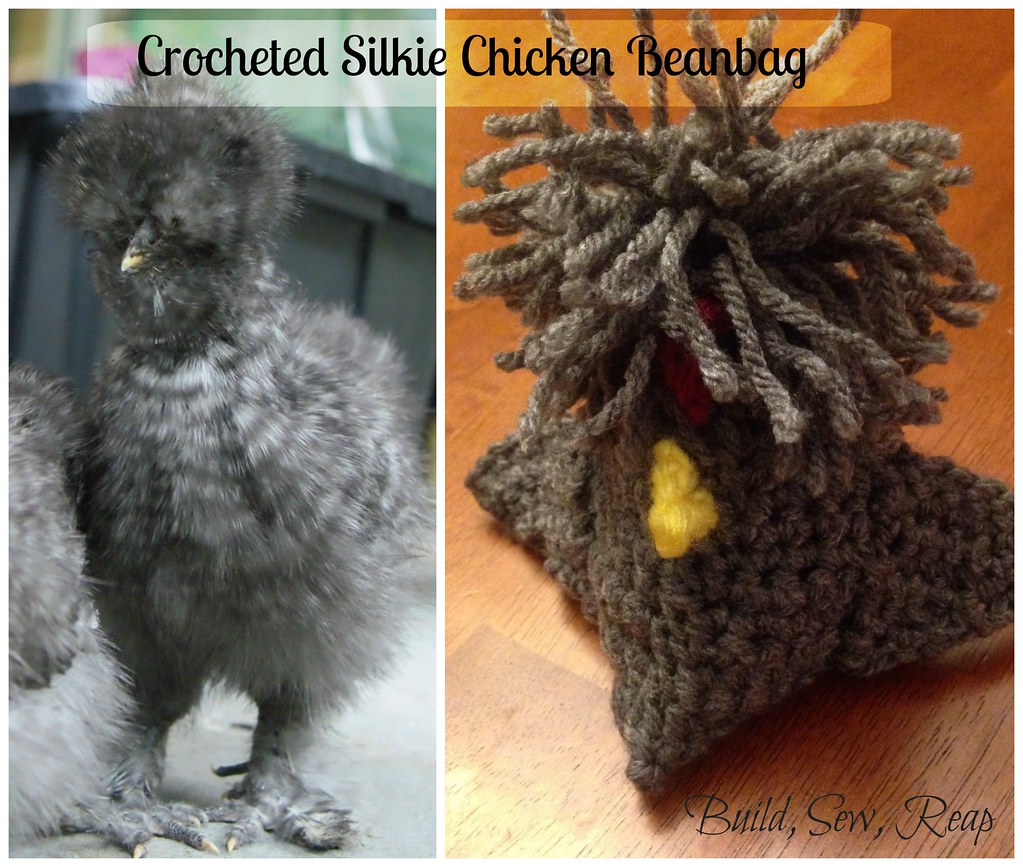
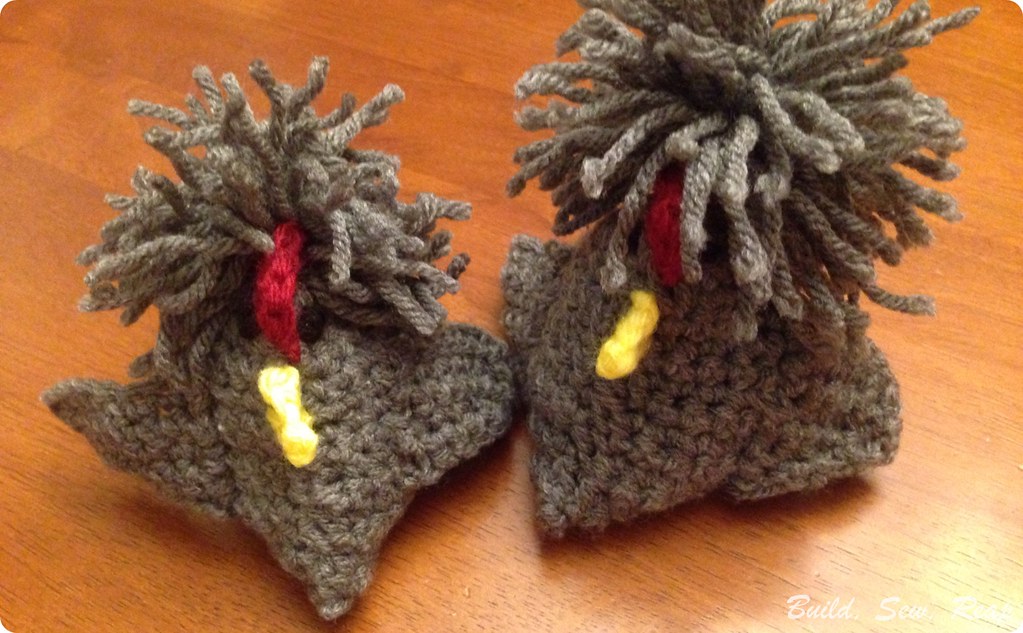
These are quick and easy to make and super cute to boot.
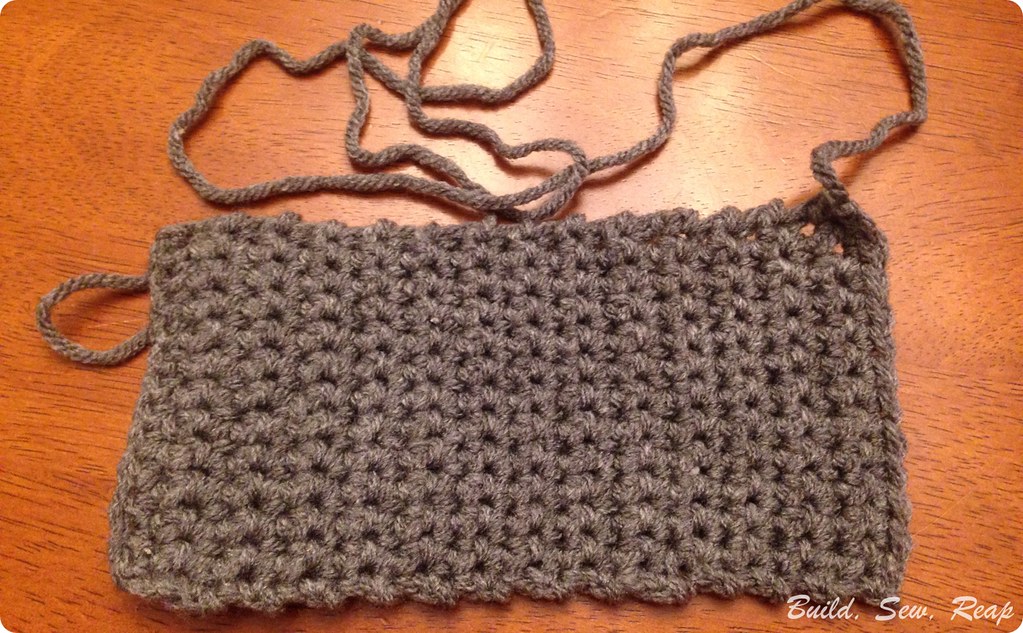
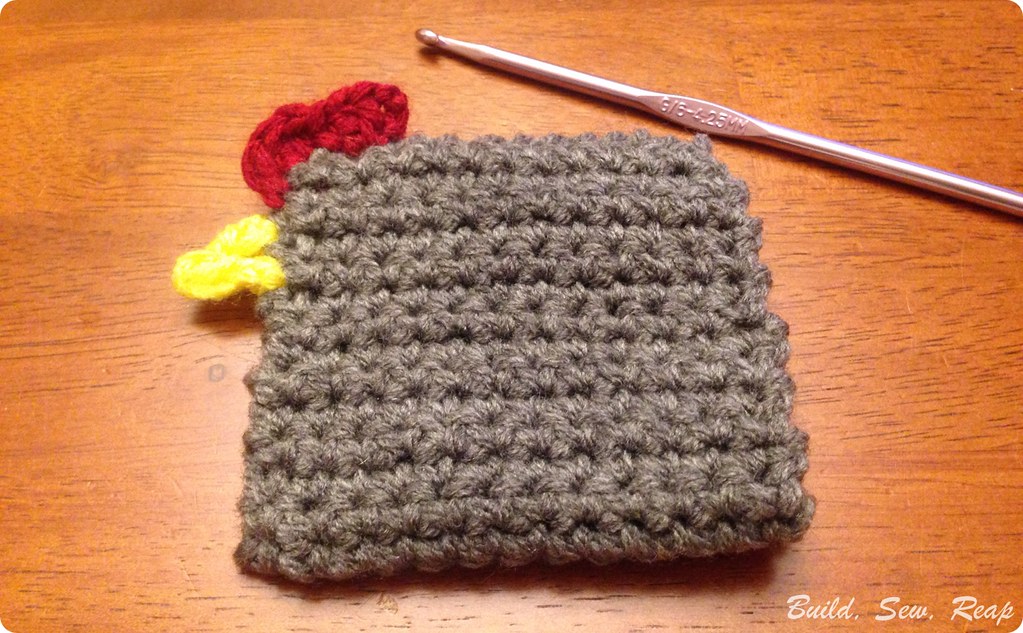
Let's back up the truck a little first. Here's what I made using the pattern exactly as written:
How to make your own Crocheted Beanbag Silkie Chicken
Here's what you'll need:
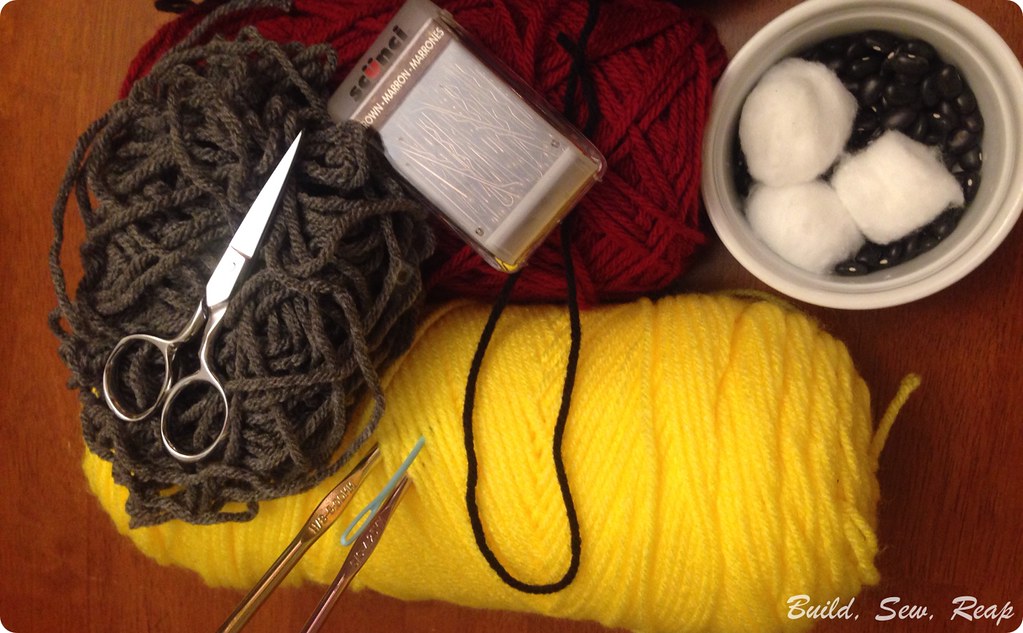
- Main yarn color
- Comb yarn color (red most likely)
- Beak yarn color (yellow most likely)
- A bit of black yarn for the eyes
- Sizes G and H crochet hooks
- Yarn needle
- Cotton balls or batting
- Beans
- Scissors
- Stitch markers (I use bobby pins)
Petals to Picots did a wonderful job of outlining how to make the body. I'm going to let you refer to her post to see specific directions but for this sized chicken (she outlines how to make bigger ones too), the body should be 12 stitches by 28 rows using a size H hook and I left a really long tail.
After making the rectangle, I veered from her instructions a bit.
When I folded the body in half, I whip stitched the pieces together using the long tail I left on the rectangle when I finished off. If you didn't leave a long tail, just use a new piece of yarn.
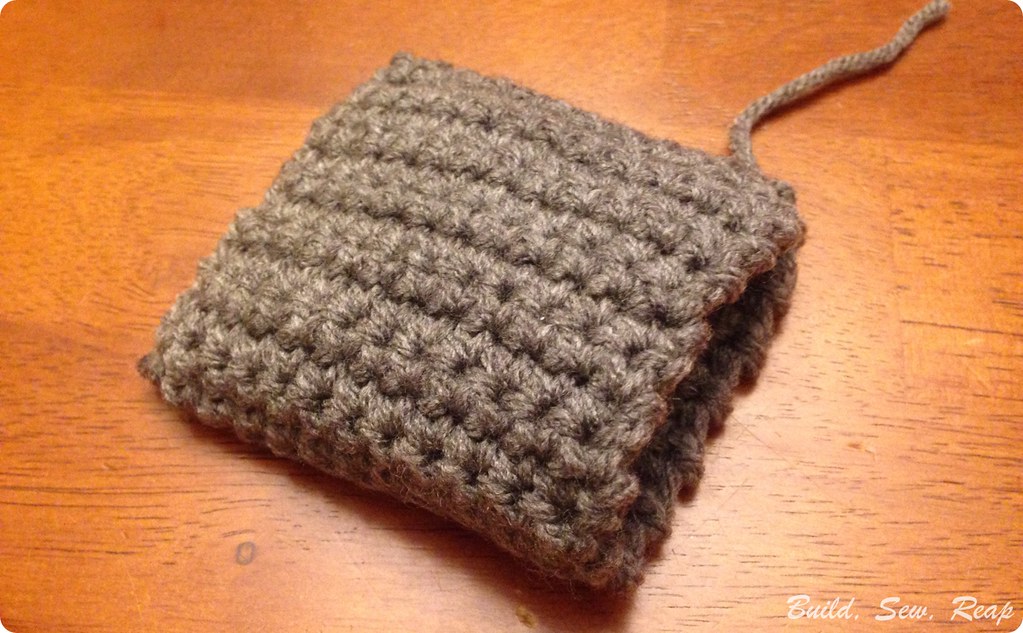
Pull all tails to the inside of the body.
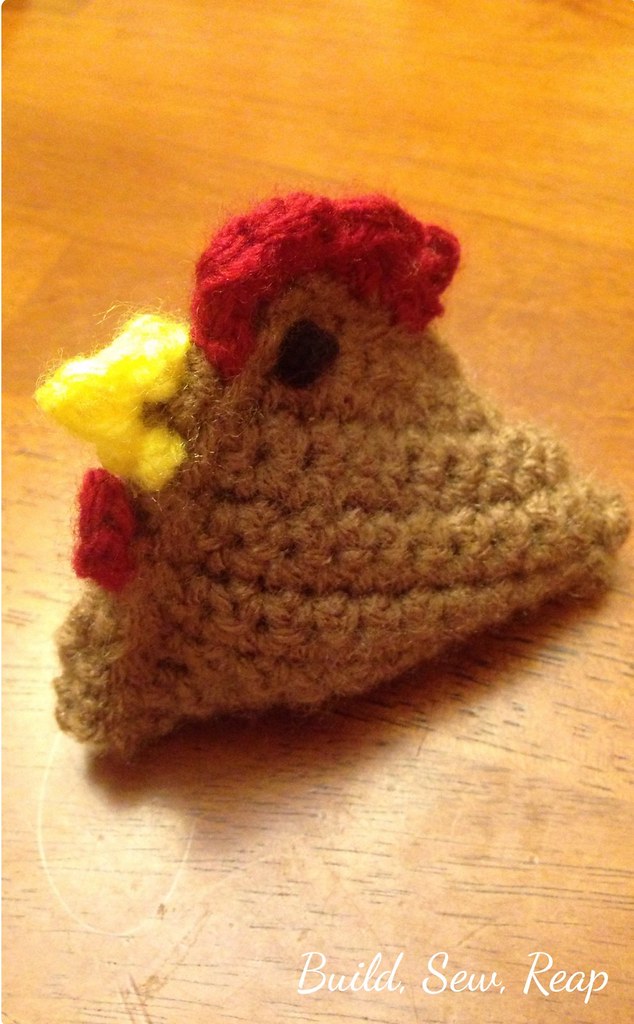
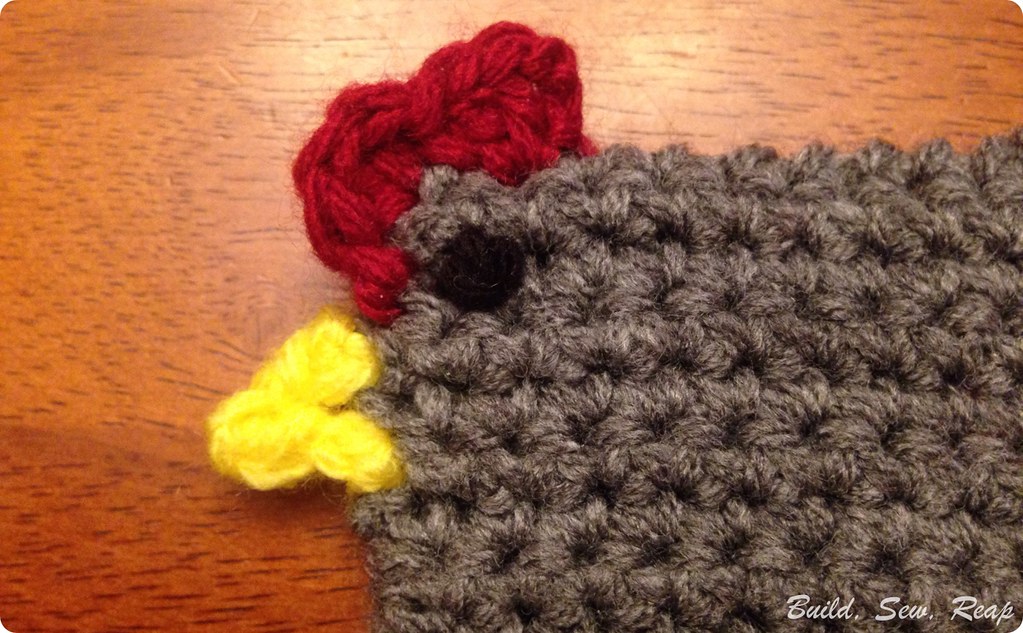
Comb:
Using red yarn and a size G hook
Join the red yarn in 2nd stitch from slip stitched corner. Make sure the opening is towards the back of your hook hand, not facing down.
Chain 3, work 2 double crochets (dc) in same stitch as join, 1 single crochet (sc) in next, dc 3 in next stitch (around the front of the square), slip stitch in next, fasten off.
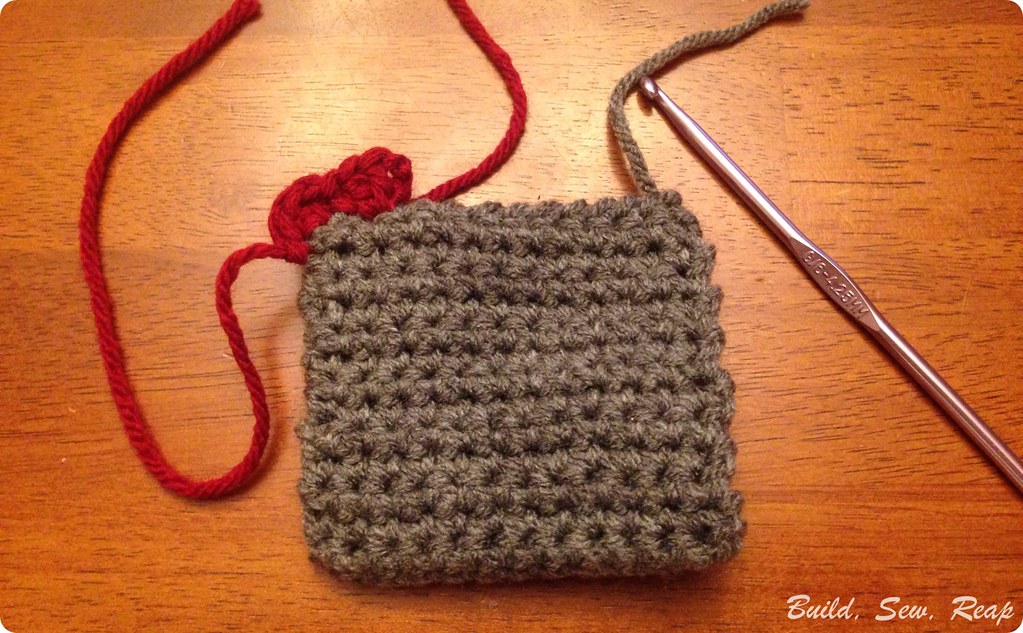
Pull all tails to the inside of the chicken body.
Beak:
This part is straight from Petals to Picots.
"Join yellow in next st, ch 1, work 1 sc in same st as join, ch 3, 1 sc in furthest ch from hook, 1 sc in next st, Sl st in same st, fasten off."
Pull in ends.
Eyes:
Using black yarn, make a french knot for each eye.
Wing:
*Make 2, use H hook
Chain 9, turn
skip 1st stitch, sc 8, ch 1, turn
sc 6, sc2tog, ch 1, turn
sc 7, ch 1, turn
sc 3, sc2tog, sc2tog, turn
sc 5, ch 1
Finish off leaving a long tail.
Position as shown below and use the long tail to whip stitch in place. Poke the ends through to the inside.

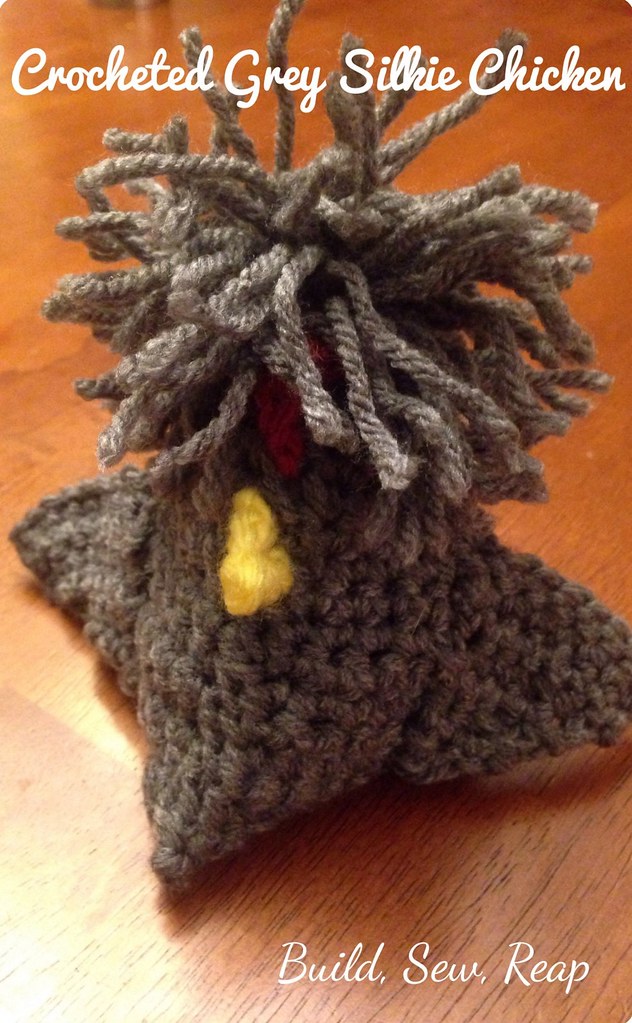
Signature silkie hair
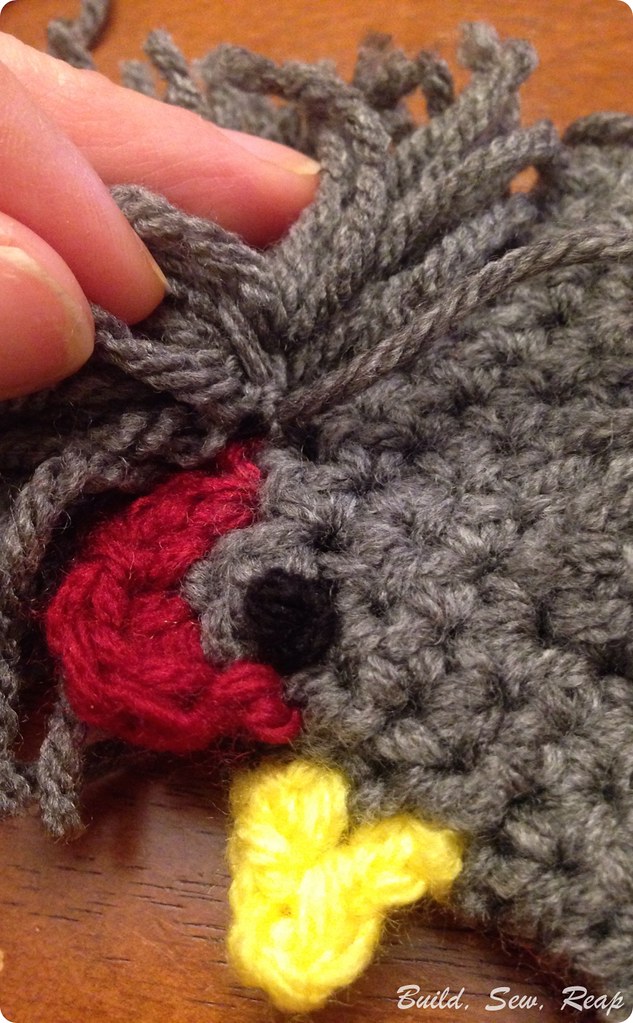
Create a lose pom pom in the same color as the body. Wrap the yarn around your fingers 40 times.
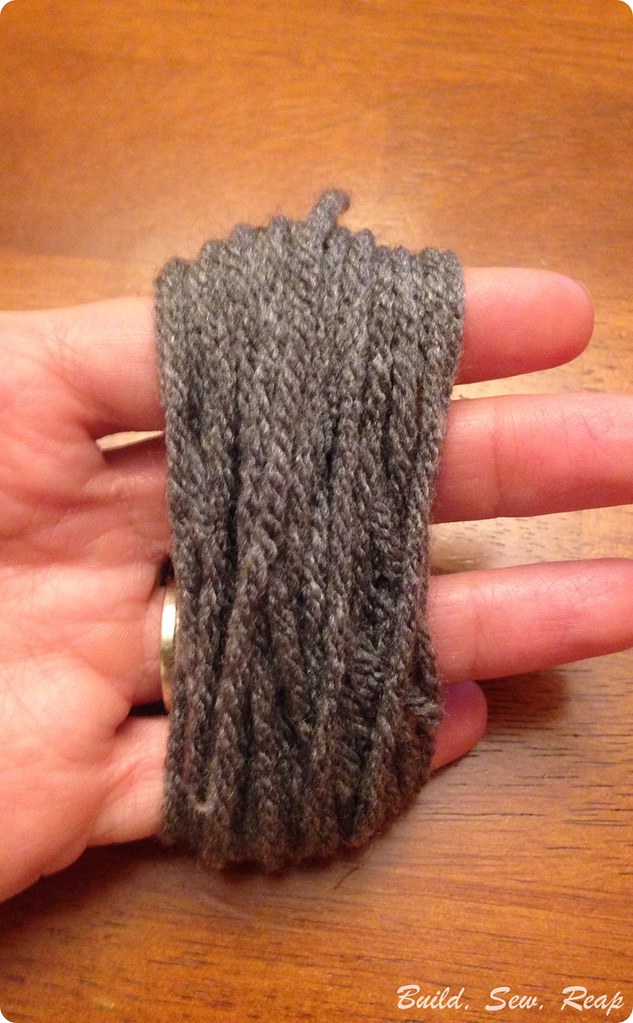
Tie off at the middle and snip the loops (snipping is optional but I prefer the look). Using the middle tie, secure it to the body of the chicken just behind the comb. I just threaded one half of the center tie through and tied it in a knot to the other side.
Finishing
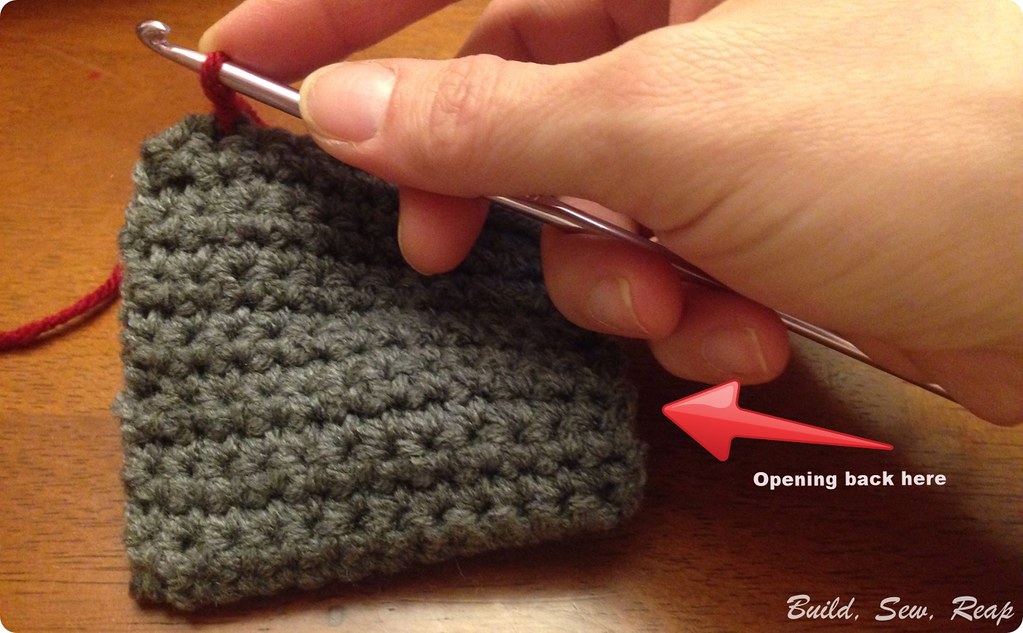
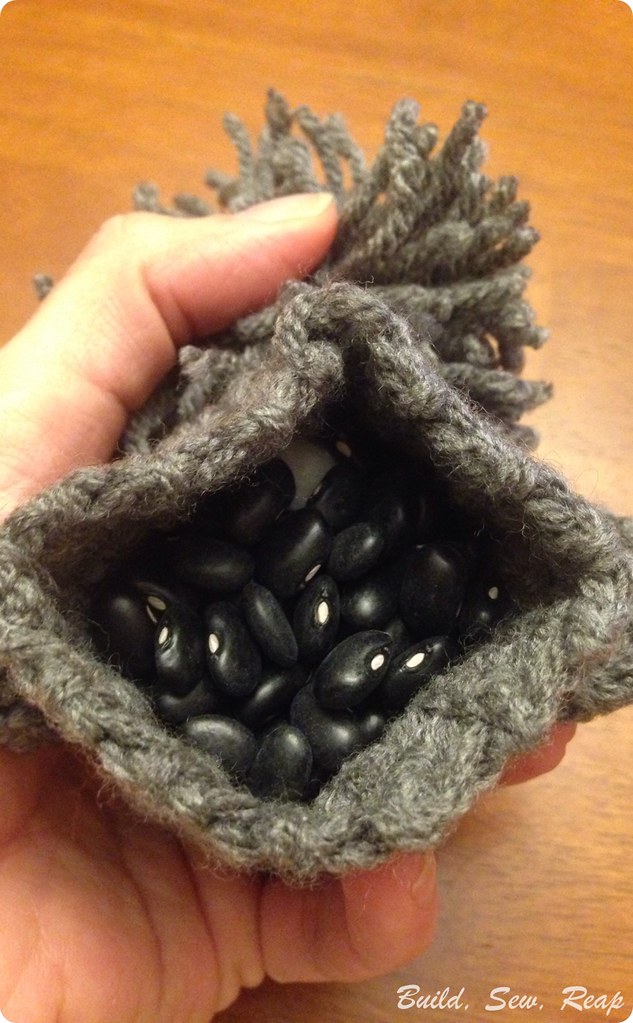
Open the back of the chicken, stuff some fiber fill or some cotton balls in at the face. Fill the rest with beans. Make sure your beans are bigger than the holes in your crochet stitches. Nobody wants a bean pooping chicken.
Fold top seam down to center of bottom fold. This back fold goes perpendicular to the front of the bird. Whip stitch closed the back of your chicken and enjoy!
Thank you for reading,
Julie


We’re ready to discuss any issue or controversial situation concerning your order. If your text wants a revision, we’ll make it at no cost ( https://grademiners.com/ ). However, if the problem can’t be solved, we’ll send you a refund.
ReplyDeleteI couldn’t remember anything for more than a few days, and then I found an assistant and started pay for essays, an assistant who helps me in completing any written work to order quickly and efficiently.
ReplyDeleteGood afternoon dear students! You can hire a subject professional for any type of work. Writers from our service https://rankmywriter.com/masterpapers-com-review specialize across all subjects and academic levels. Their profound expertise is the key to brilliant results and fast delivery. Any task is do-able with their pro help.
ReplyDeleteGood morning! It's really interesting to know something new about this, so thank you for posting it! But what about studying, you can do so many amusing things, if you have some free time. Our professional authors work at this magnificent online company and help scholars to write their essays and any other types of their assignments. Studying can be so much easier when you know real professionals in their case from which you can order correct dissertations and essay papers at https://topessaybrands.com/review/time4writing/ this website.
ReplyDeleteRight provider and really instructive internet web site! Wonderful hand for humans seeking out a person like them! Recommended to all! digital agency web design
ReplyDeleteIf you want to ensure that your essay is written in an effective and engaging manner then our fully certified editors are here to help you ( https://rankmywriter.com/ewriters-pro-review ). They will ensure that everything from your word choices and transitions to the overall flow of your essay is perfect to help you improve your grades.
ReplyDeleteRight provider and really instructive internet web site! Wonderful hand for humans seeking out a person like them! Recommended to all! casino utan spelpaus
ReplyDeleteLike almost every student, I was faced with writing an essay, but if this task was easy for others, then for me it was unrealistic. Therefore, I decided to turn to the authors of the letter for help and found a service that just saved me buy coursework These are really cool guys, everything is at the highest level. Accurately, efficiently and, most importantly, quickly. I am very pleased and all those who find it difficult to write assignments on their own, then you should go to them. Recommend.
ReplyDeleteNever mind the difficulty of your subject. Our team has experts in all competencies. Field-specific subjects included. The quality global assignment help of your paper is beyond any dispute. We follow your requirements accurately and stick to academic writing standards.
ReplyDeleteThe team provides a great quality-to-cost ratio in their work and prices. Die Stoffwechsel Formel
ReplyDeleteGreat idea! You can access quality assignment help 24/7/ 365 from professional essay writers by following our simple ordering process- submit your instructions, deadline, and wait. We assure you of a well-researched, zero-mistake, and 100% original paper.
ReplyDeletedownload bokep terbaru gratis
ReplyDeleteI appreciate how approachable and easy-to-follow your tips are. Great job. Discover the value of creative insights through this Geometry Dash SubZero Free profile now. The winter-themed levels in Geometry Dash SubZero are so cool. The music makes the gameplay even more engaging.
ReplyDeleteStatistics students and professor are worried to find the deviation calculator because their work depends on it.
ReplyDeleteGrateful for your writing—easy to apply and follow. This Geo Dash profile is a quick way to learn. The rhythm in Geometry Dash makes it feel like dancing with your fingers. Every jump needs to match the beat, or you’ll crash into spikes.
ReplyDelete